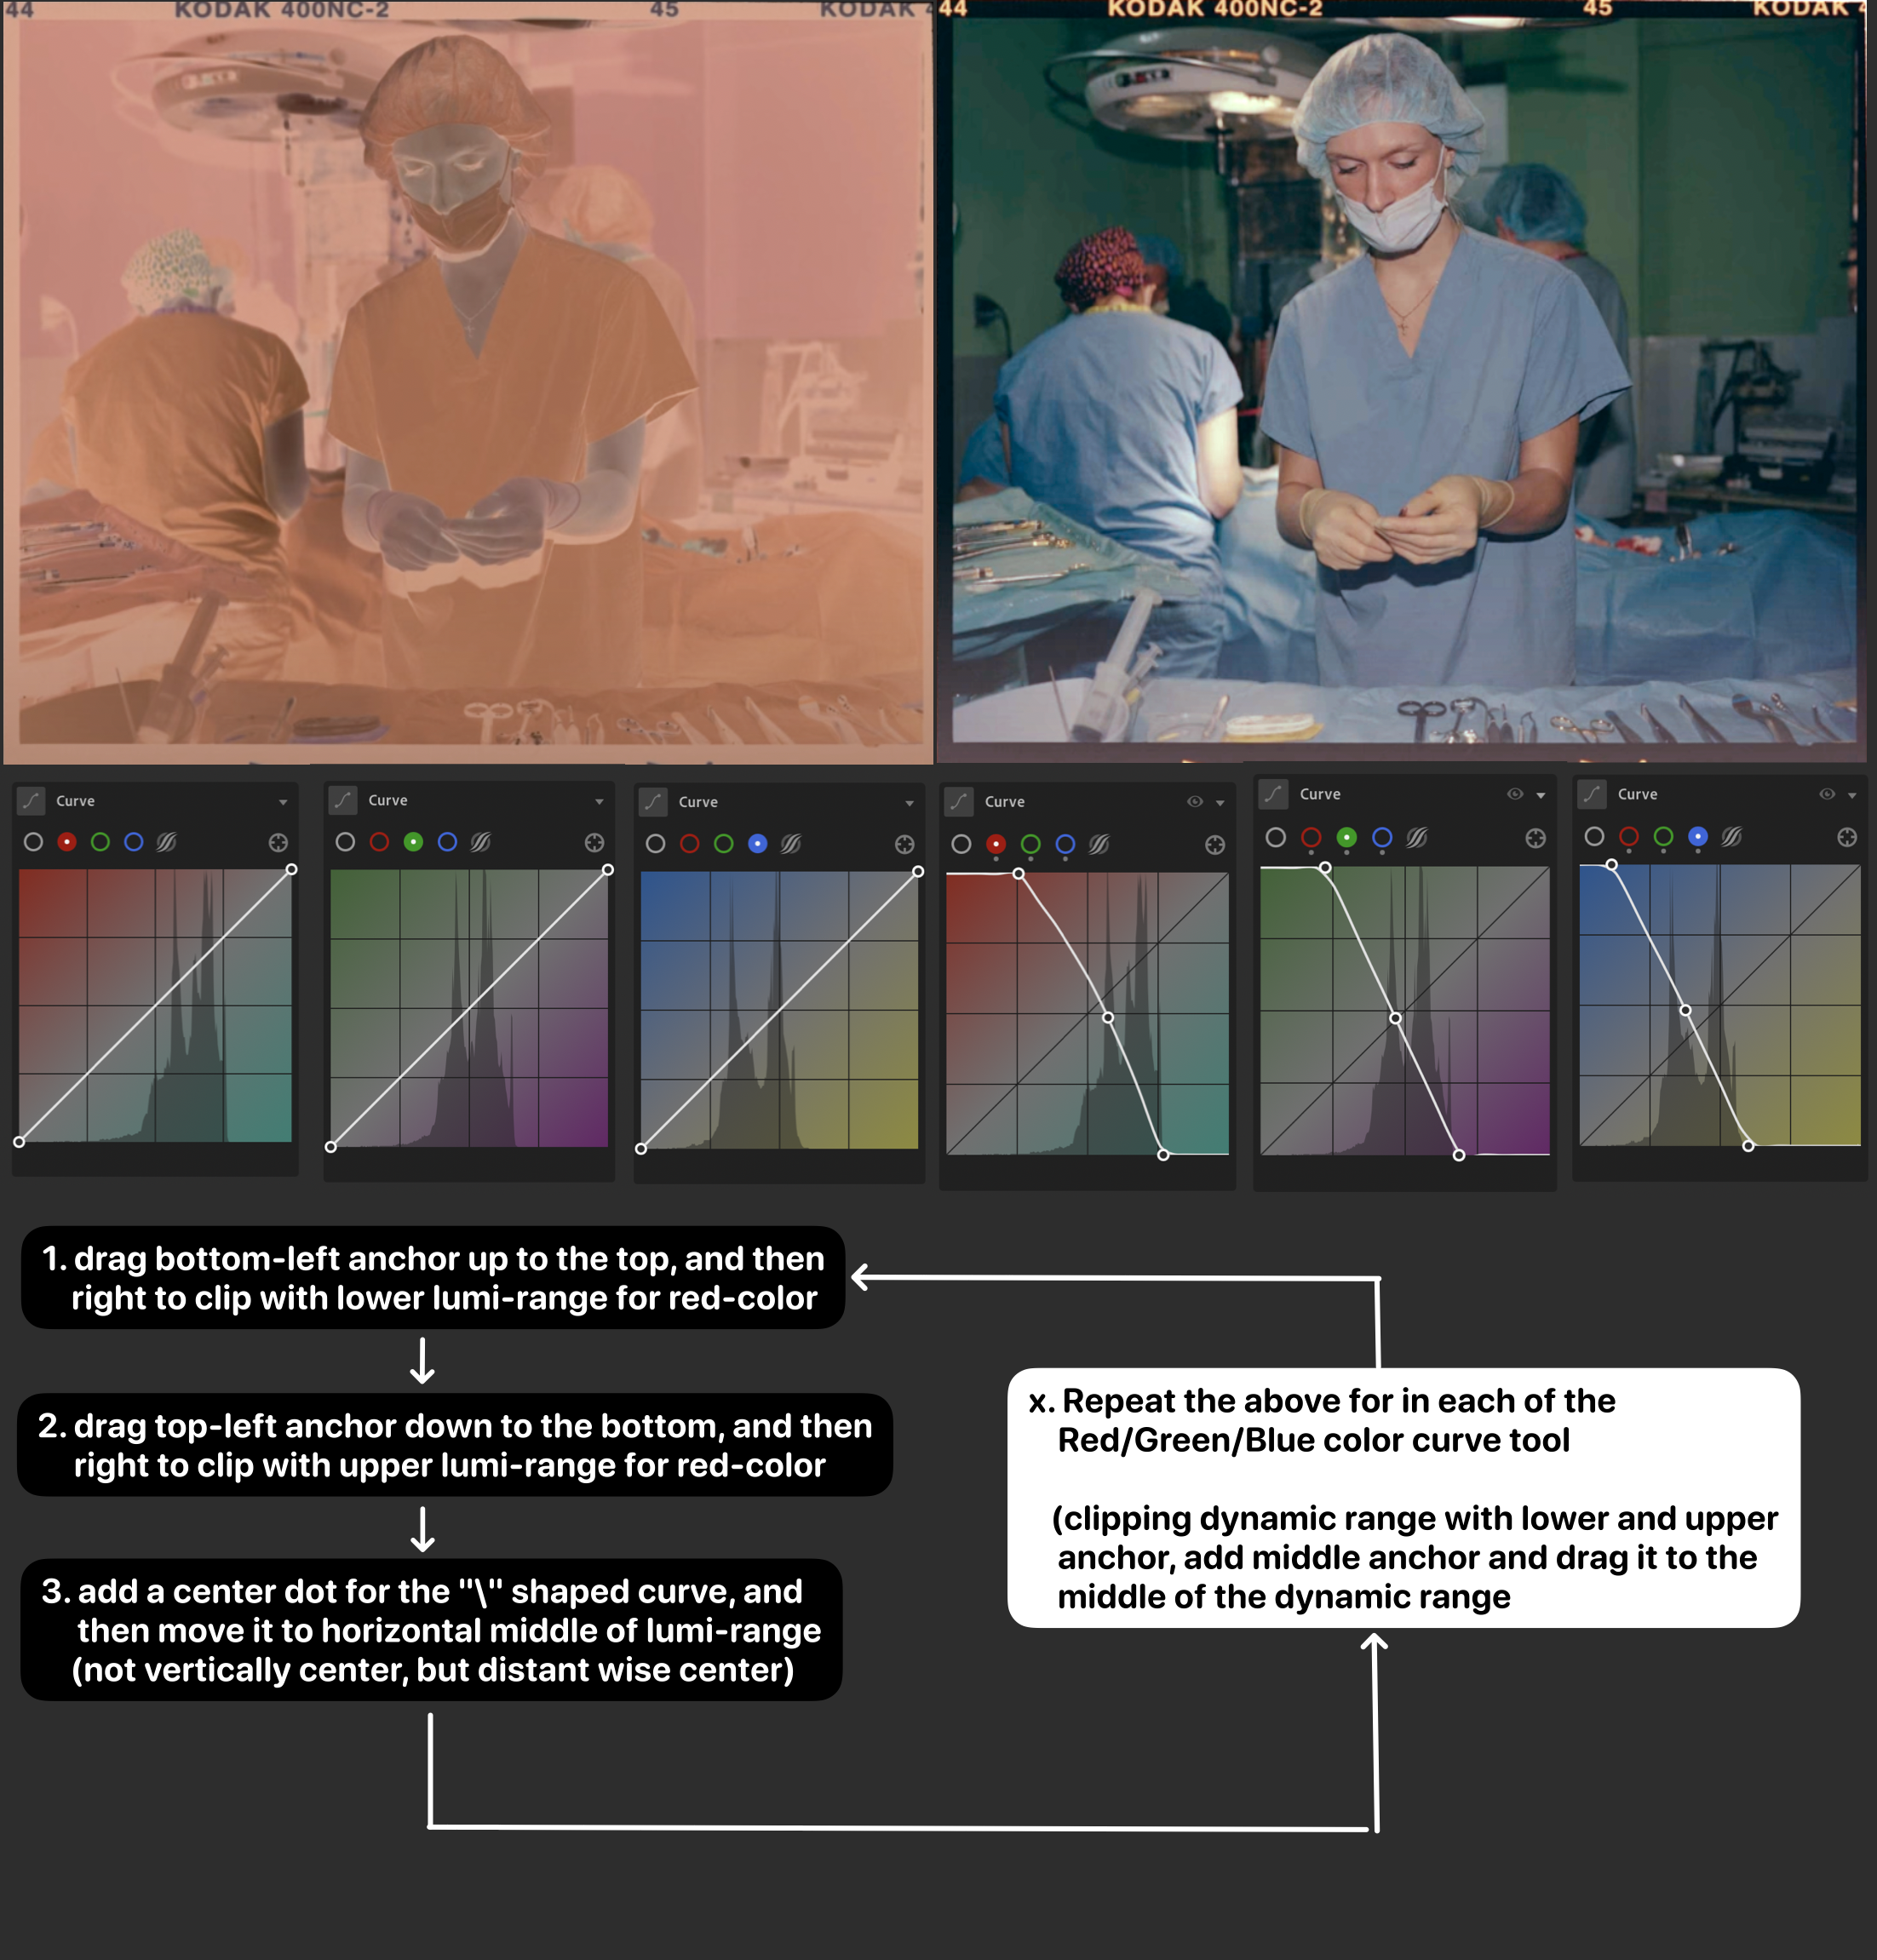
Illustration for TLDR

Steps-Breakdown
Import the Scanned Negatives: Start by importing your scanned negatives into Lightroom. Ensure that the scans are free of dust, scratches and interference of ambient light for better results.
- Ideally the film should be the only thing shining in the image, all other area in the lightbox should be tapped/covered
- If you are using a macro lens (or filter), please use smaller aperture such as f11 or smaller to ensure the largest depth-of-field.
- If you don’t have a macro lens (or filter) and is only using the center of the image, then you may use larger aperture such as f5.6 ~ f4.0
- Try capture using exposure bracket setting such that you have more choice the the lightroom (and you can stack them into HDR if you want)
Switch to Tone/Point Curve: In the right sidebar, click on the “Light” panel to expand, and scroll down to the “tone curve” or “point” curve section, and select any of the “Red”, “Green”, “Blue” color (we will repeat the same steps 3-4 for each of the R/G/B-curve; But if you are aiming for quick preview, you can also do step 3-4 only on the RGB-curve only)
Invert the Tone Curve:
- Drag the lower left anchor point (representing shadows) all the way up to the top of the curve.
- Drag the upper right anchor point (representing highlights) all the way down to the bottom of the curve.
- (Note: you may also drag these anchor up and down, but please make sure you understand it before proceeding, you can find more information in the “tone curve tool explaination” blog post)
(Optional) Adjust Midtones: If necessary, you can add a center anchor point in the (distance-wise) middle of the curve to fine-tune midtones. This allows for more control over how light and dark areas are rendered after inversion. Usually it is recommended to move the center point to the (weighted) center of your dynamic range
(Optional) Batch Copy/Paste Settings: If you plan to process multiple negatives, consider copying/pasting this editing to all the images within the same roll of film.
*p.s. Theoretically images coming from the films of a identical roll (company, manufature, expired?) can be inverted with the same setting. Though not garanteed, you can potentially get better result by doing the step 3-4 for every image individually/
Post-Inversion Adjustments: After inverting, you may notice that colors look unnatural or cold. Use other sliders like Exposure, Contrast, and Temperature to adjust and correct colors as needed. Some slider may act unexpected due to the nature of the original inverted image, in that case you may want to export the image with the identical format as the original image (JPEG, PNG, TIFF, BMP), then start doing the post editing adjustment from that image.