Steps to Setup Private Upload Destination
Step-1: Activate Private File
To begin with you will need to configure private file directory, by defining file_private_path in settings.php:
| |
It is recommended to keep the “private files” outside the “public file folder”; For instance, if the public file folder is <root>/public_html/sites/default/files, then you may put it somewhere else outside this directory, for instance <root>/public_html/web/private.
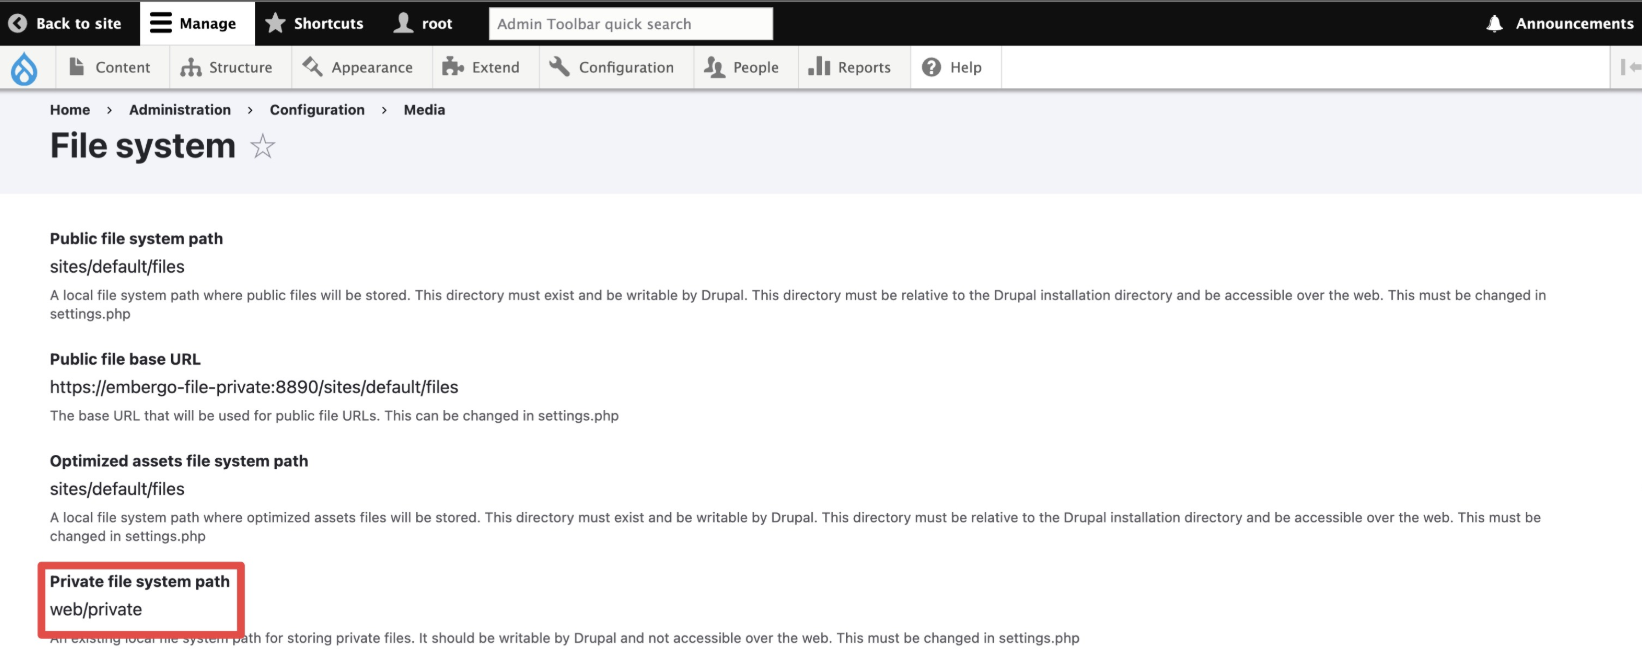
(Also as a side note, to my understanding the permission on whether the visitor can access files within the private folder are controlled by drupal, instead of the default file permission, hence it is not requried remove the read permission from file, having chmod 755 private_file_path is okay)
Step-2: Change File System Settings
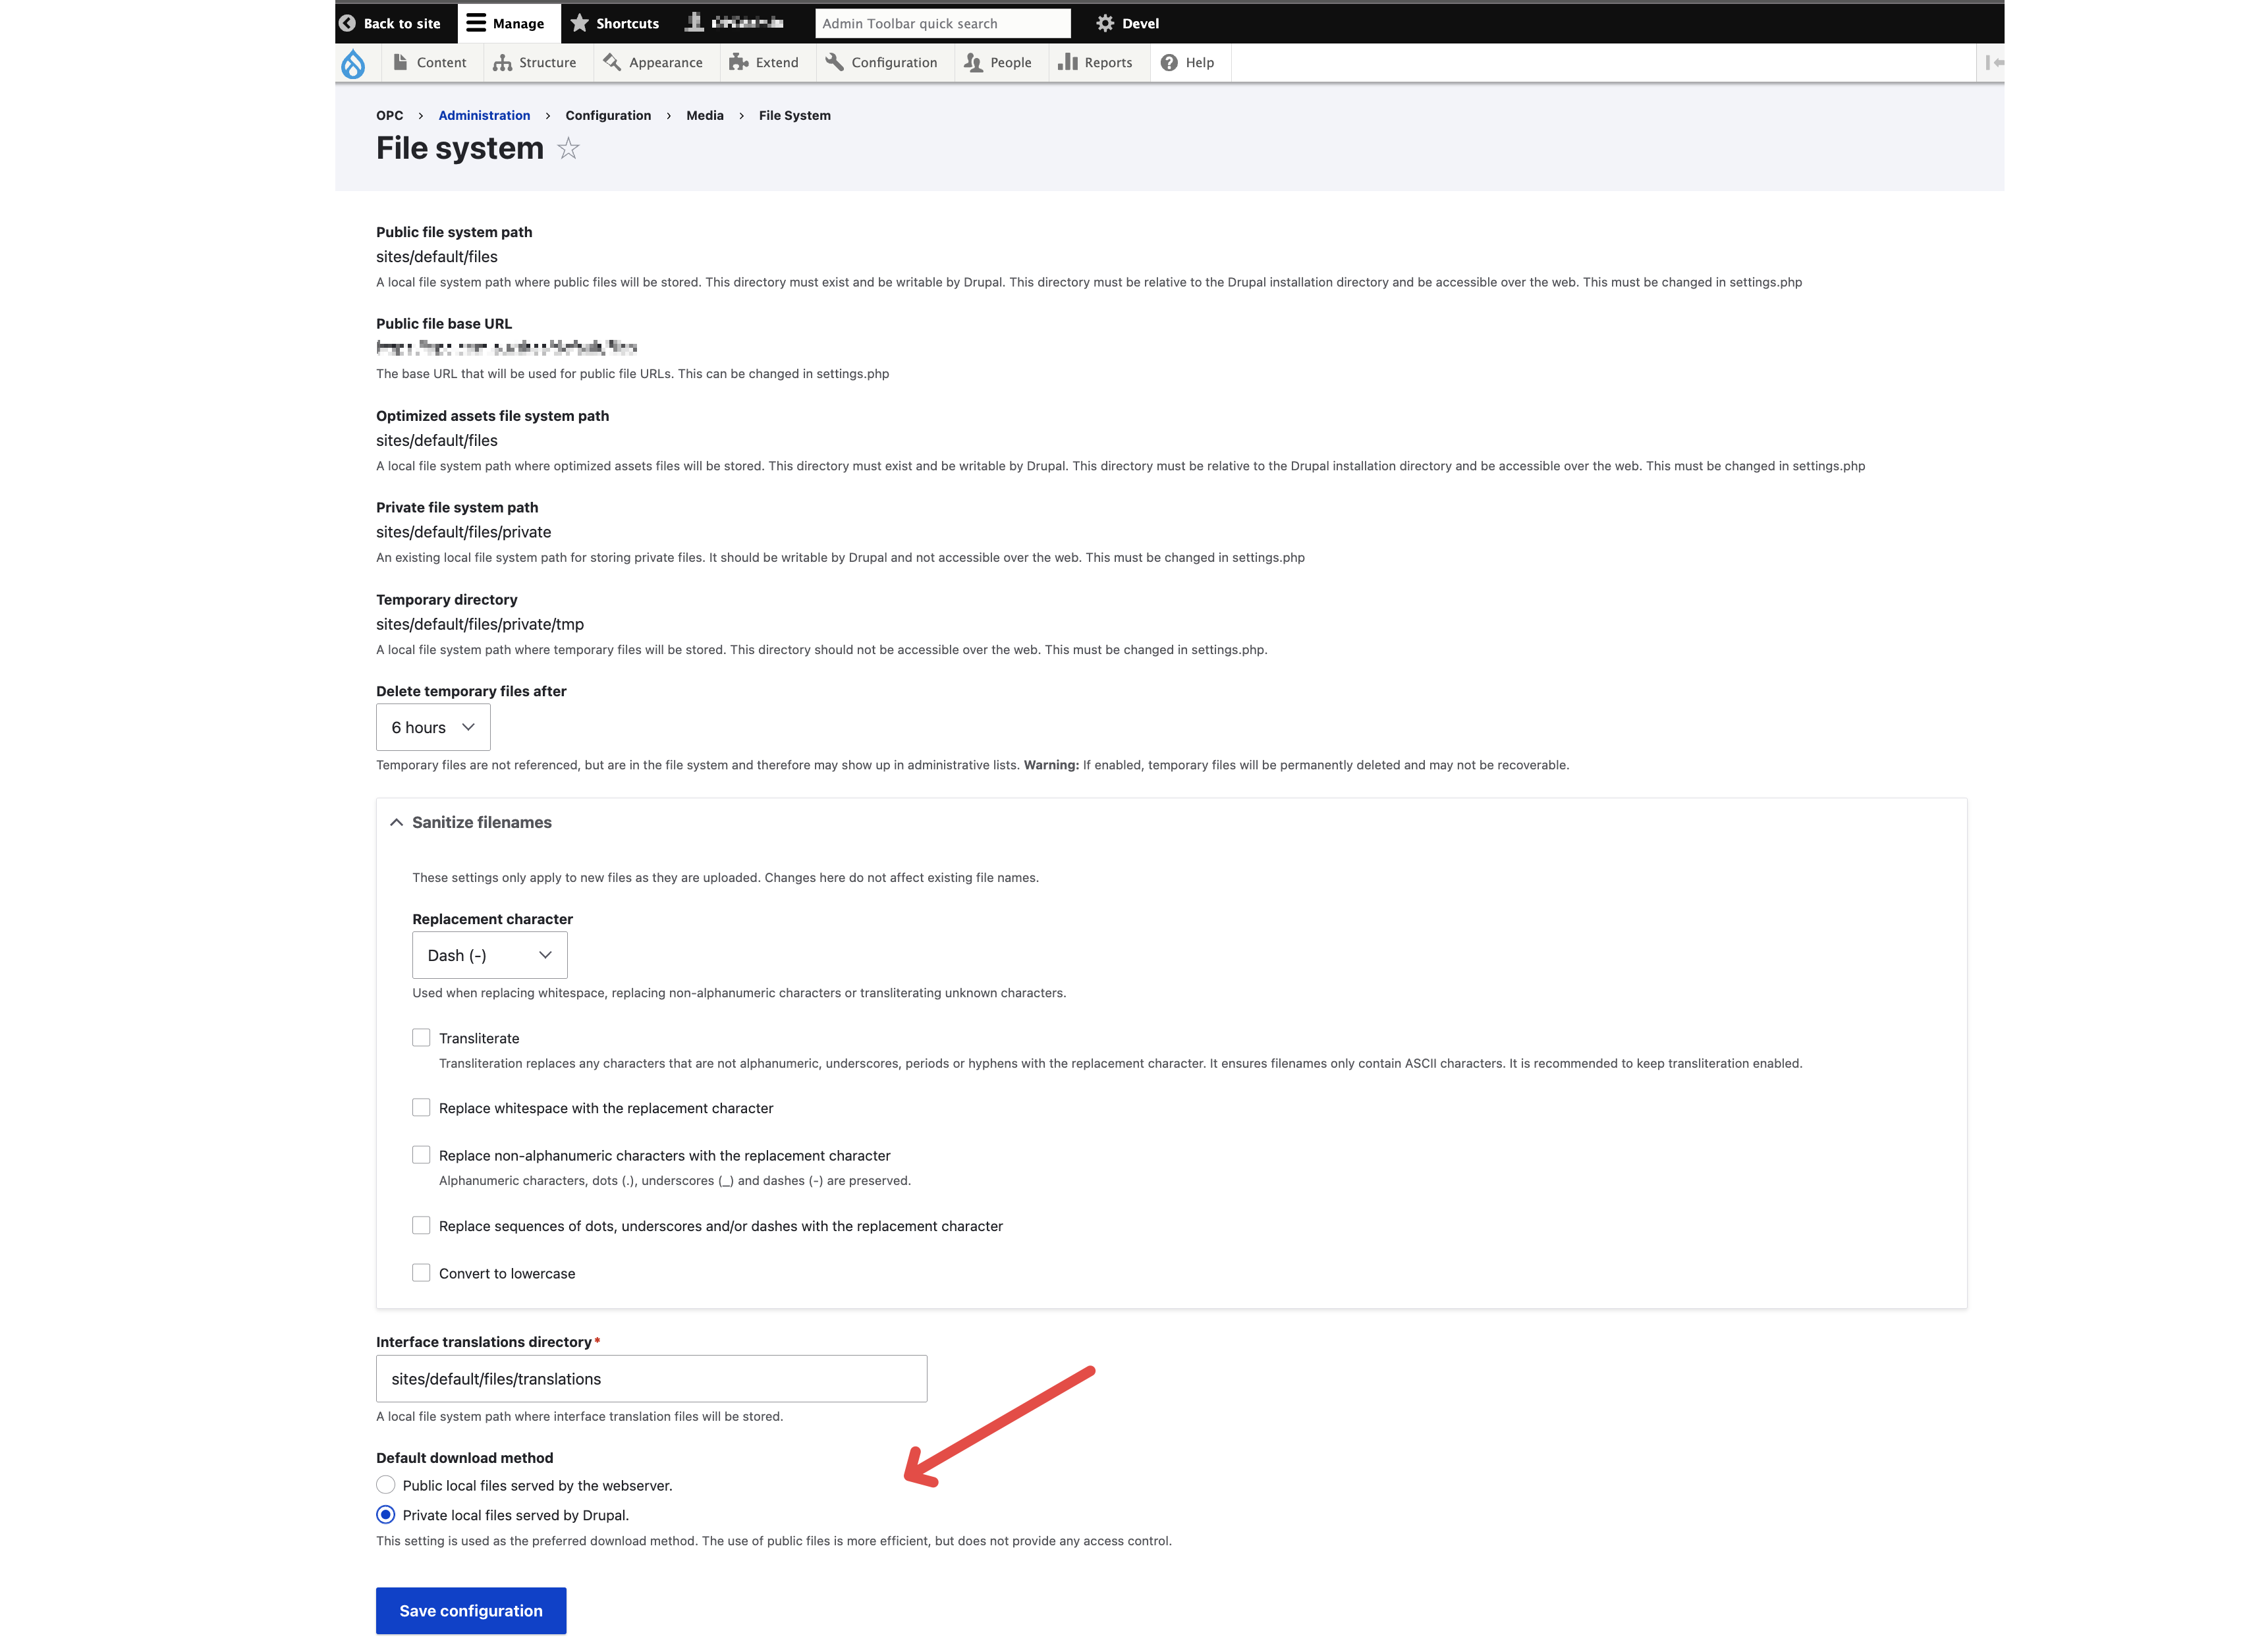
Proceed to <base_url>/admin/config/media/file-system, we need to configure “default download method” setting; By default, you should see it being chosen as “Public local files served by the webserver”, this means: if visitors want to download a file, or want to look at an image for example, it will invoke the file directly from the server/file-browser.
In order for the drupal system to take over this control, we’ll need to change this setting to “Private local files served by Drupal” (This post: link, explains the the mechnism behind the drupal system’s permission control, over the files within the private upload destination, involving the hook_file_upload, file_file_download function in file.module file, checkAccess function in FileAccessControlHandler.php.)
Step-3: Change Medias’ Field Setting
Lastly, you’ll need to configure the “upload destination"of relevant fields (image or files) in Media Types (or Content Types, if you are using images or files directly in them), changing them from the default “public files” to “private files”:
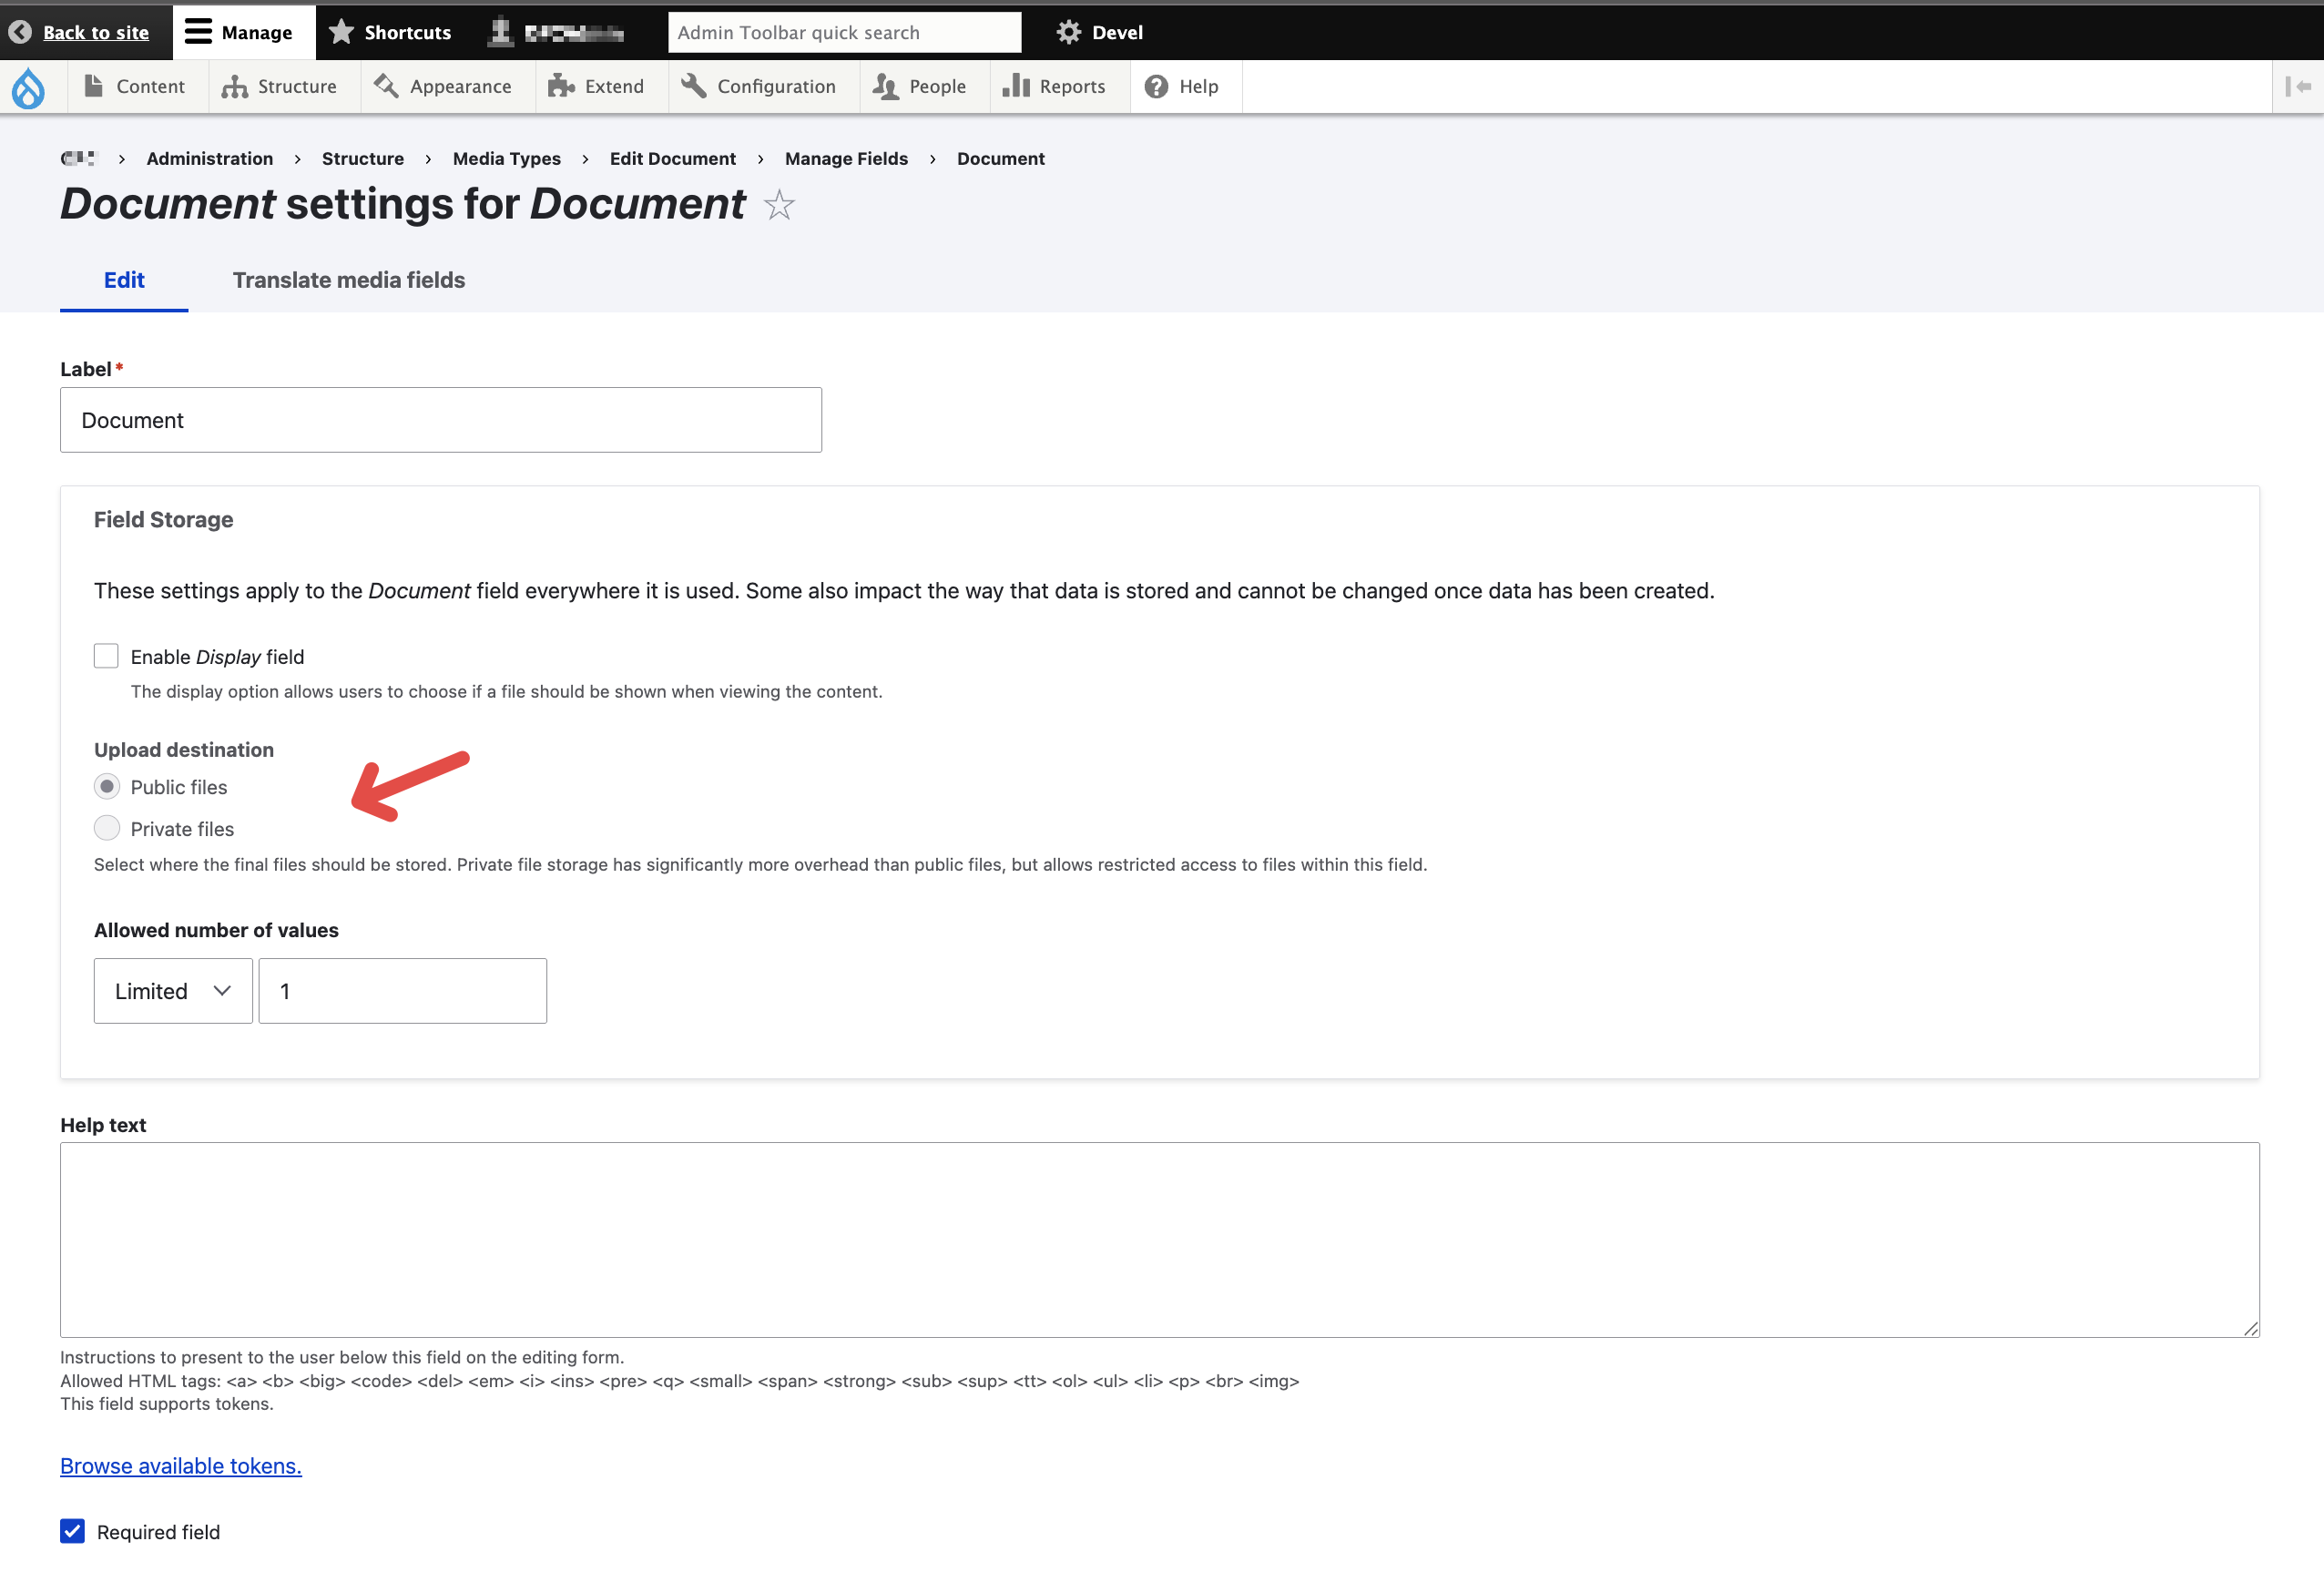
(if you see this being gray-ed out, then it is likely that this media type have already got its associated items created; In order to make this field configurable again, you will need to delete all the items first, then return to the same configuration page)
According to this post: link, if you are an anonymous user and can’t view the content because it is unpublished, you won’t have access to the private files attached to it. If you are an anonymous user but can view the content because it is published, you will also be able to see the private file.
Final Outcome Showcase
Combining with “Sceduled Transition” Module
You can “publish/unpublish” embargoed file (document/image) using scheduled rtasnition module + private file upload desitnation:
[scheduled-transition-example-1.mp4]
You can also “replace” embargoed file (document/image) using the same setup:
[scheduled-transition-example-2.mp4]
Reference
Controlling access to private files:
Mechnism behind the permission control of the private file uplaod desitnation:
https://bryanmanalo.com/drupal-private-file-mystery-who-has-access
Set private file as default upload destination:
Scheduled transition module how-to:
(*also here’s some alias of term mentioned:
- public vs private file upload path, public vs private file upload destination
- embargoed file, sensitive file, embargoed document, sensitive document