Introduction
In this post, I’ll explore how to use Figma’s MCP (Model Context Protocol) in the Agent Code Editor. We’ll cover the basic setup, available MCP tools, and best practices for efficiently using this powerful combination of design and development tools.
Setup Steps
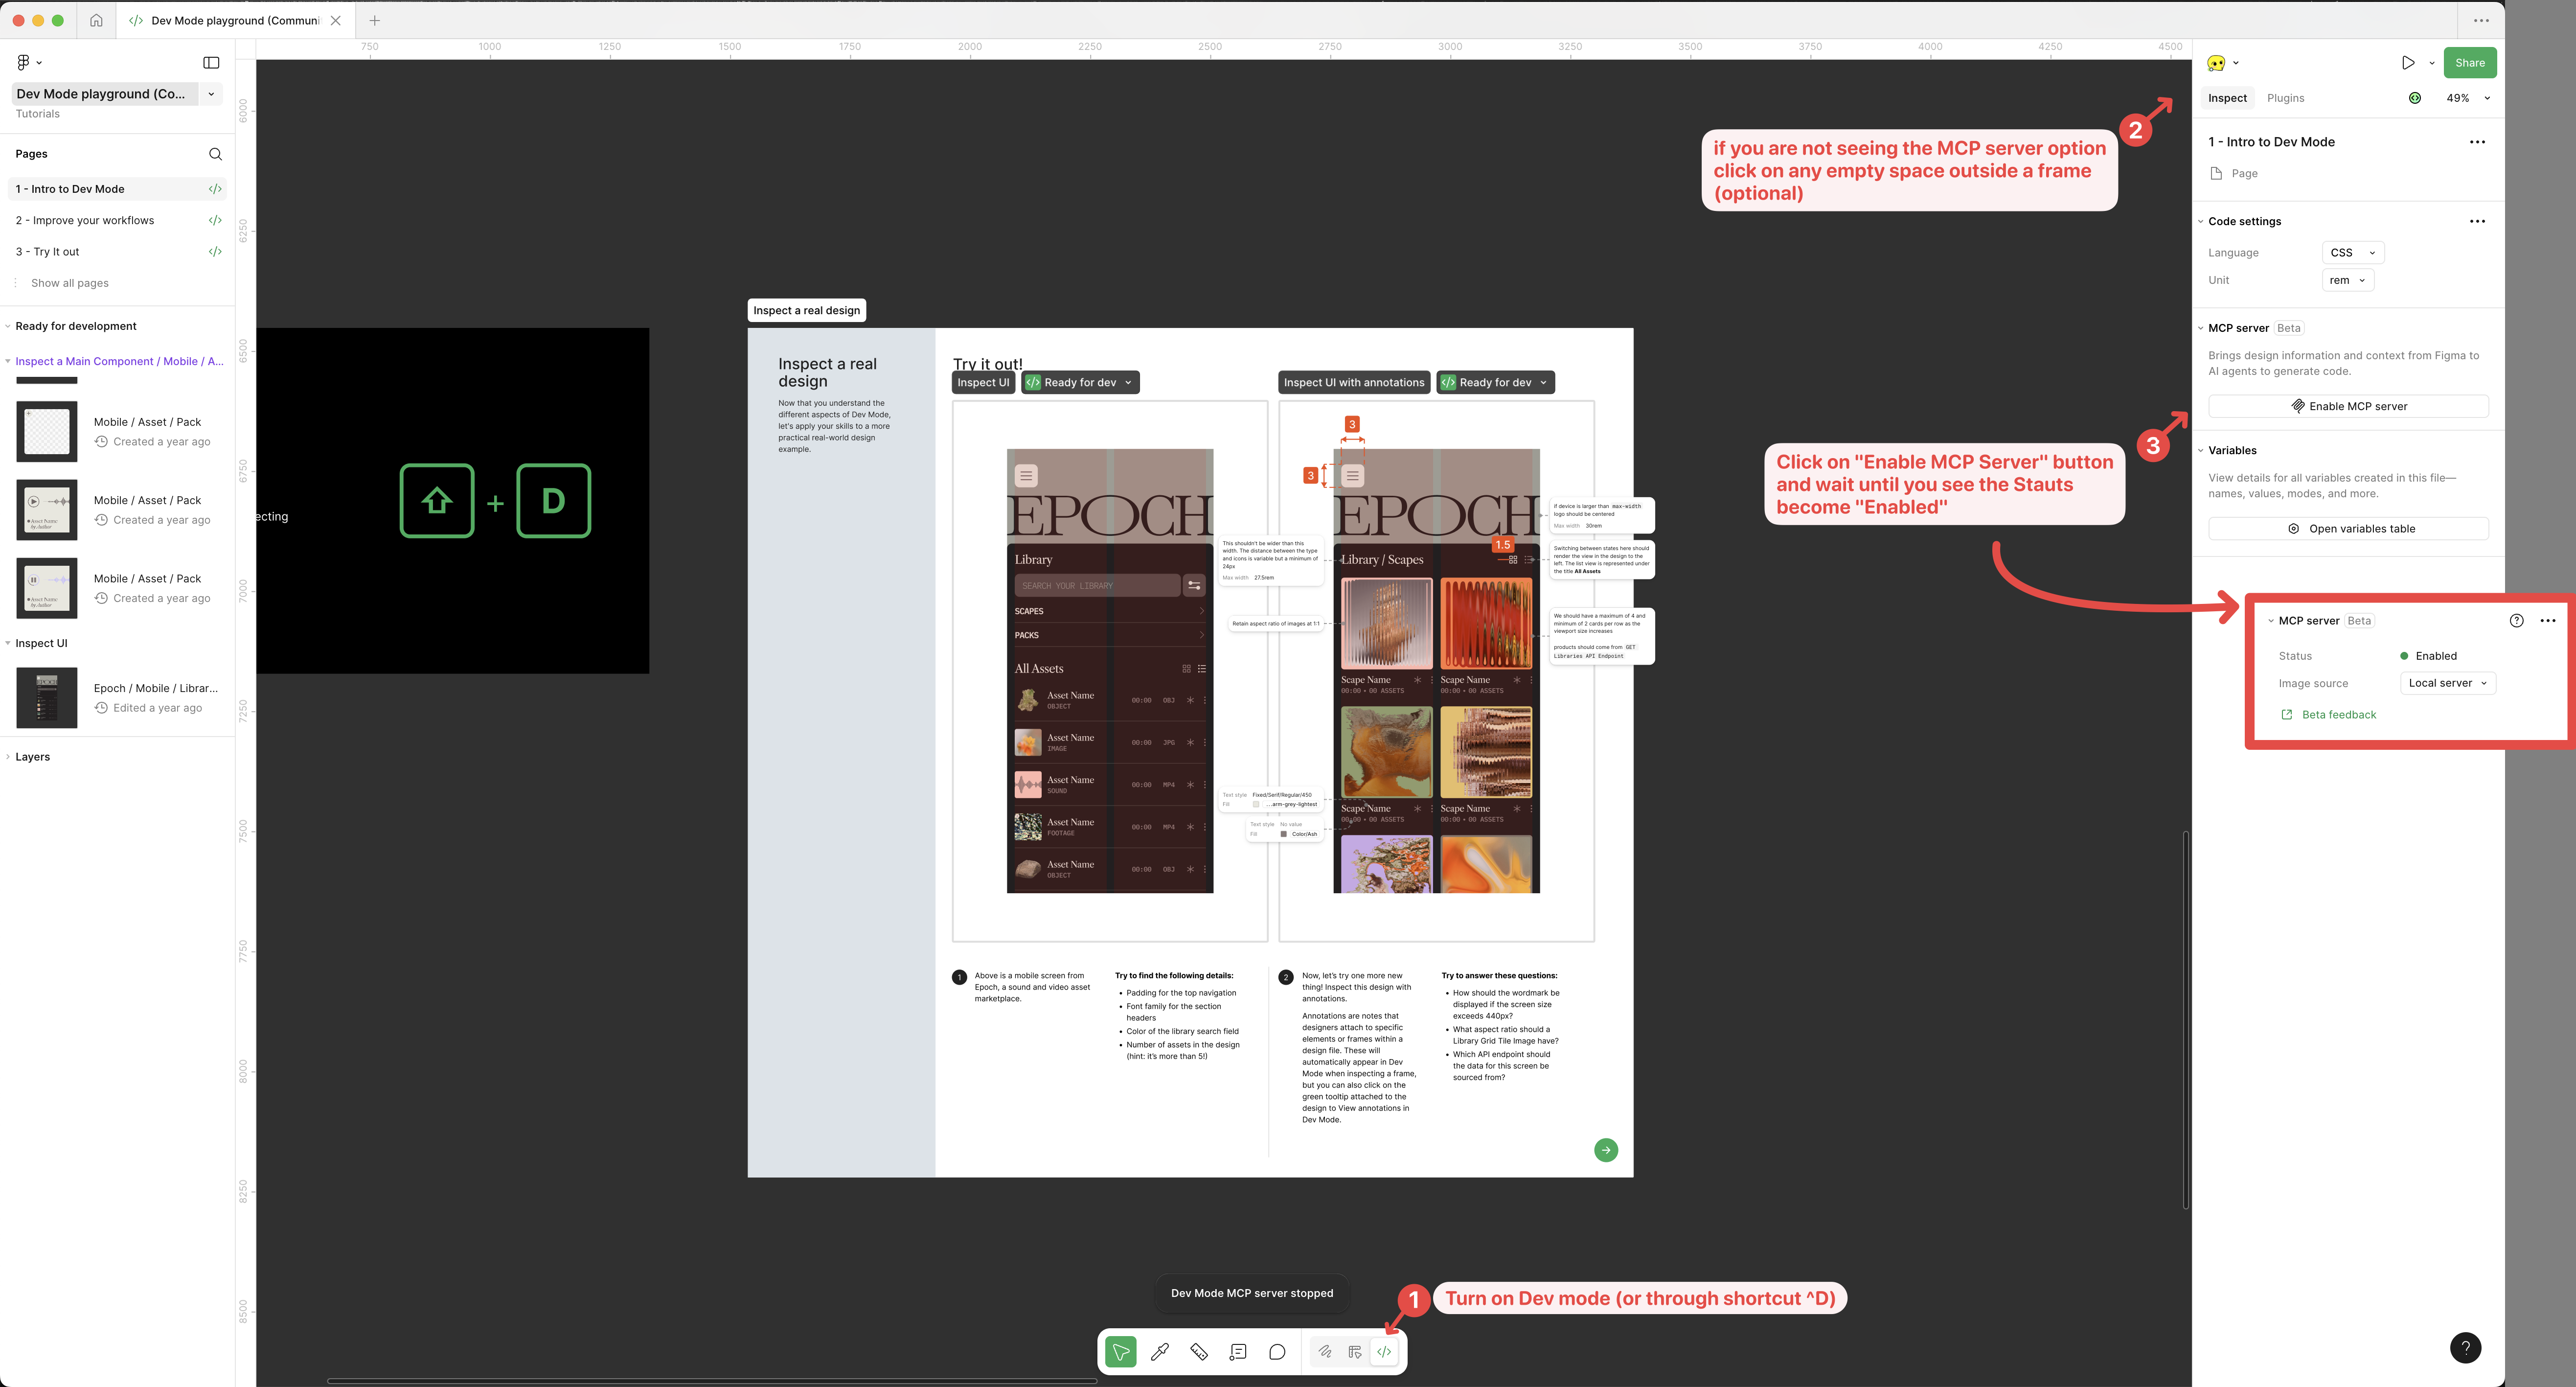
Step 1: Enable MCP Server in Figma
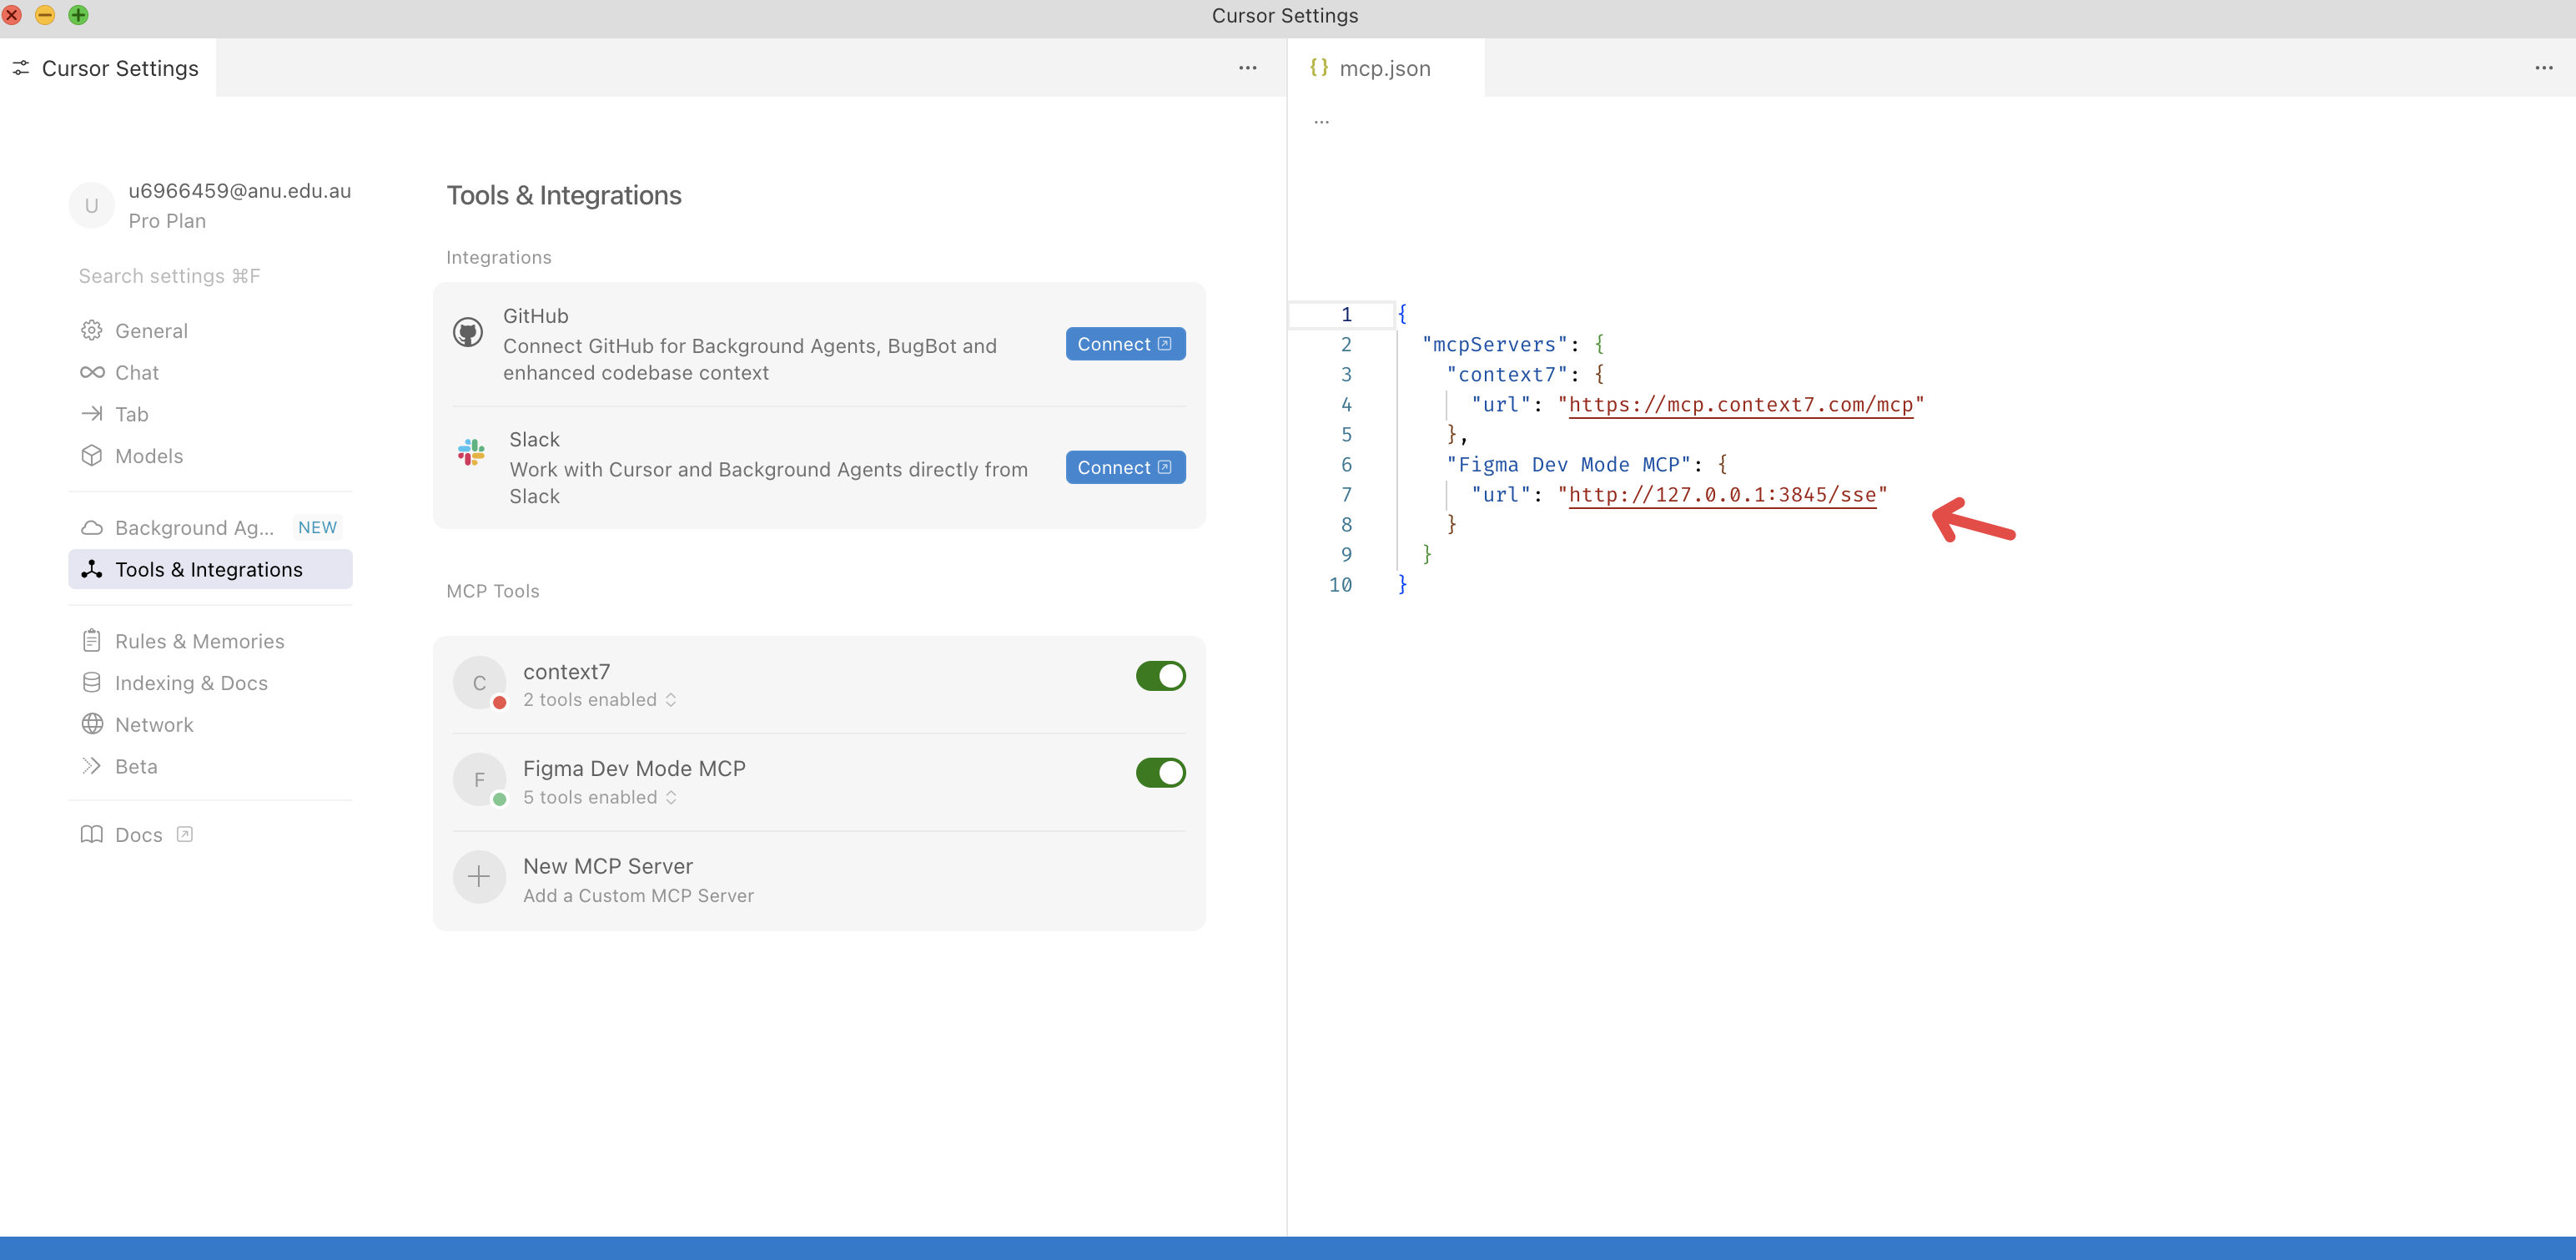
Step 2: Configure Your MCP Client (IDE)
Step 3: Start Using MCP in Your Client
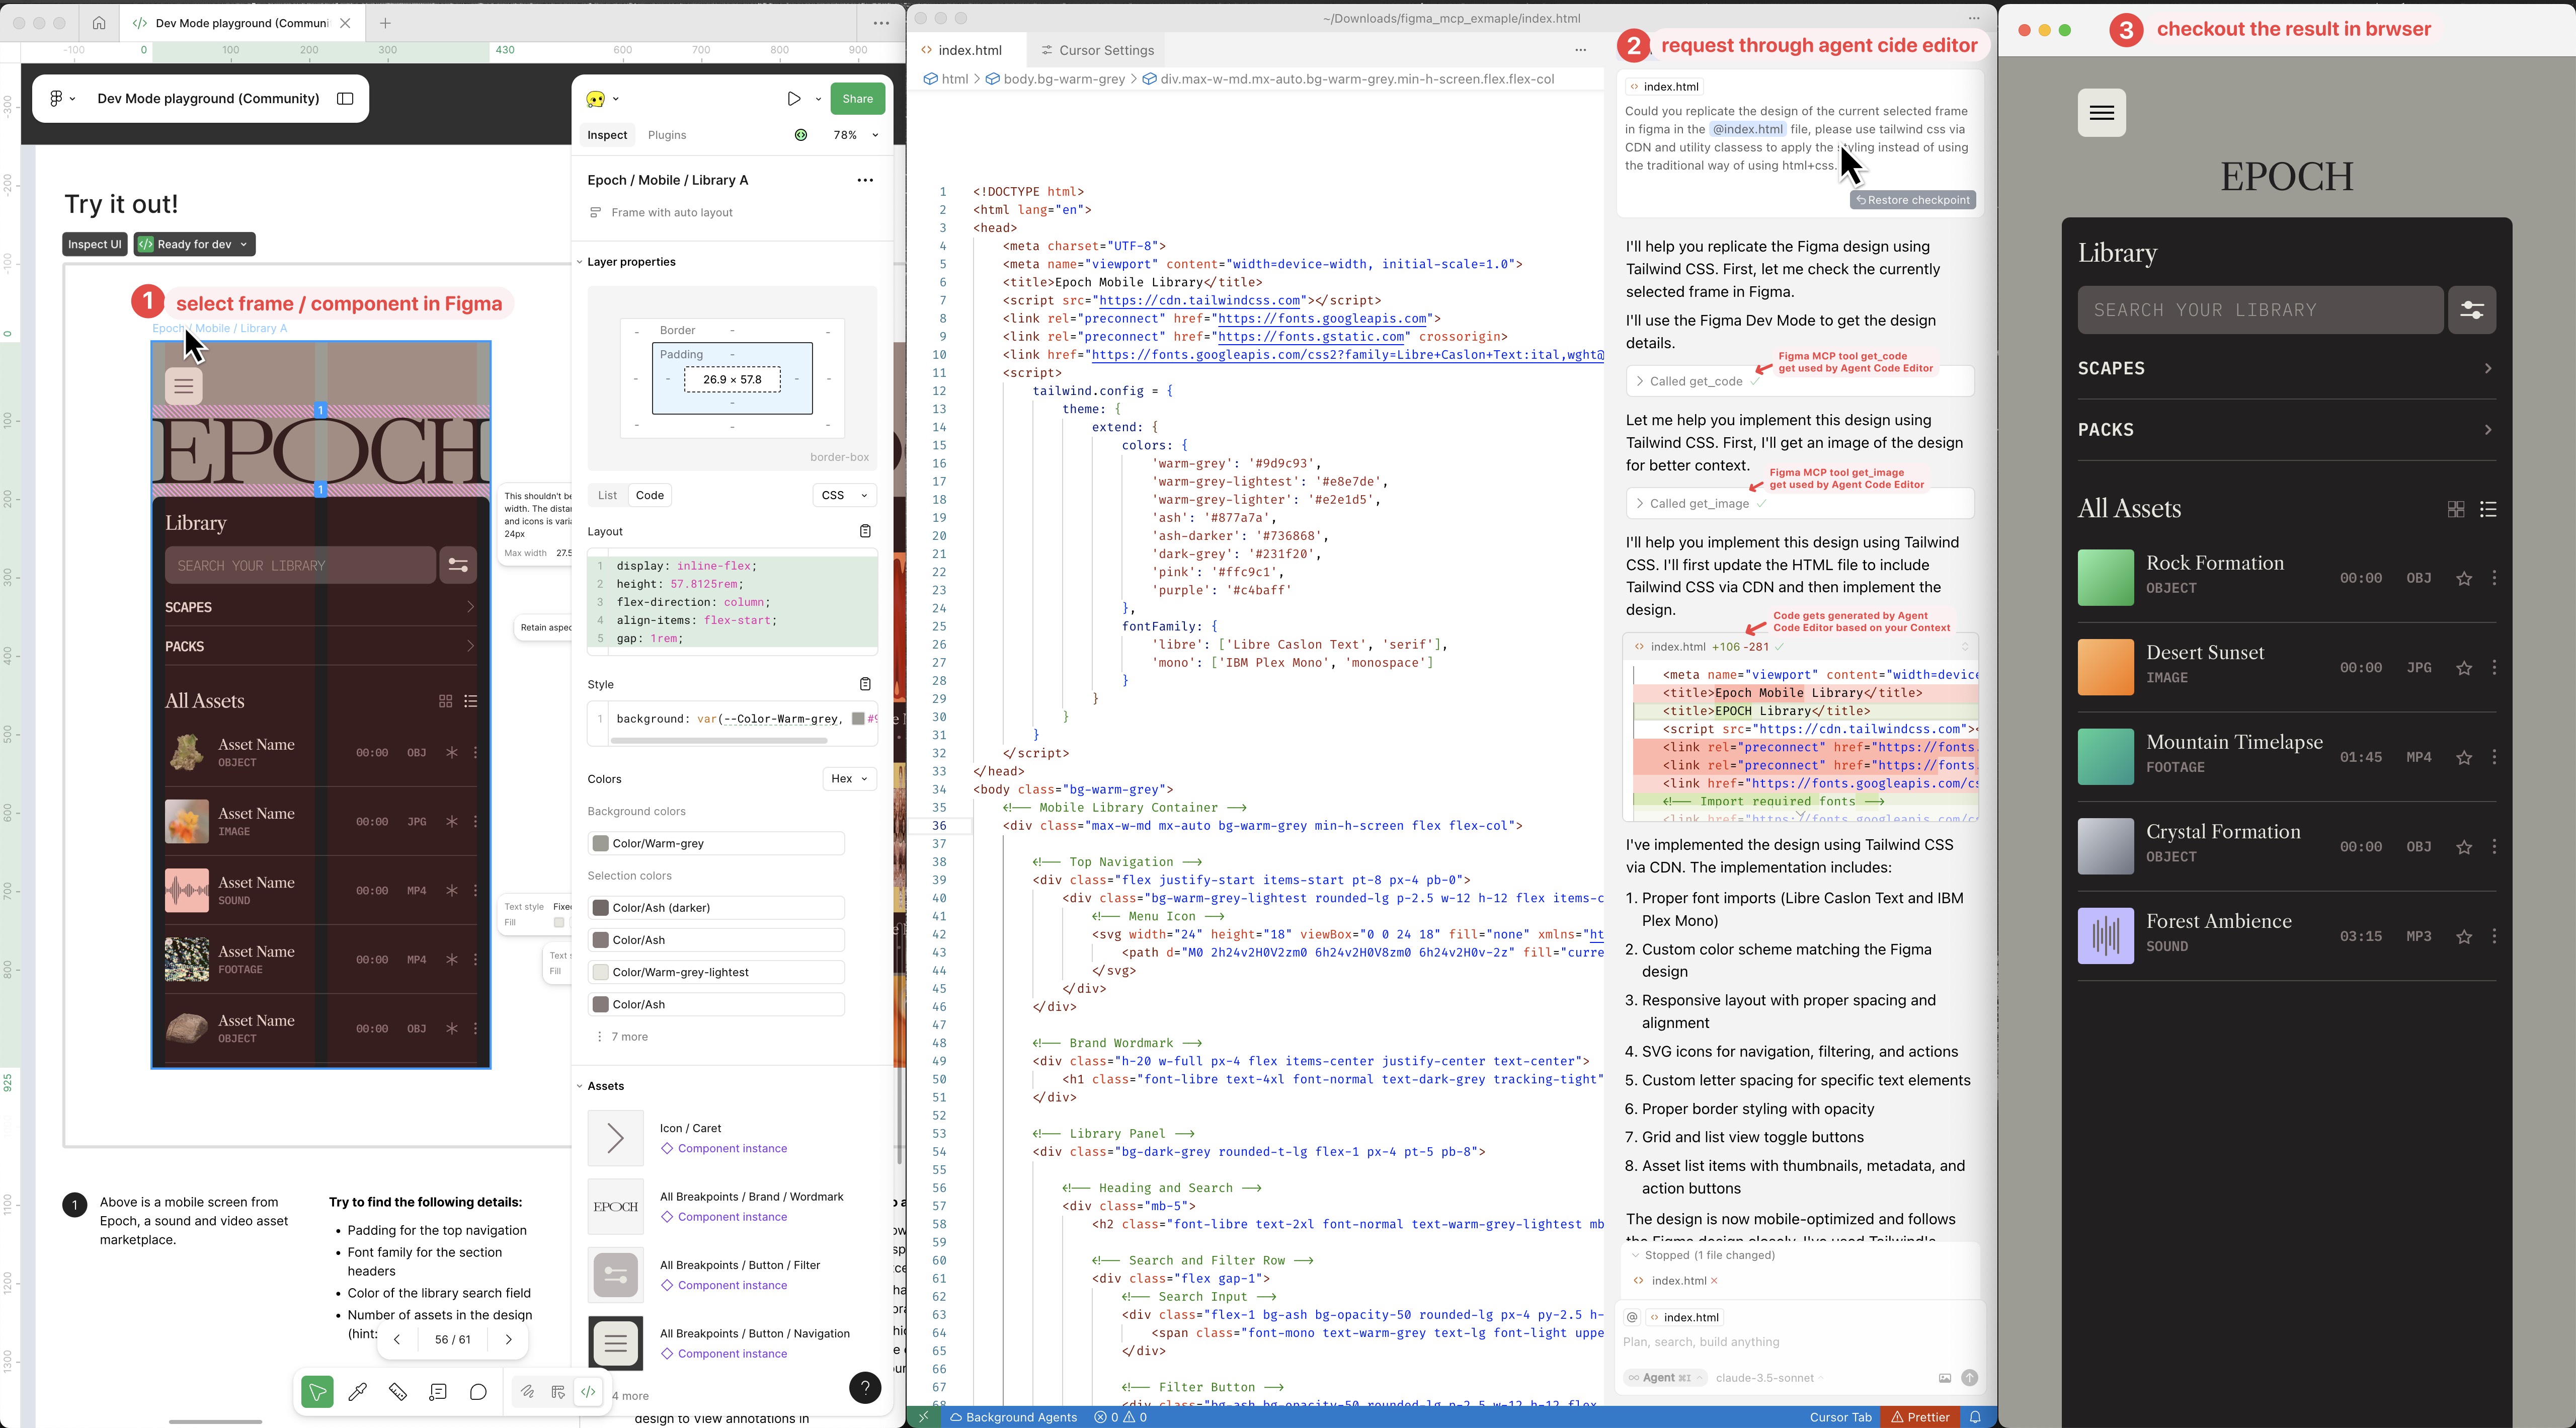
Note: You can also copy a Figma frame or layer URL and ask your MCP client to implement the selected design. For more information, see the official documentation.
Available MCP Tools
1. get_code
Generates code based on your Figma selection. By default, it outputs React with Tailwind CSS, but you can customize the output through prompts:
| |
2. get_image
Captures screenshots of your selection to maintain layout fidelity. Useful for:
| |
3. get_variable_defs
Returns variable definitions and styles used in your selection, including:
- Colors
- Spacing
- Typography
Example prompts:
| |
Best Practices
In Figma
Component and Variable Usage
- Use components for reusable elements
- Implement variables extensively for spacing, colors, and typography
- Utilize auto-layout and grid-layout whenever possible
Naming Conventions
- Use semantic layer names (e.g.,
CardContainer,CardItem_Image) - Avoid generic names like
Frame1
- Use semantic layer names (e.g.,
Design Documentation
- Add annotations to communicate design intent
- Document component reuse patterns
- Use Figma’s annotation features to add measurements and notes
- These annotations will be converted to HTML data attributes (
data-content-annotation) when using theget_codetool (see: example)
When Prompting
Be Specific About Technology
- Specify your tech stack and framework preferences
- Mention any styling system requirements
Encourage Component Reuse
- Ask the agent to utilize existing components
- Prefer modifying existing files over creating new ones
Example prompts:
| |