This post is for people who want to quickly get up to speed with how SSH connection work under the hood with some visuals to assist with understanding. If you want for rigid explanation regarding to this, please refer to the referenced YouTube video and articles.
Overall, it is important to understand that SSH uses asymmetric (public-private) key only for verifying if the client (developer’s machine) is allowed to connect to the host (the VPS), once the verification successes it uses Diffie-Hellman key exchange to establish a shared private key, then after that they use a generated and shared symmetric (private) key that is used only for this session.(i.e. public-private key is NOT used anymore once the connection is established)
Step-1: Generating and Sharing SSH Key
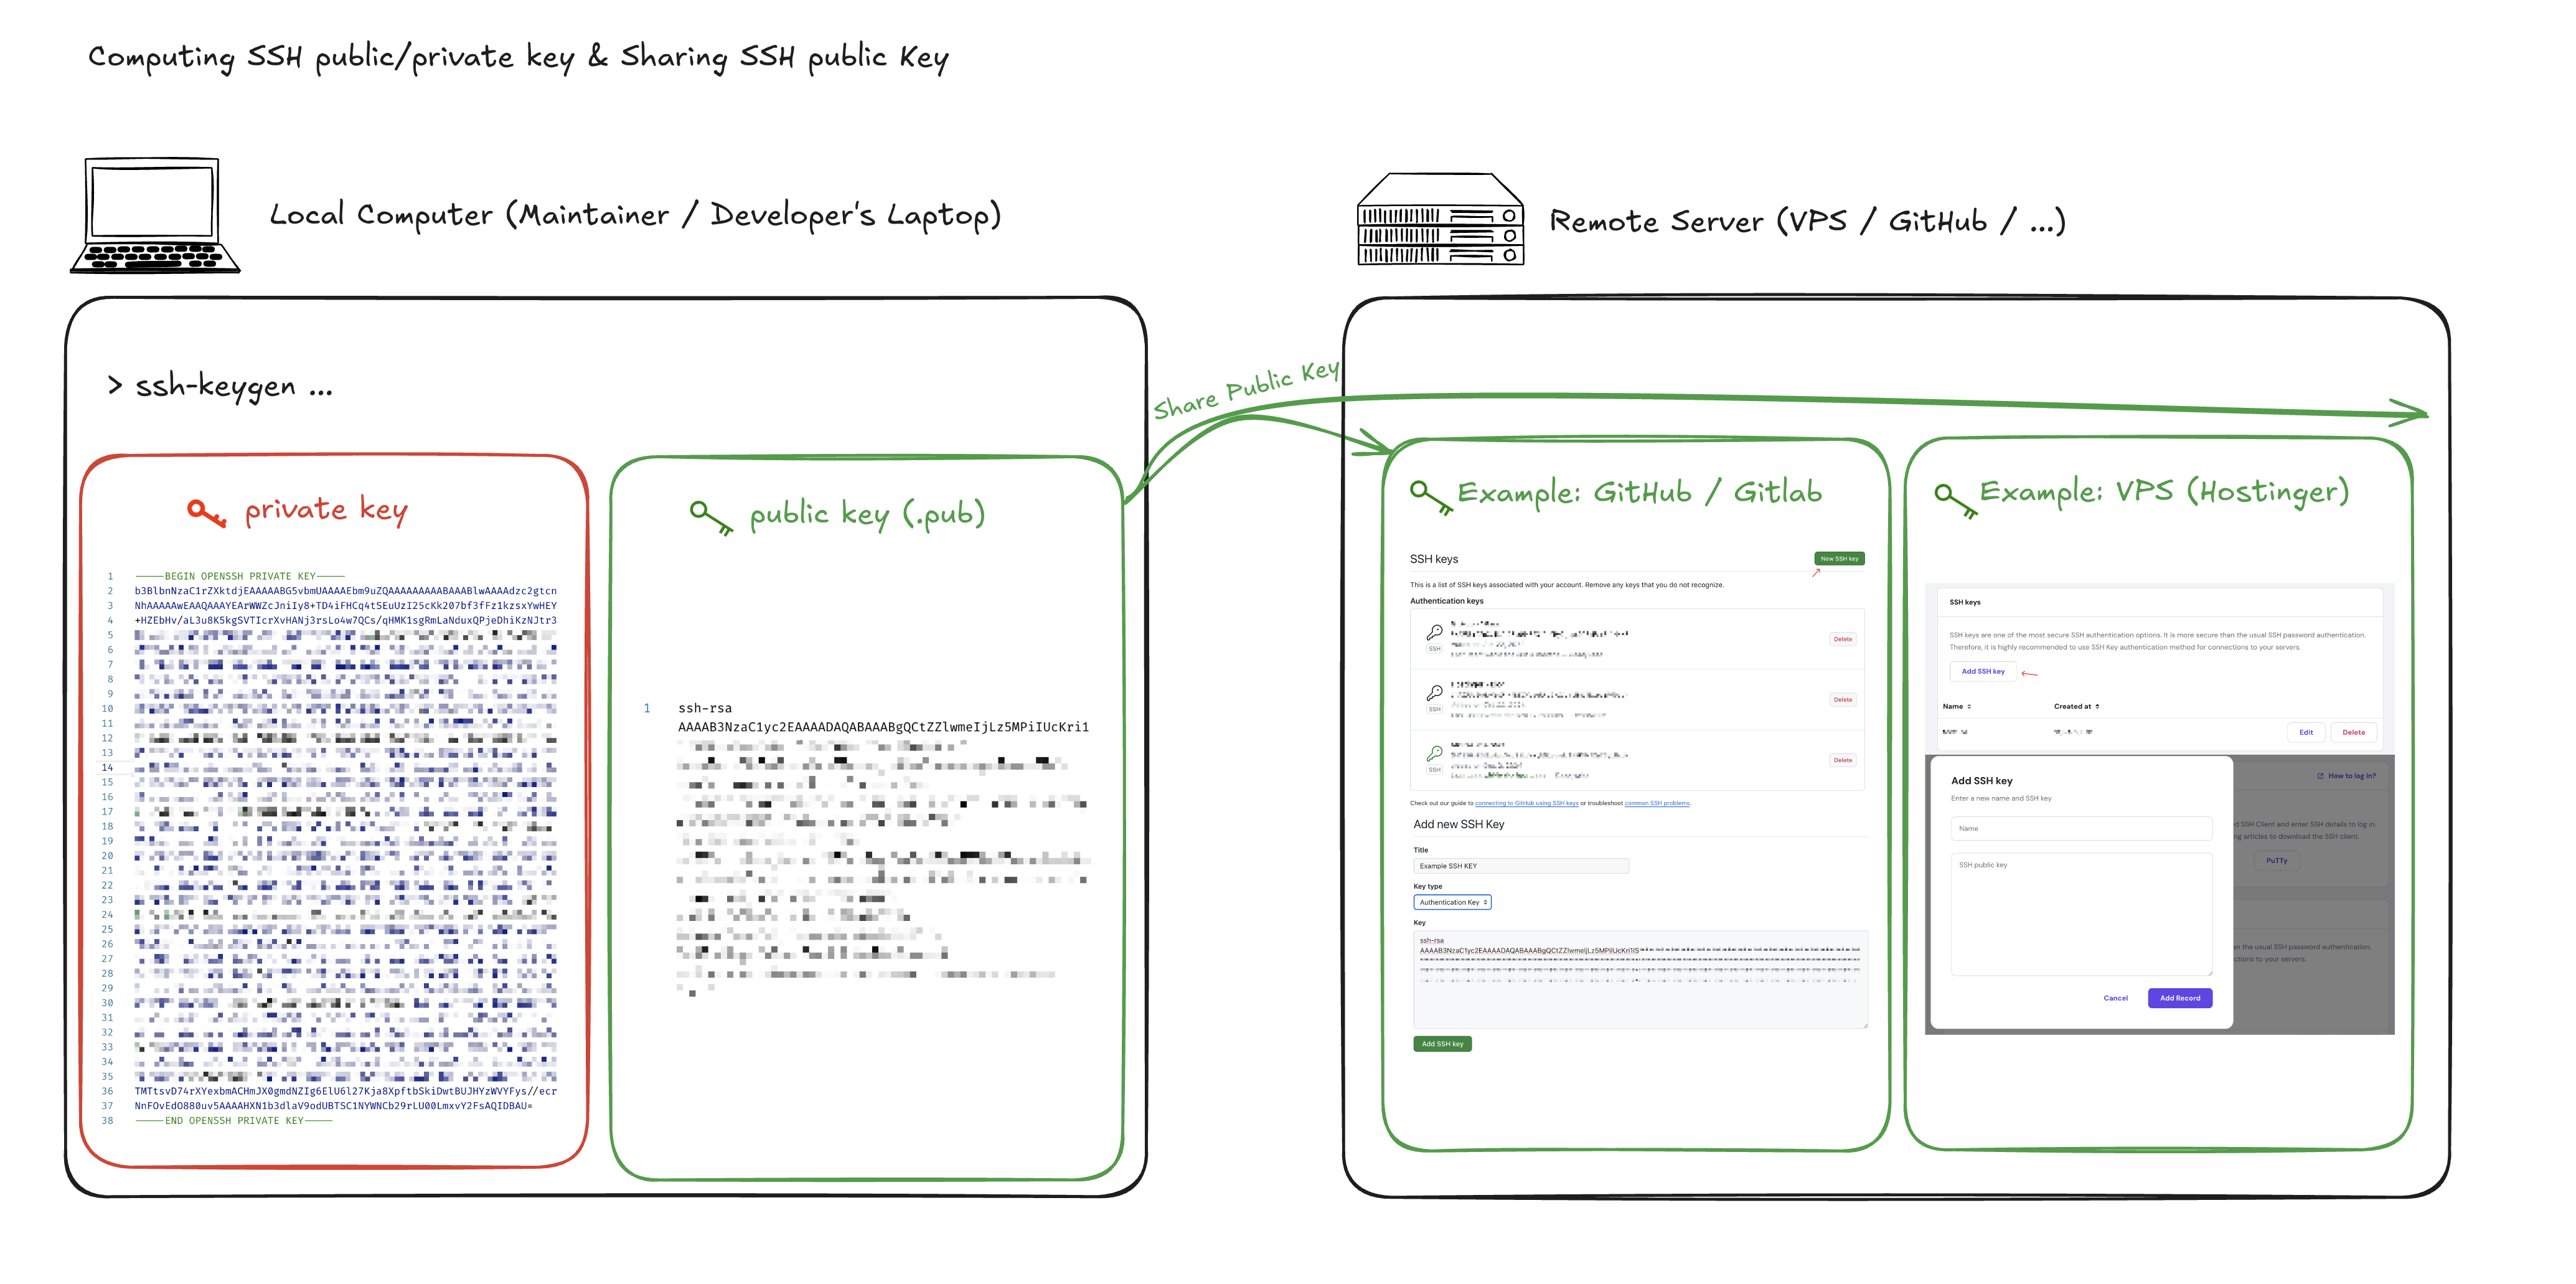
To begin with, a client will usually create the SSH key via the ssh-keygen ... command, which by default will create a pair of public and private key in the ~/.ssh/id_rsa folder.
For testing purpose, we will create it in a designated folder instead using the command: ssh-keygen -t rsa -f <path-to-hold-ssh-keys>/example-ssh (e.g. ssh-keygen -t rsa -f ~/Downloads/example-ssh), once the command is ran, you’ll get two files:
example-ssh: this is the private key used to decrypt the message, it will NOT be shared. One can generate multiple version of the public key using a single private key, but not the other way around.example-ssh.pub: this is the public key that will be shared, and can be used to encrypt the message. The encrypted message can be decrypted using the private key only.
The example-ssh.pub public key will then be stored on the host, such as the VPS, GitHub/GitLab, etc for future SSH authentication purpose. In case you have accidentally deleted or forgotten the public key, you can generate it via the following command:
| |
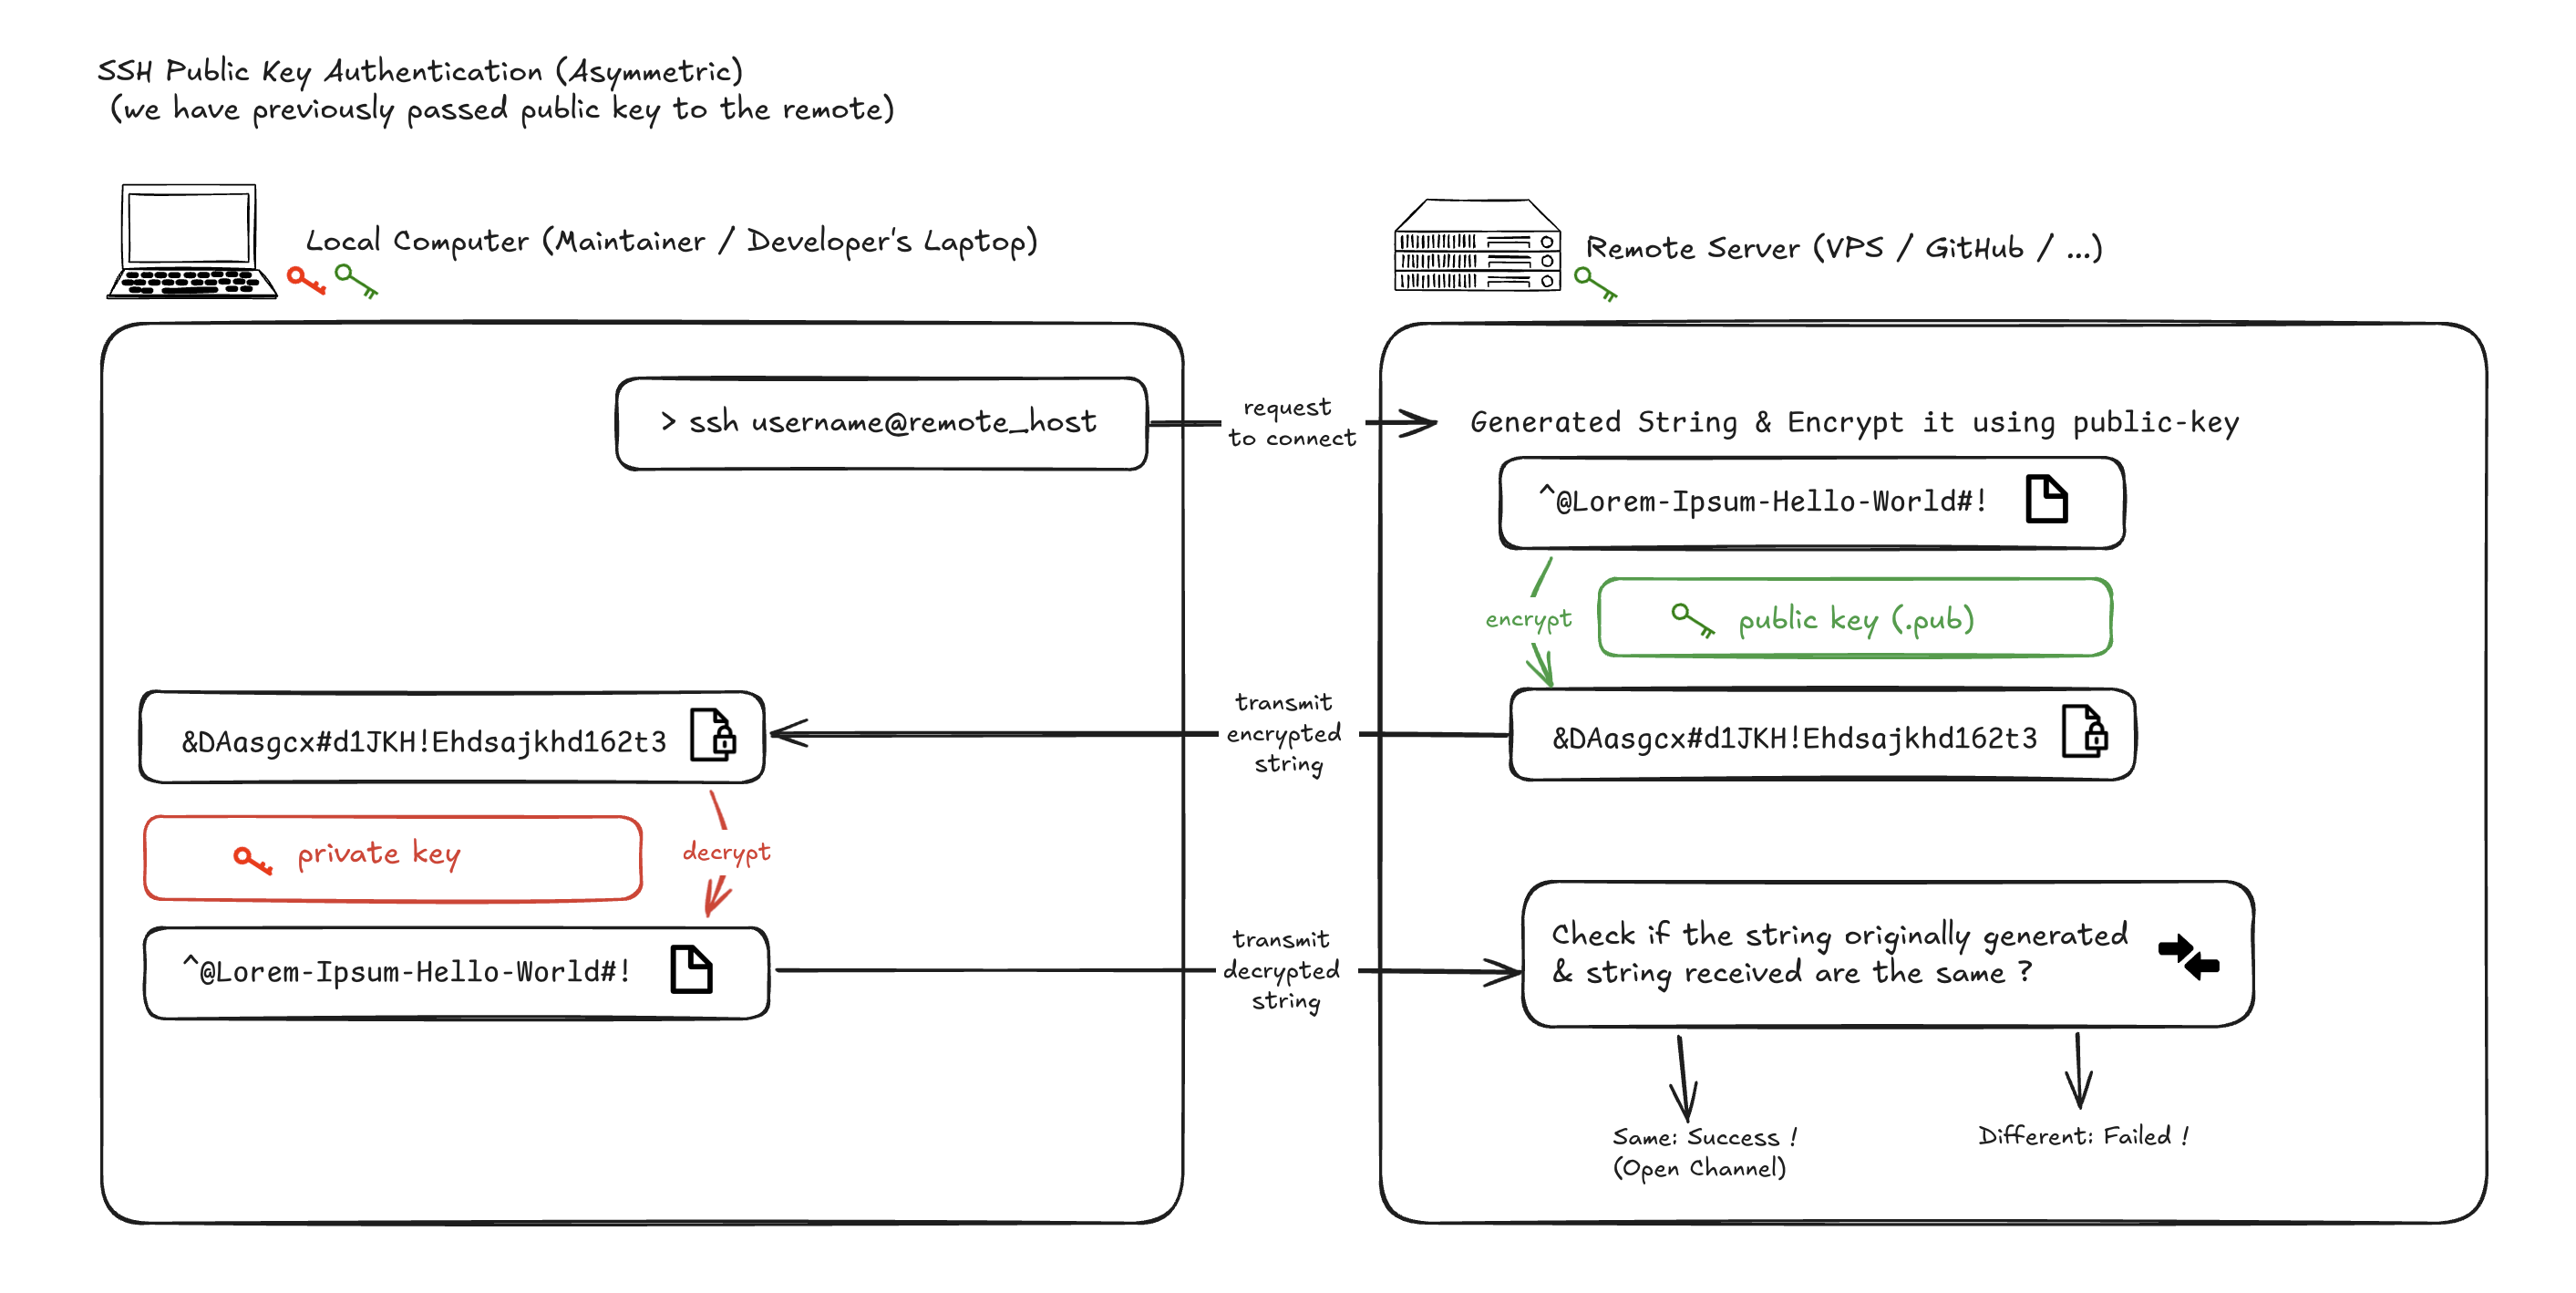
Step-2: SSH Public Key Authentication
This process is so called asymmetric authentication, and involves SSH Keys that was generated in Step-1. Below are the event that will take place during this step:
- Client (developer’s laptop) initiate the authentication, for instance via running
ssh username@hostin the terminal - Host (VPS/GitHub) generate a random string, for instance
^@Lorem-Ipsum-Hello-Wor1d#!, and encrypt it via theexample-ssh.pubpublic key that was shared previously from step-1, the outcome will be something like&DAasgcx#d1JKH!Ehdsajkhd162t3****== - Host will then transmit the encrypted message to the client, as a “challenge to solve”. The client will need to decrypt the message using the
example-sshprivate key, then send it back to the host. - Host will compare the decrypted version of message against its original generated one, if they match, then the authentication is a success.
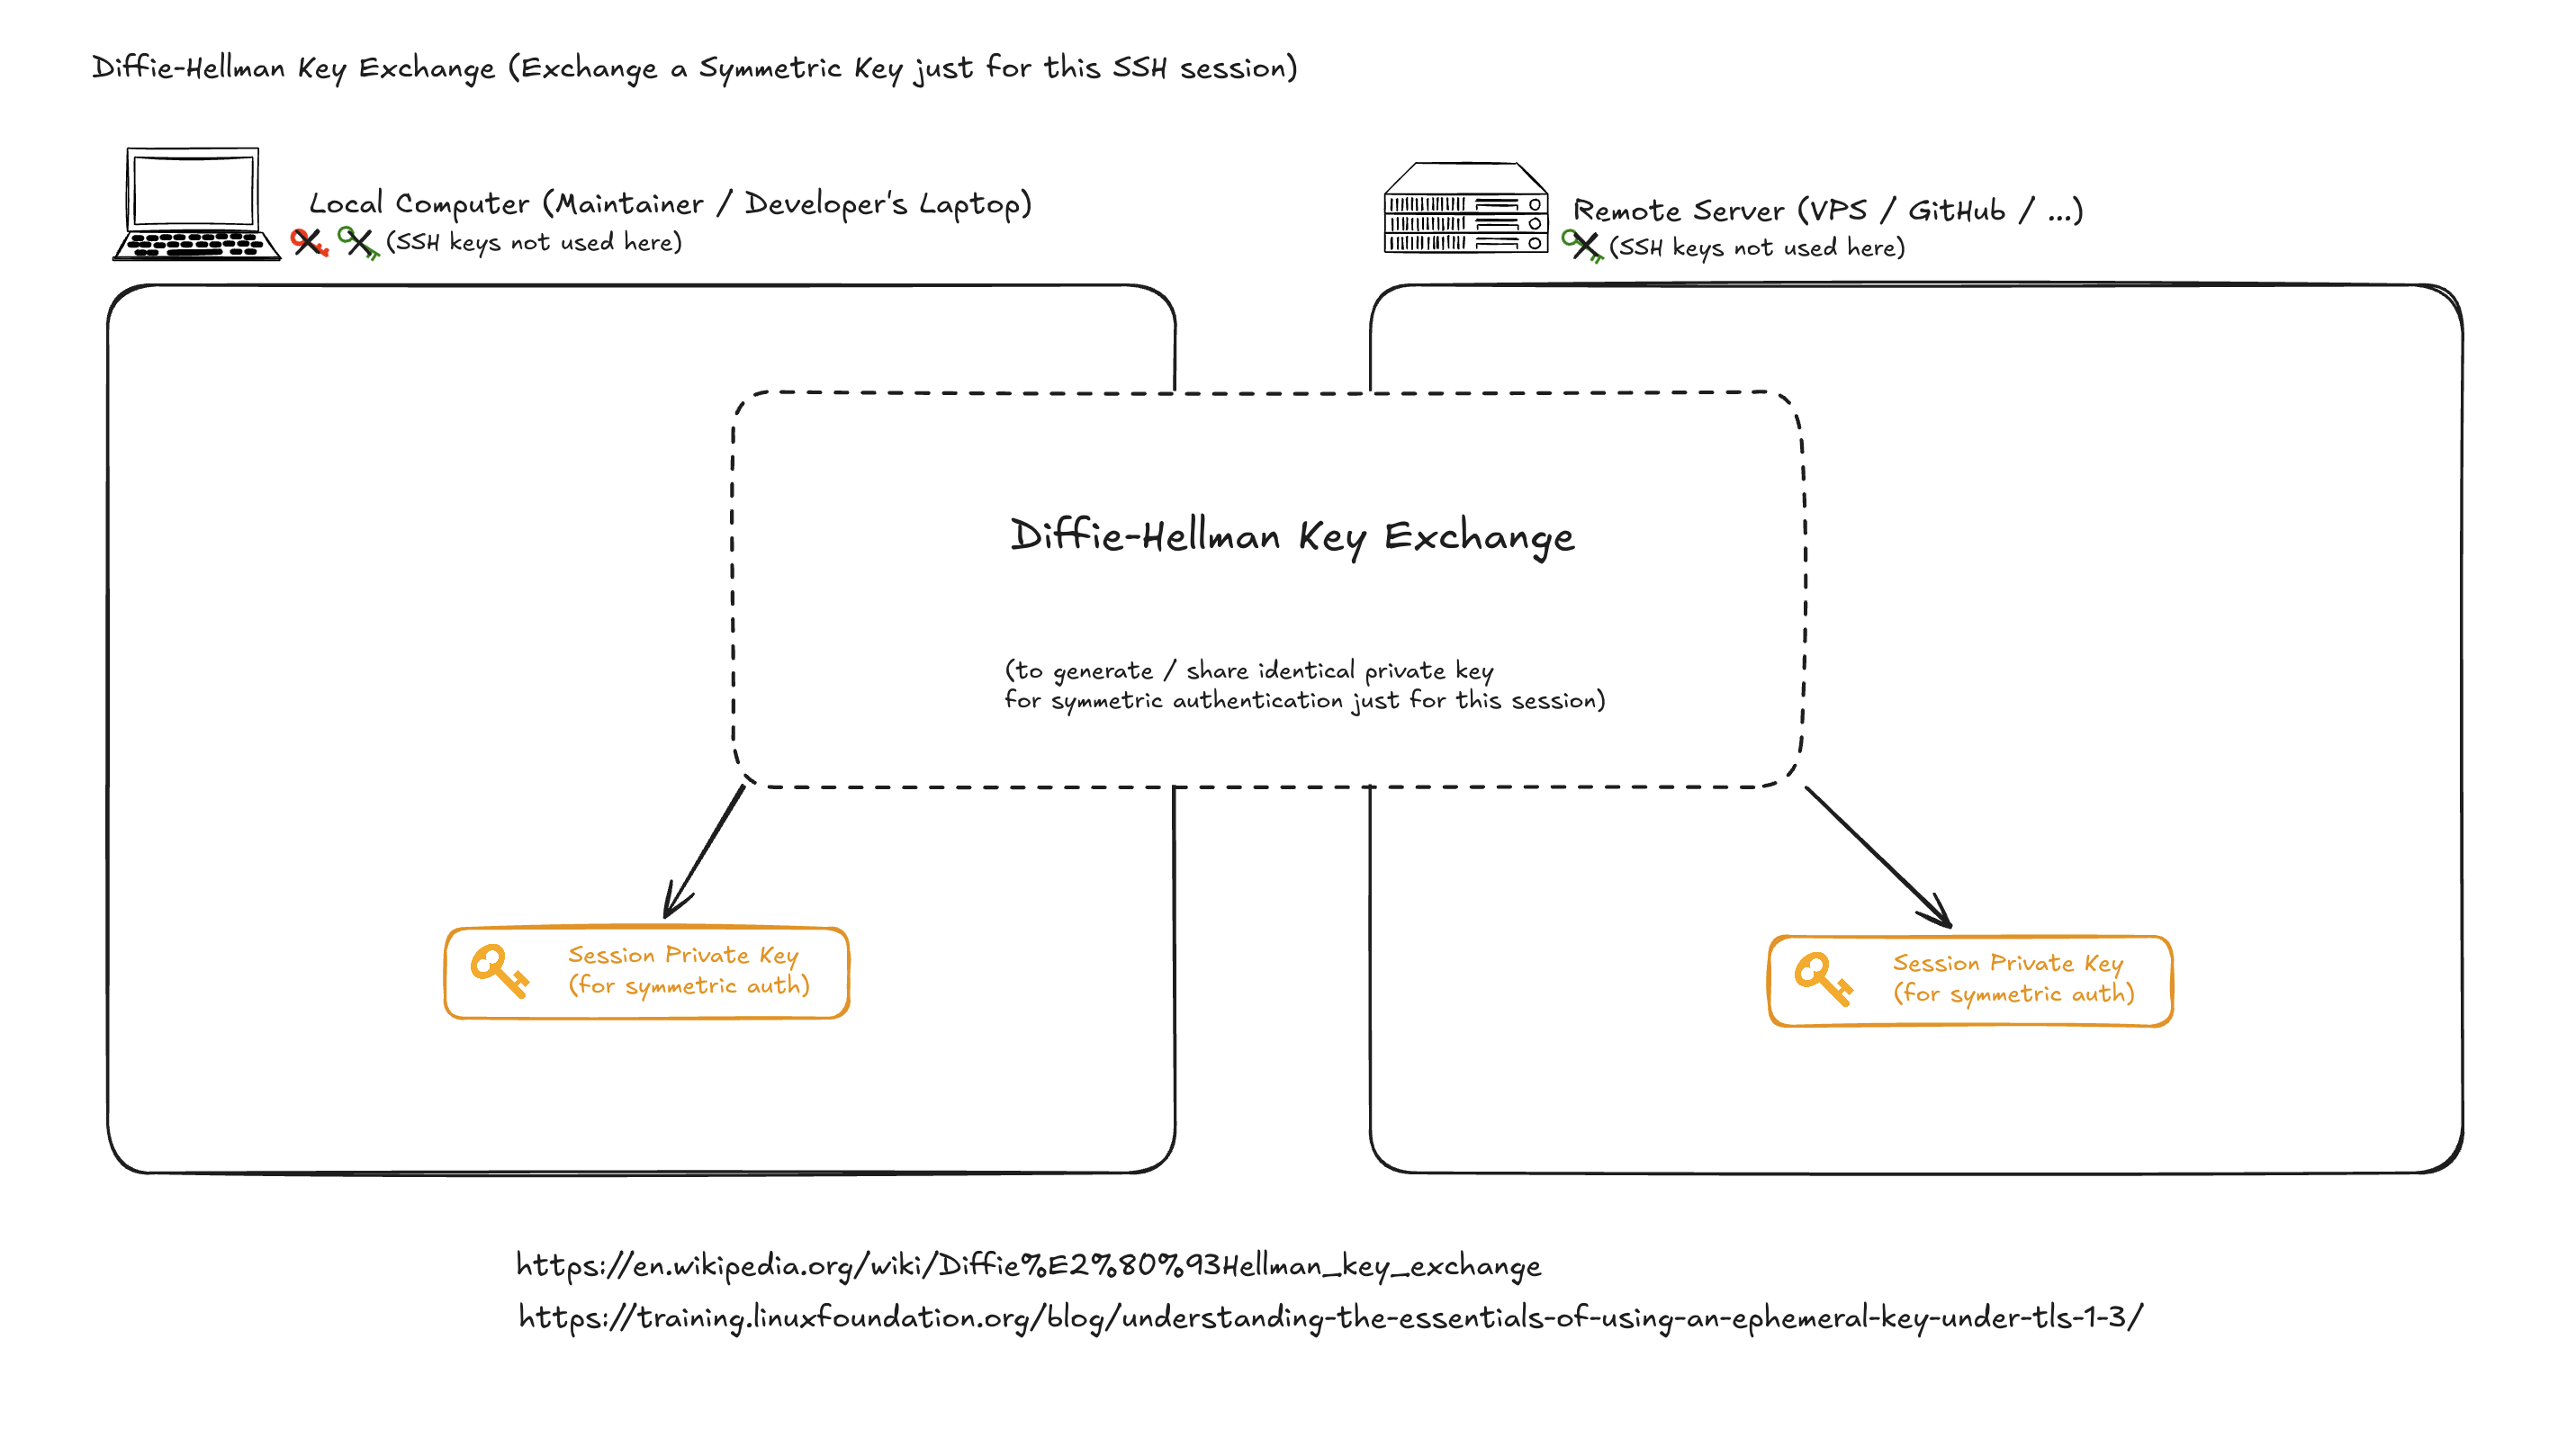
Step-3: Session Key Exchange
(Generate & Exchange New Private Keys that will used only for the session)
This process generate symmetric private key for future, and does involves SSH Keys that was generated in Step-1. I uses the process so called “Diffie-Hellman key exchange” to achieve it. I acknowledge that myself couldn’t explain this very well, so please following blog post for this part of the content:
Here for continuity illustration, I have abstracted it into a dotted box:
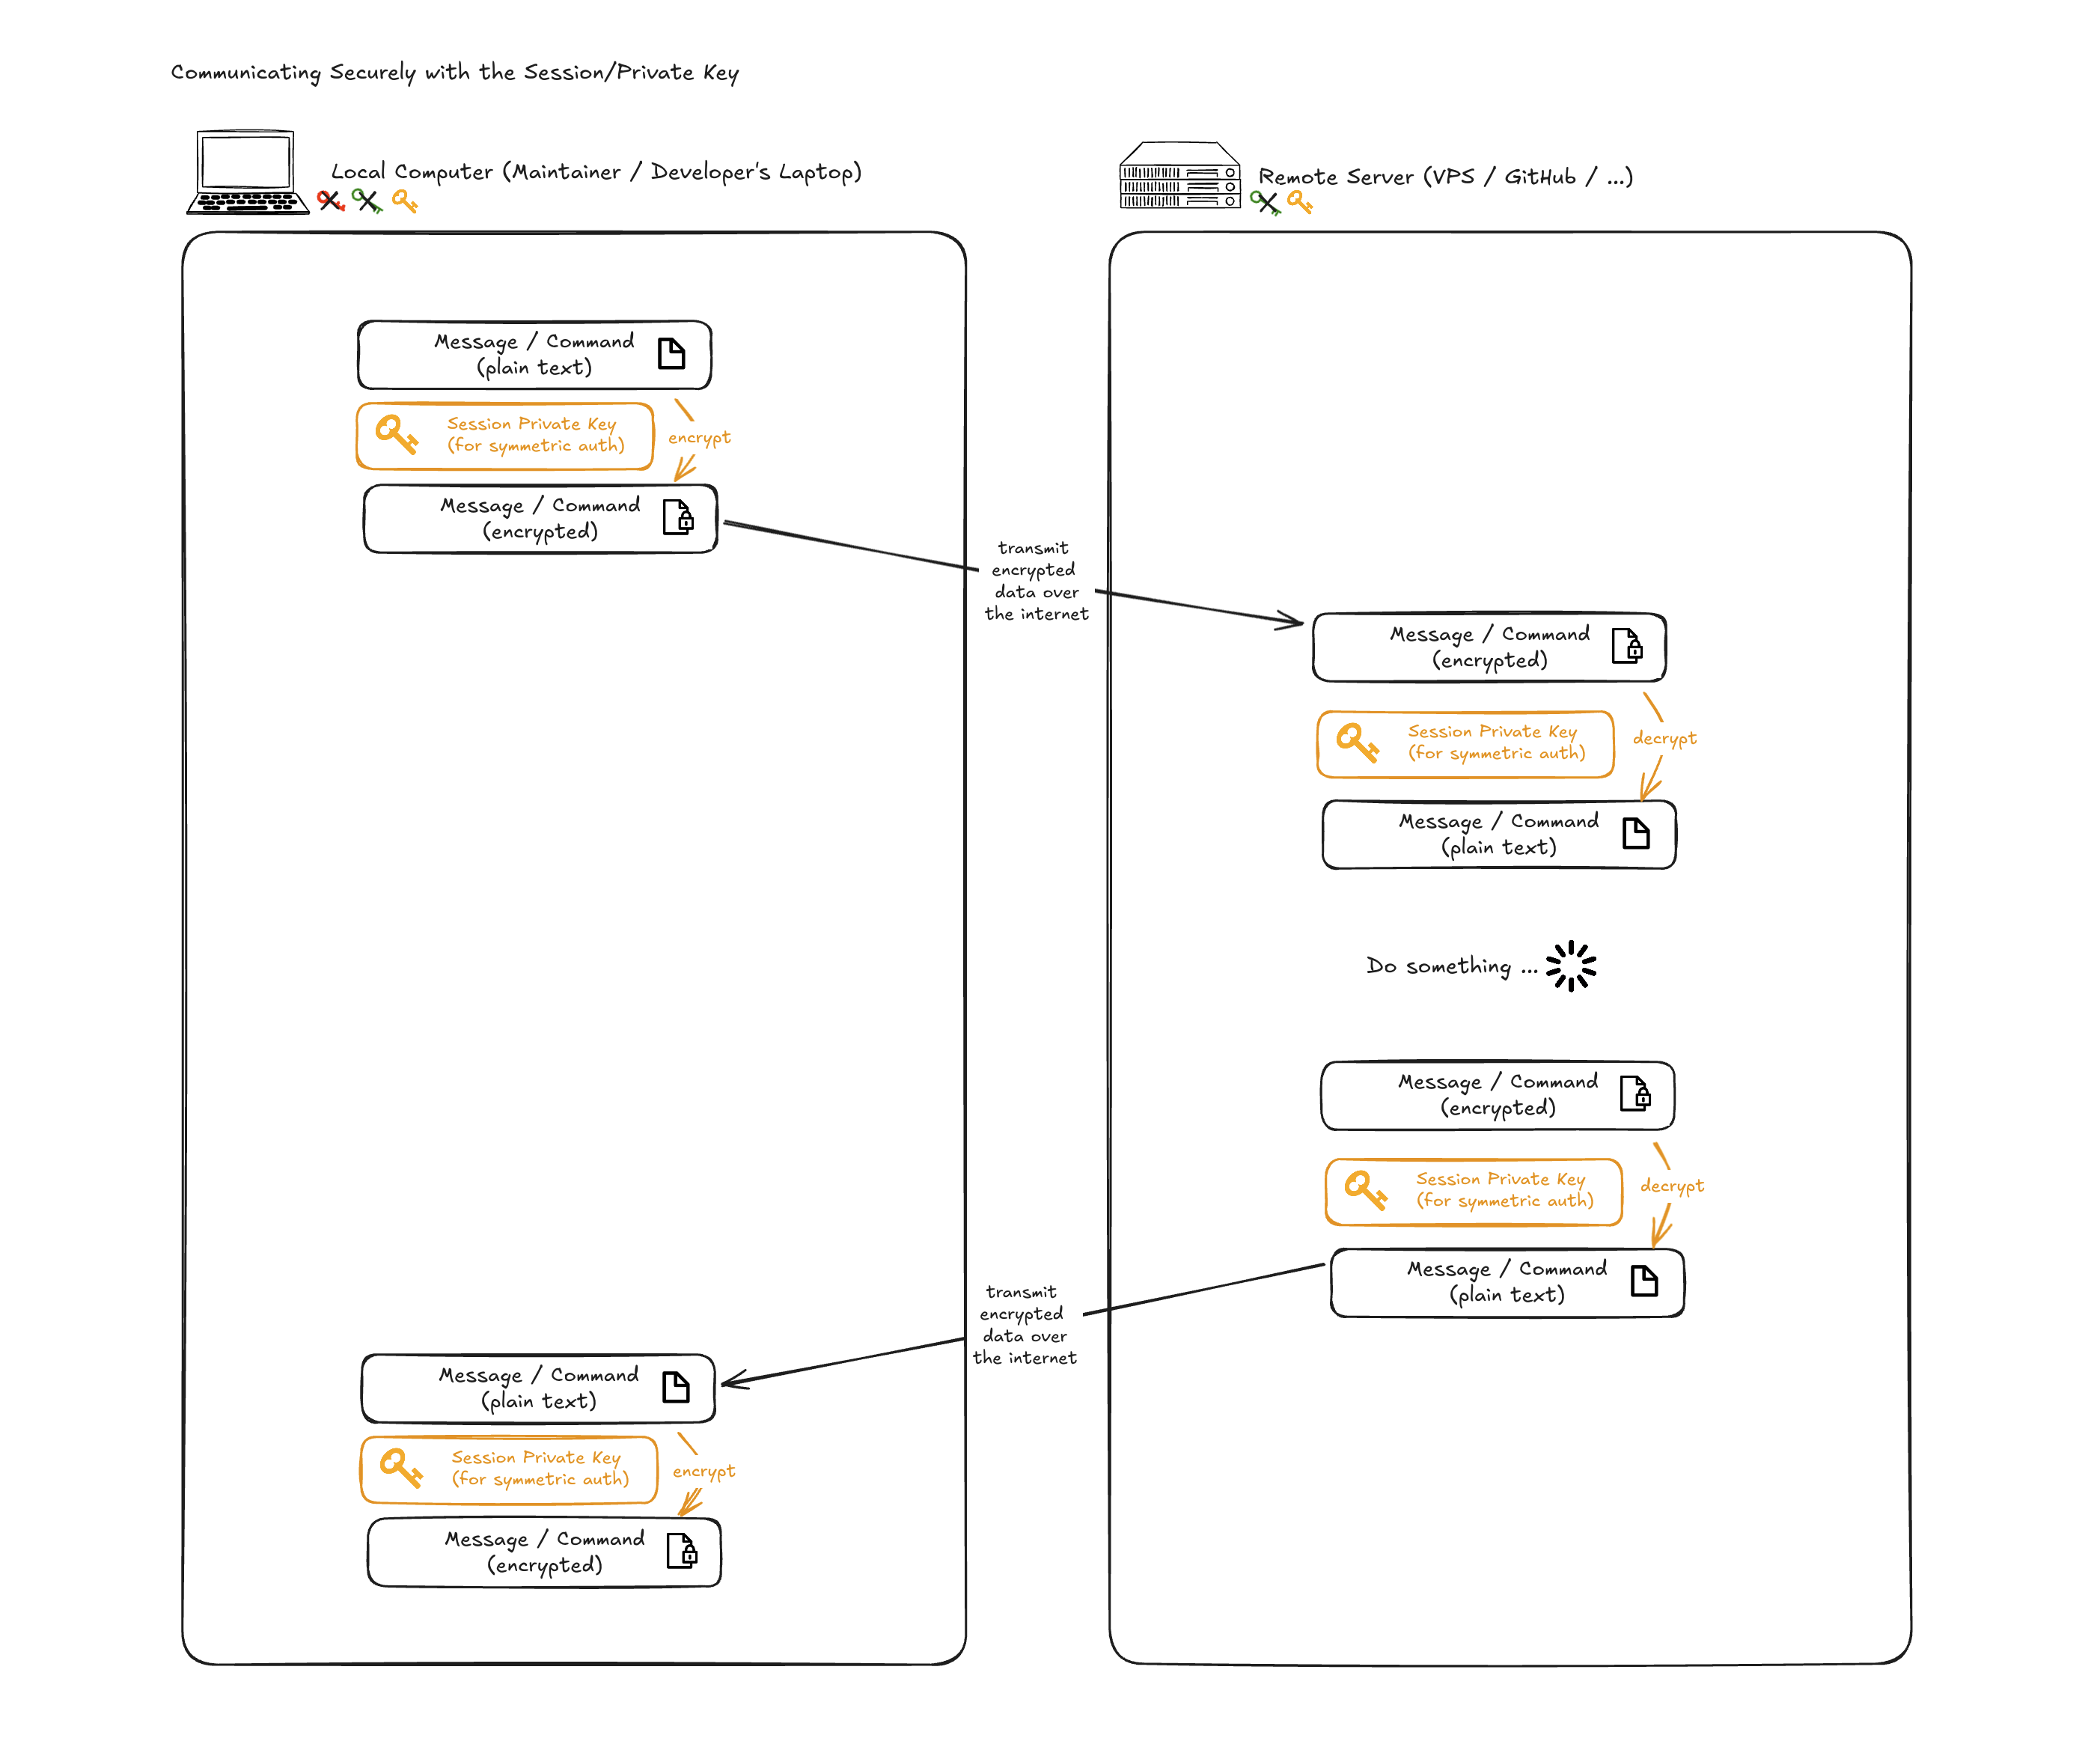
Step-4: Communicate Securely
(Secure Connection using Generate Private Key for the Session Only)
Finally the client and the host can both use the session private key that was generated and exchanged in the step-3, to encrypt the data before sending over the internet, and decrypt the encrypted data that was sent by the other entity.
Reference
YouTube
Blog Post
Diffie-Hellman key exchange
My Read-Only Excalidraw White Board (link)