(Optional) Generate SSH Key#
If you do not have SSH (Public+Private) key pair, you can generate it via the following command:
1
2
3
4
| ssh-keygen -t rsa -f ~/.ssh/id_rsa_cpanel
# this will generate
# - private key located at: ~/.ssh/id_rsa_cpanel
# - public key located at: ~/.ssh/id_rsa_cpanel.pub
|
Alternatively if you happen to already have a private key, but does not have a public key in hand, you can generate the public key based on the private key:
1
2
3
| ssh-keygen -f ~/.ssh_id_rsa_cpanel -y > ~/.ssh/id_rsa_cpanel.pub
# this will generate
# - public key located at: ~/.ssh/id_rsa_cpanel.pub
|
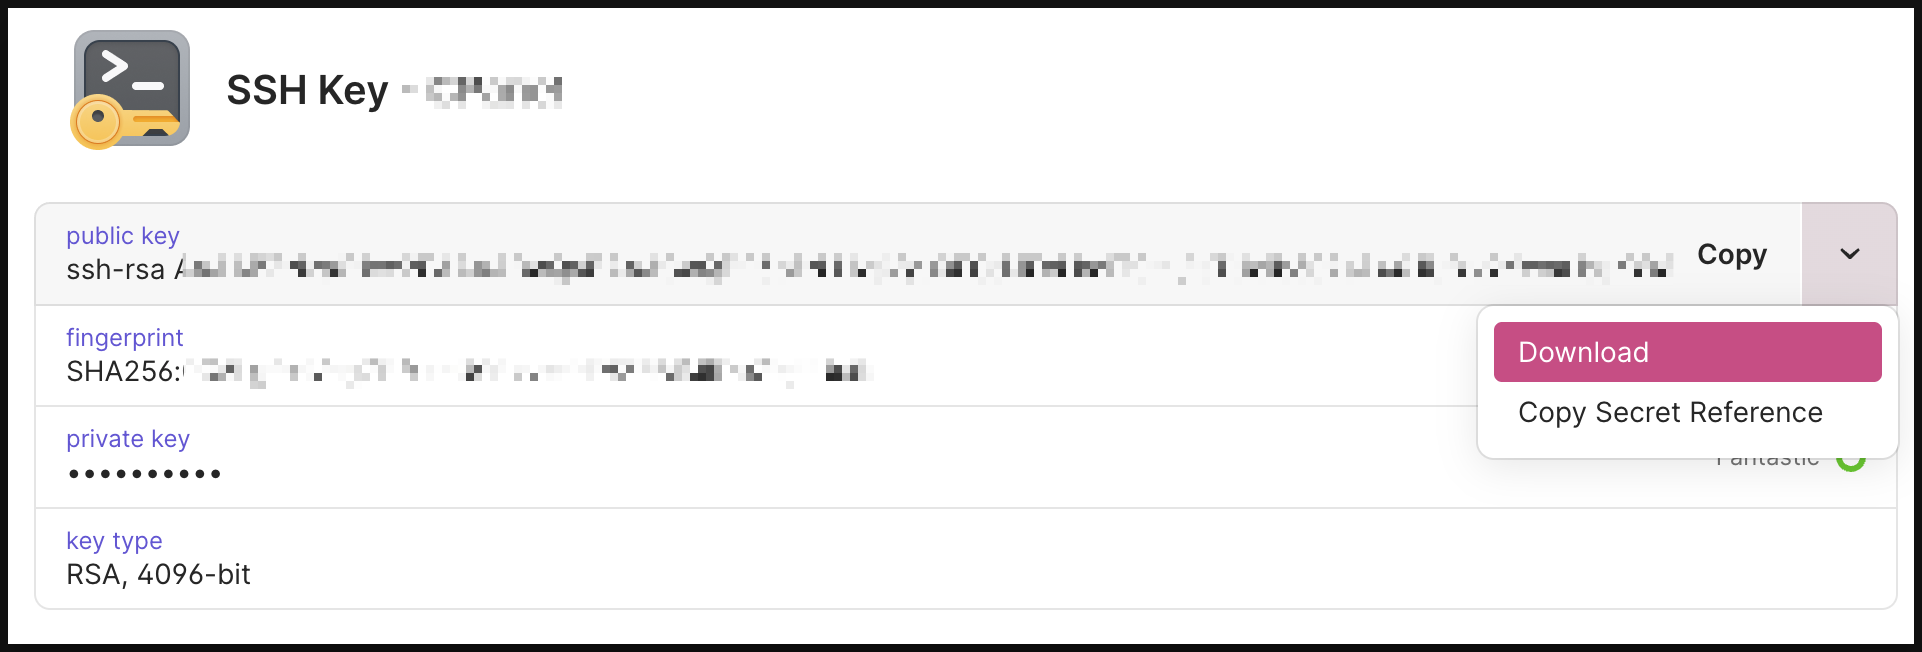
(If you happen to already have public/private key stored in 1Password, then you can download the private key via hovering the down chevron and click on “Download”, (naming doesn’t really matter):
Install SSH Public Key to Server#
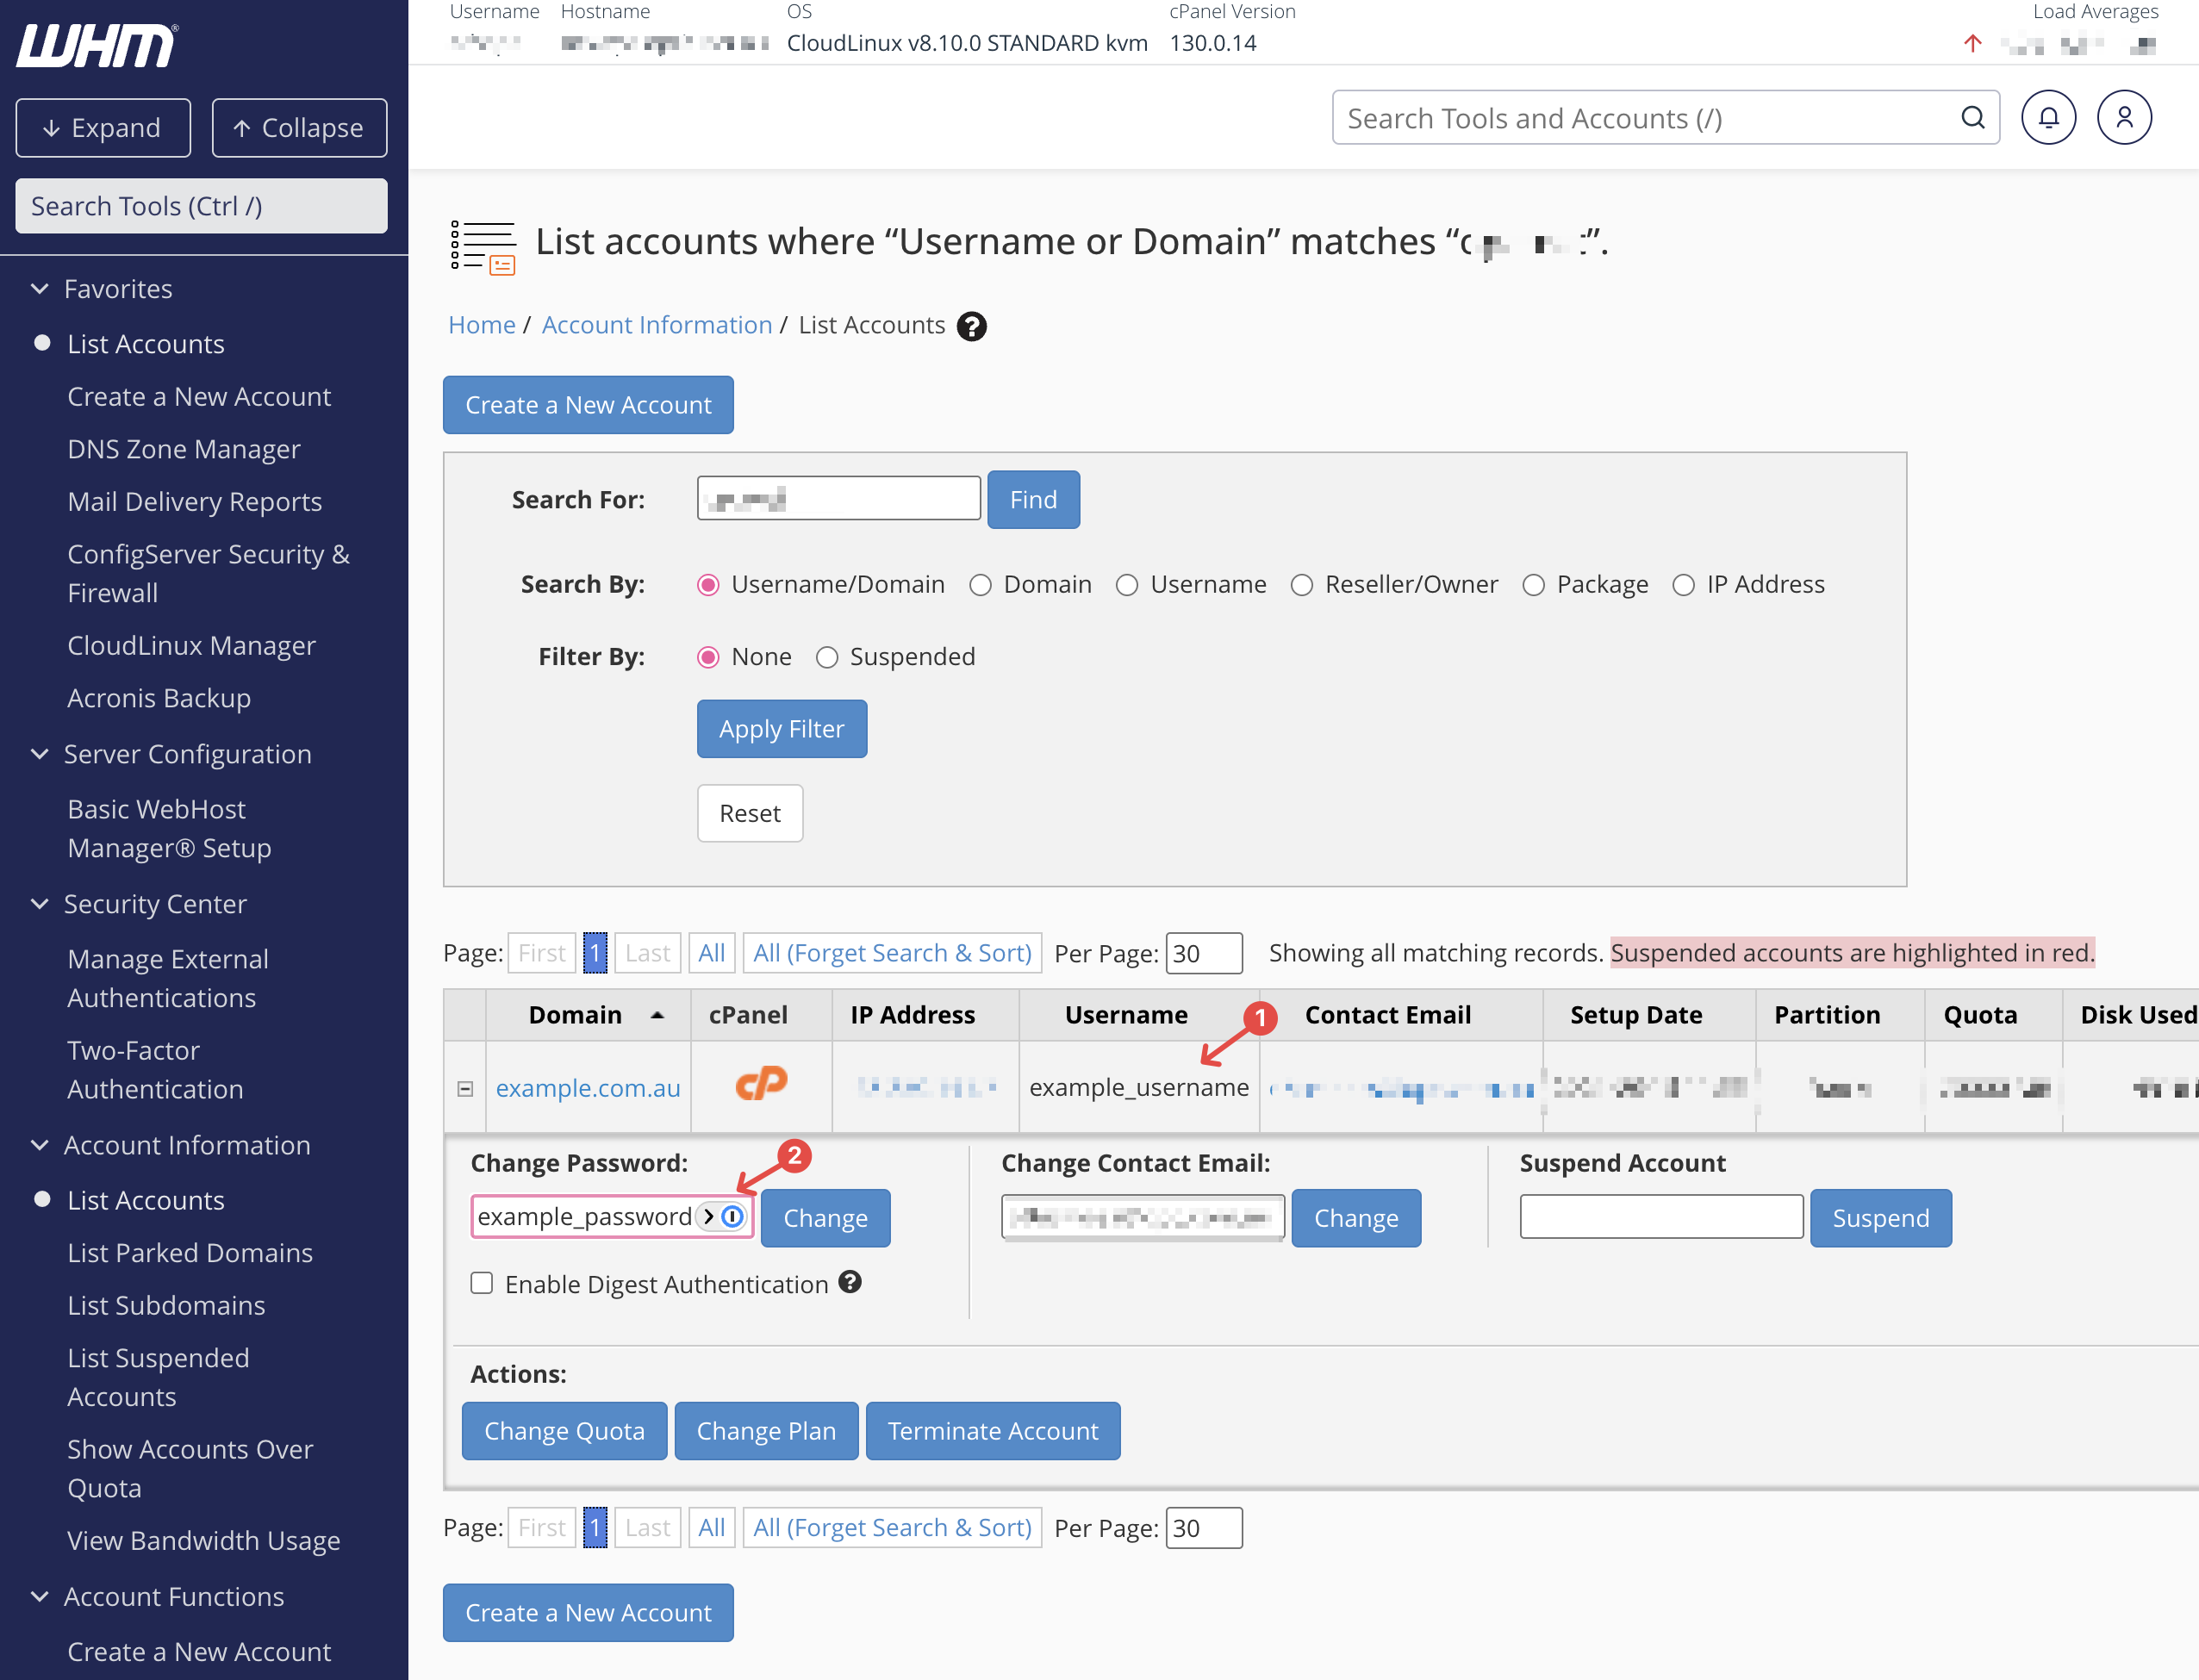
Before you proceed with the next command, you will need to know username & password, if you happen to be using WHM/CPanel, this can be found in the “List Account” page, you can override/reset the password if you forgot the existing one:
Then run the following ssh-copy-id command will install your nominated public SSH key onto the remote server, in our case it is a CPanel server:
 1
 2
 3
 4
 5
 6
 7
 8
 9
10
11
12
13
| # Copy your SSH public key to the remote server so you can log in without a password
ssh-copy-id \
-p 2222 \ # Use port 2222 instead of the default port 22
-i ~/.ssh/id_rsa_cpanel.pub \ # Specify the path to your public key
example_user@example.com.au # Remote username and host
> /usr/bin/ssh-copy-id: INFO: attempting to log in with the new key(s), to filter out any that are already installed
> Please Enter Password # You will be prompted to enter your password
> example_password # enter your CPanel password
> Number of key(s) added: 1
> Now try logging into the machine, with: "ssh -p 2222 'example_user@example.com.au'"
> and check to make sure that only the key(s) you wanted were added.
|
Connecting to SSH Session - Manual#
After running the ssh-copy-id to install the public key to host, you will be able to login the host (CPanel server) via SSH Key without then need of typing a password. This is known as key-based ssh authentication:
1
2
3
4
5
6
| ssh \
-p 2222 \ # Use port 2222 instead of the default port 22
-i /.ssh/id_rsa_cpanel \ # Specify the path to your private key
example_user@example.com.au # Remote username and host
example_user@bash-4.4$
|
Connecting to SSH Session - Automatic#
If you do not want to enter the username, port-number, specify the private key every time, you can define a host alias and configure its setting in ~/.ssh/config file:
1
2
3
4
5
6
7
| # Shortcut configuration for opctest server
Host example.com.au
HostName example.com.au # The real domain or IP of the remote server
Port 2222 # Custom SSH port
User example_user # Remote username
IdentityFile ~/.ssh/id_rsa_cpanel # Path to your private key
IdentitiesOnly yes # Ensures only this key is used for aut
|
Then the connection command can be much simpler:
1
2
| ssh example.com.au
example_user@bash-4.4$
|
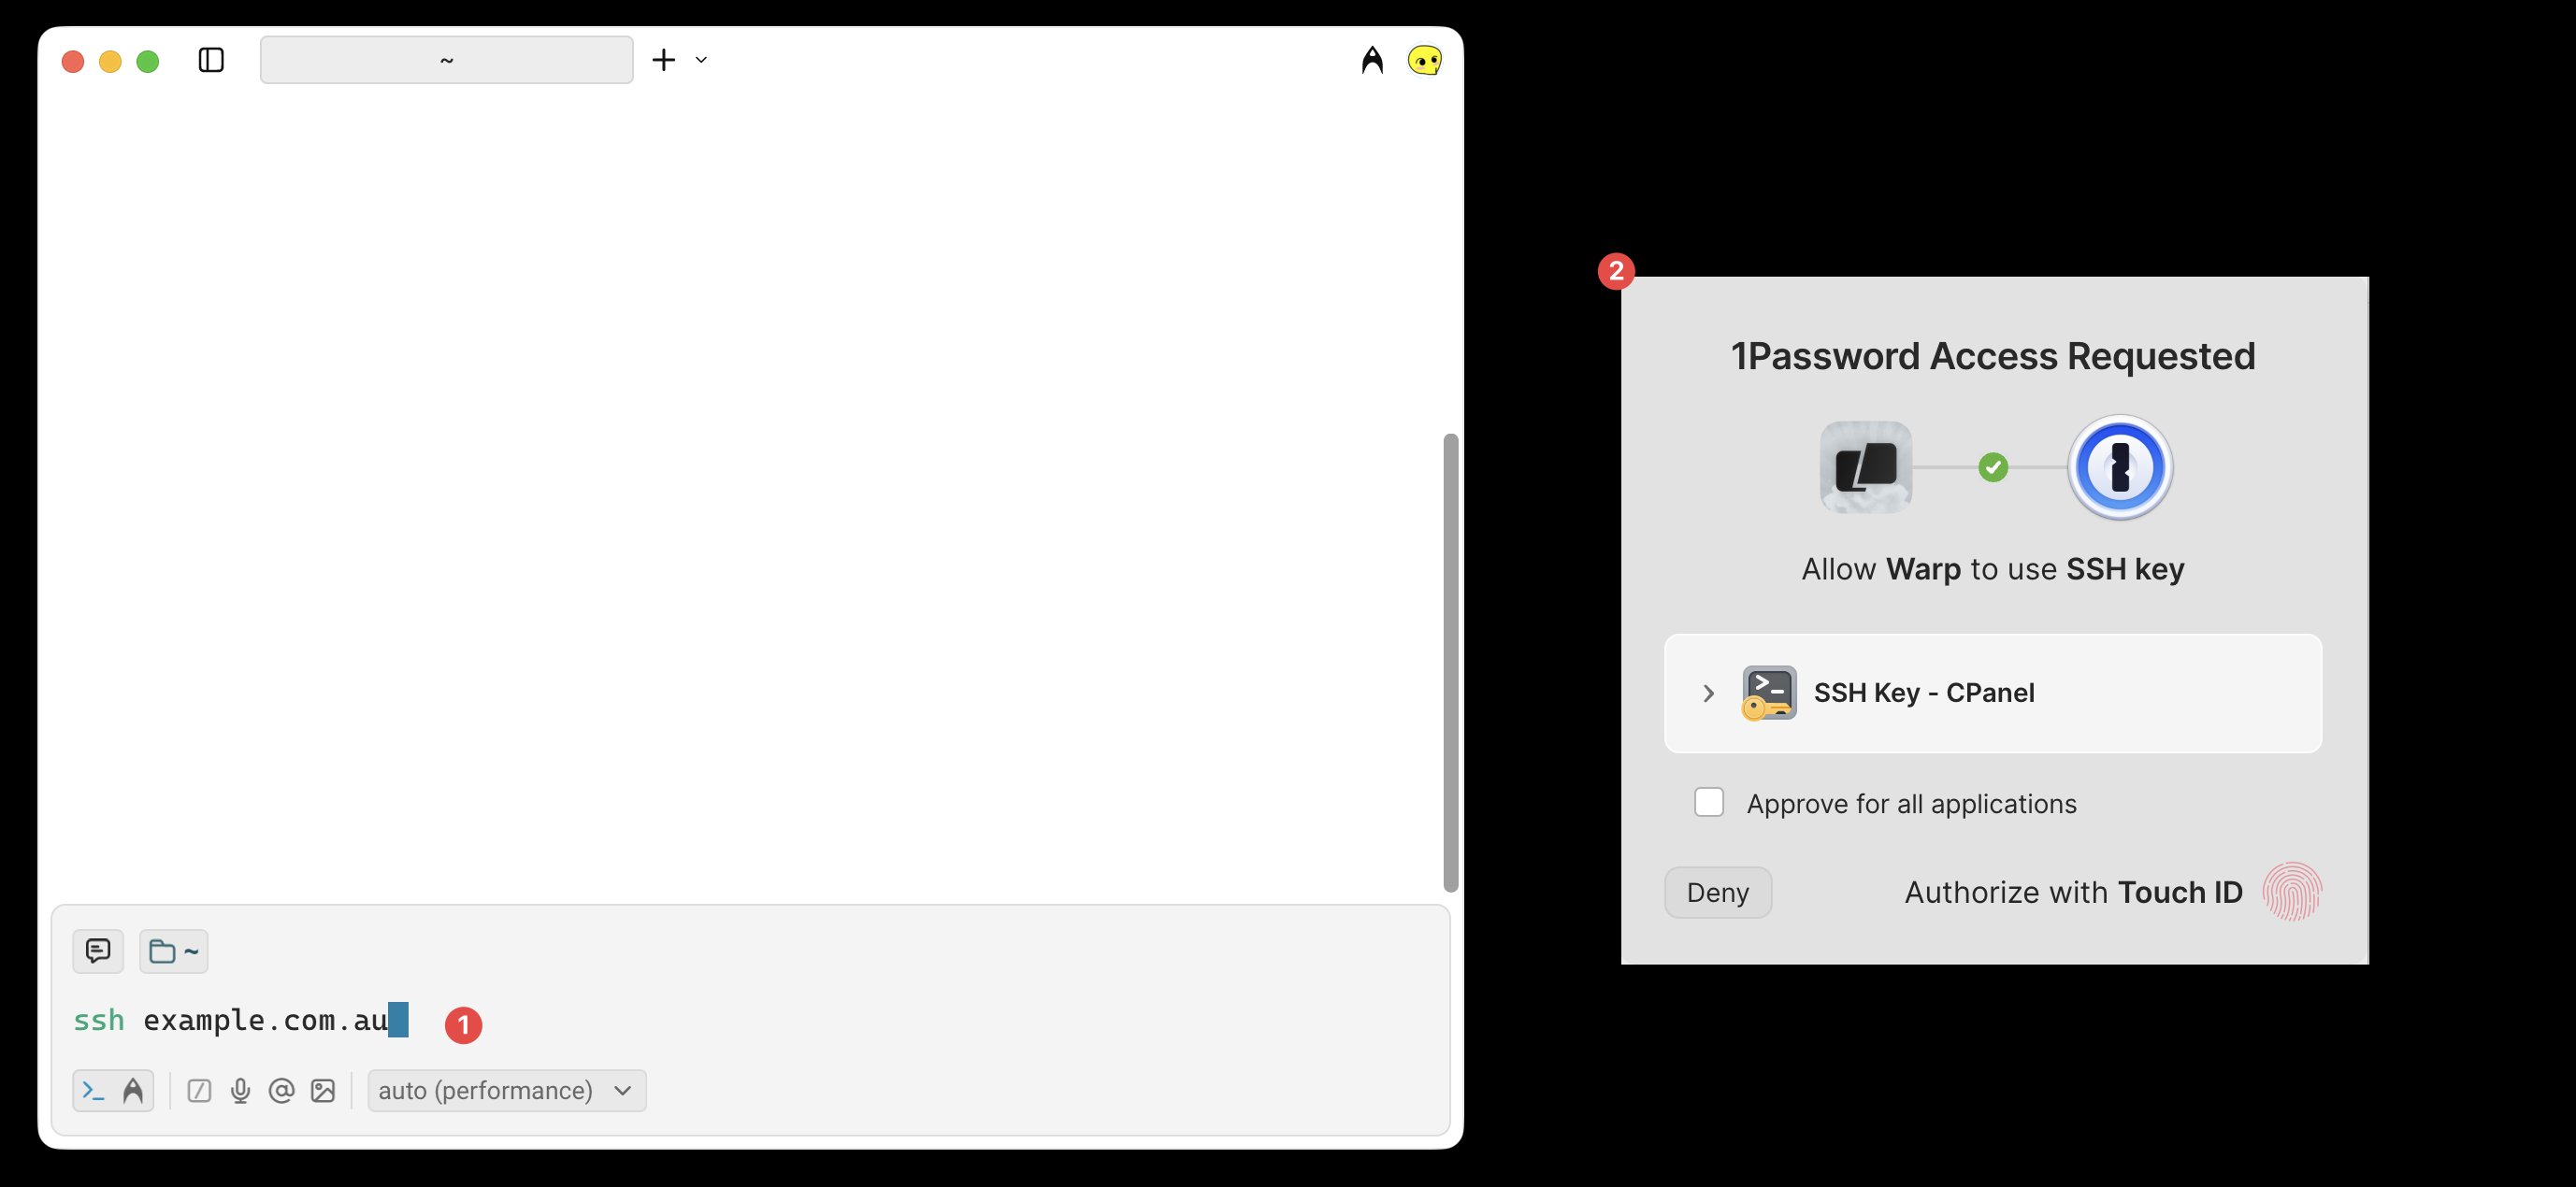
Connecting to SSH Session - via 1Password SSH Agent#
For those user using 1Password to store the SSH public/private key, after proper configuration outlined at “1Password SSH agent”. The agent will be available to automatically fill-in the private key when you starts SSH session.
- Declare SSH Key in
/.config/1Password/ssh/agent.toml file:
1
2
3
| [[ssh-keys]]
item = "SSH Key - CPanel example.com.au" # Item name (OR USE item UUID if you want to have the freedom of changing name in the future)
vault = "Personal" # Vault name (e.g. General, Private, Public, Company)
|
- Alter
~/.ssh/config file to use 1Password SSH Agent:
1
2
3
4
5
| Host example.com.au
HostName example.com.au
Port 2222
User example_user
IdentityAgent "~/Library/Group Containers/2BUA8C4S2C.com.1password/t/agent.sock"
|
1
2
3
4
| # Host *
# IdentityAgent "~/Library/Group Containers/2BUA8C4S2C.com.1password/t/agent.sock"
# ↑
# [(AND/OR) add this line if you want 1password ssh agent to take over all ssh connection]
|
- Retry connecting to the
example.com.au server via ssh again: you will now be prompted to unlock your 1Password (either via password or bio-identity depending on setting) to use SSH key for the key-based authentication:
Reference#