Overview / Flowchart
(* to my current understanding….)
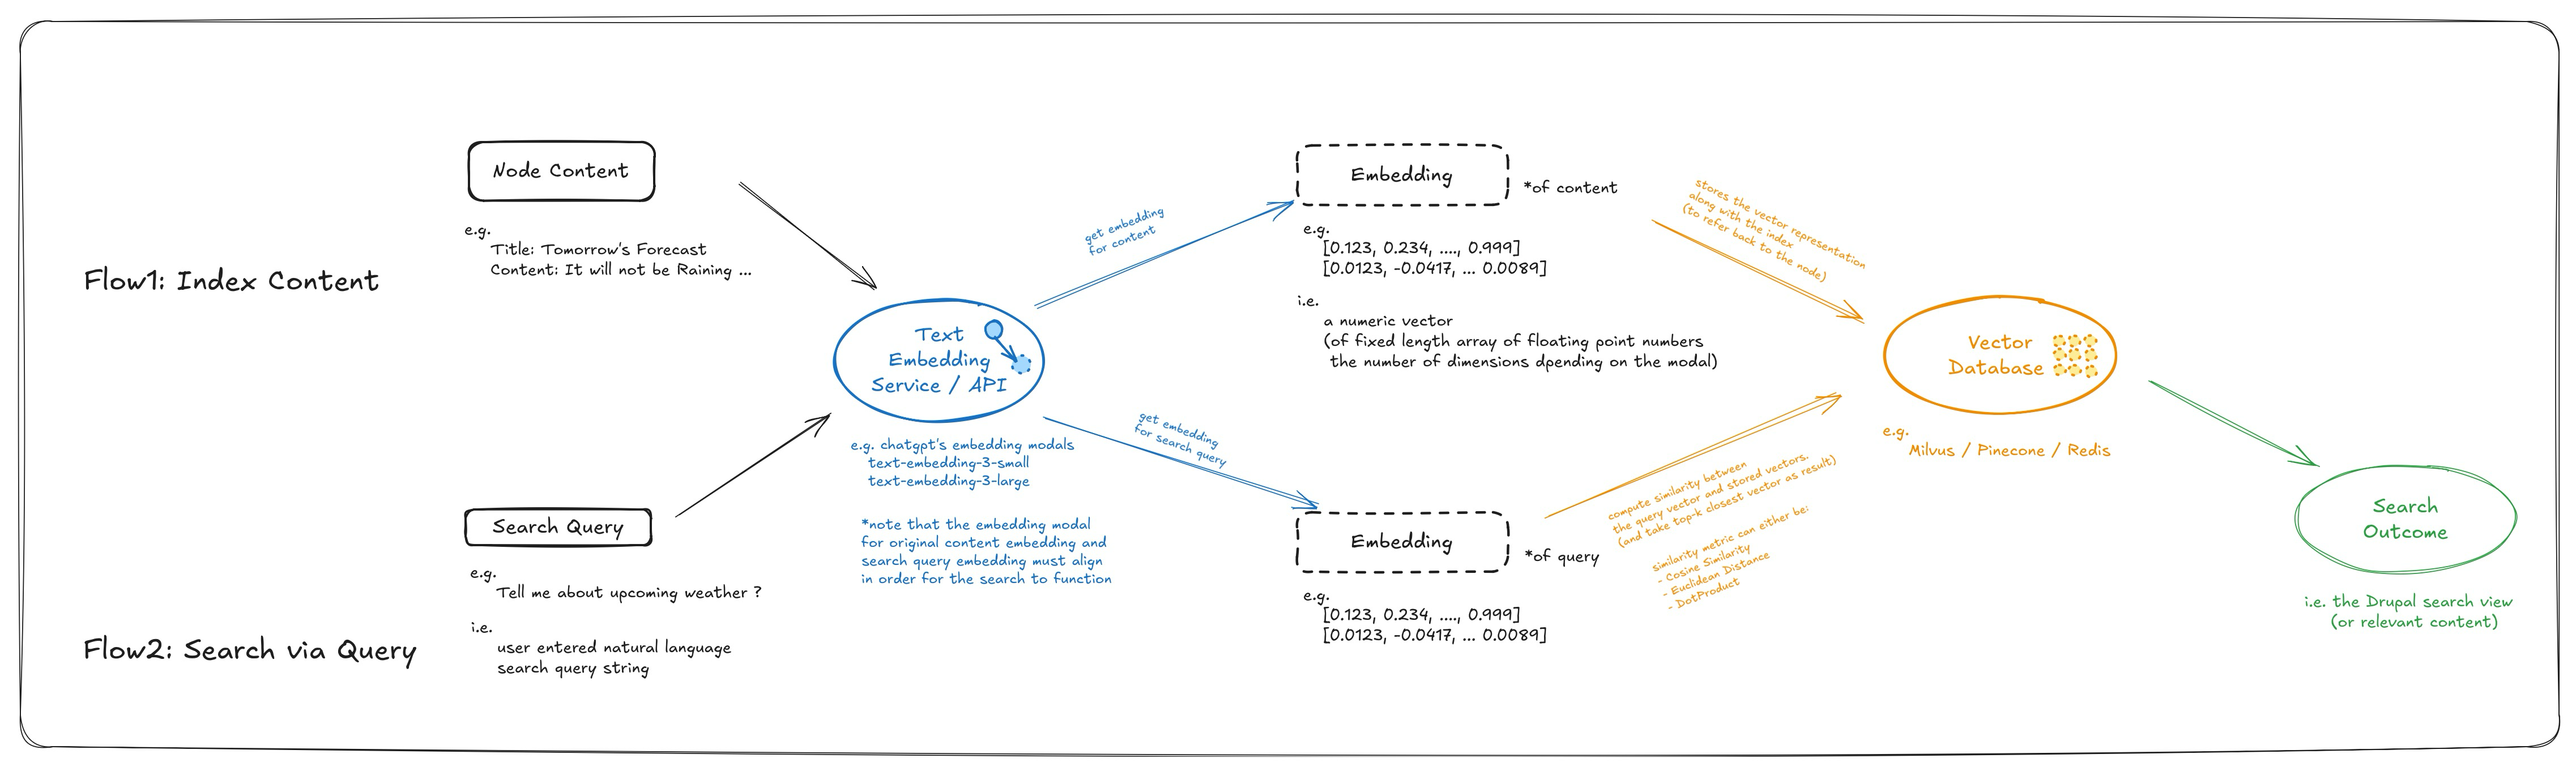
Flow1: Index Content (Text Embedding Generation and Storage): Content will be passed from “search api” to “ai search” module to be transformed into vector embedding. The transformation will be performed by text embedding modal (there’re usually service/api provided by LLM companies such as “text-embedding-3-small” provided by ChatGPT), these vector embeddings are stored into vector database for future usage.
Flow2: Search via Query (Compare Vector Similarity and Return Top-K Result): User will enter a search query from a “search view”, the entered query will be transformed into vector embedding using the same text embedding model used (earlier in the indexing process). The vector representation of the query will then be compared with the vectors in the vector database to compute to come up with the top-k most similar results (using algorithm such as: cosine similarity, euclidean distance, or dot product). The index of these top-k most similar results will be returned and Drupal search API will translate those to search outcomes.
Preview of the Outcome
Step-by-Step Guide
Step-1: Preliminary Setup
Install Drupal Modules
Install the following required modules:
- AI Core (drupal/ai)
- AI Search (drupal/ai_search)
- OpenAI Provider (drupal/ai_provider_openai) … or other AI provider
- Pinecone Serverless VDB Provider (drupal/ai_vdb_provider_pinecone) … or other VDB Provider
Configure Pinecone and OpenAPI
Add the OpenAI/ChatGPT API key (for text embedding service) and Pinecone API key (for access to the Pinecone Vector Database) at “/admin/config/system/keys”, refer to these posts to find your API keys:

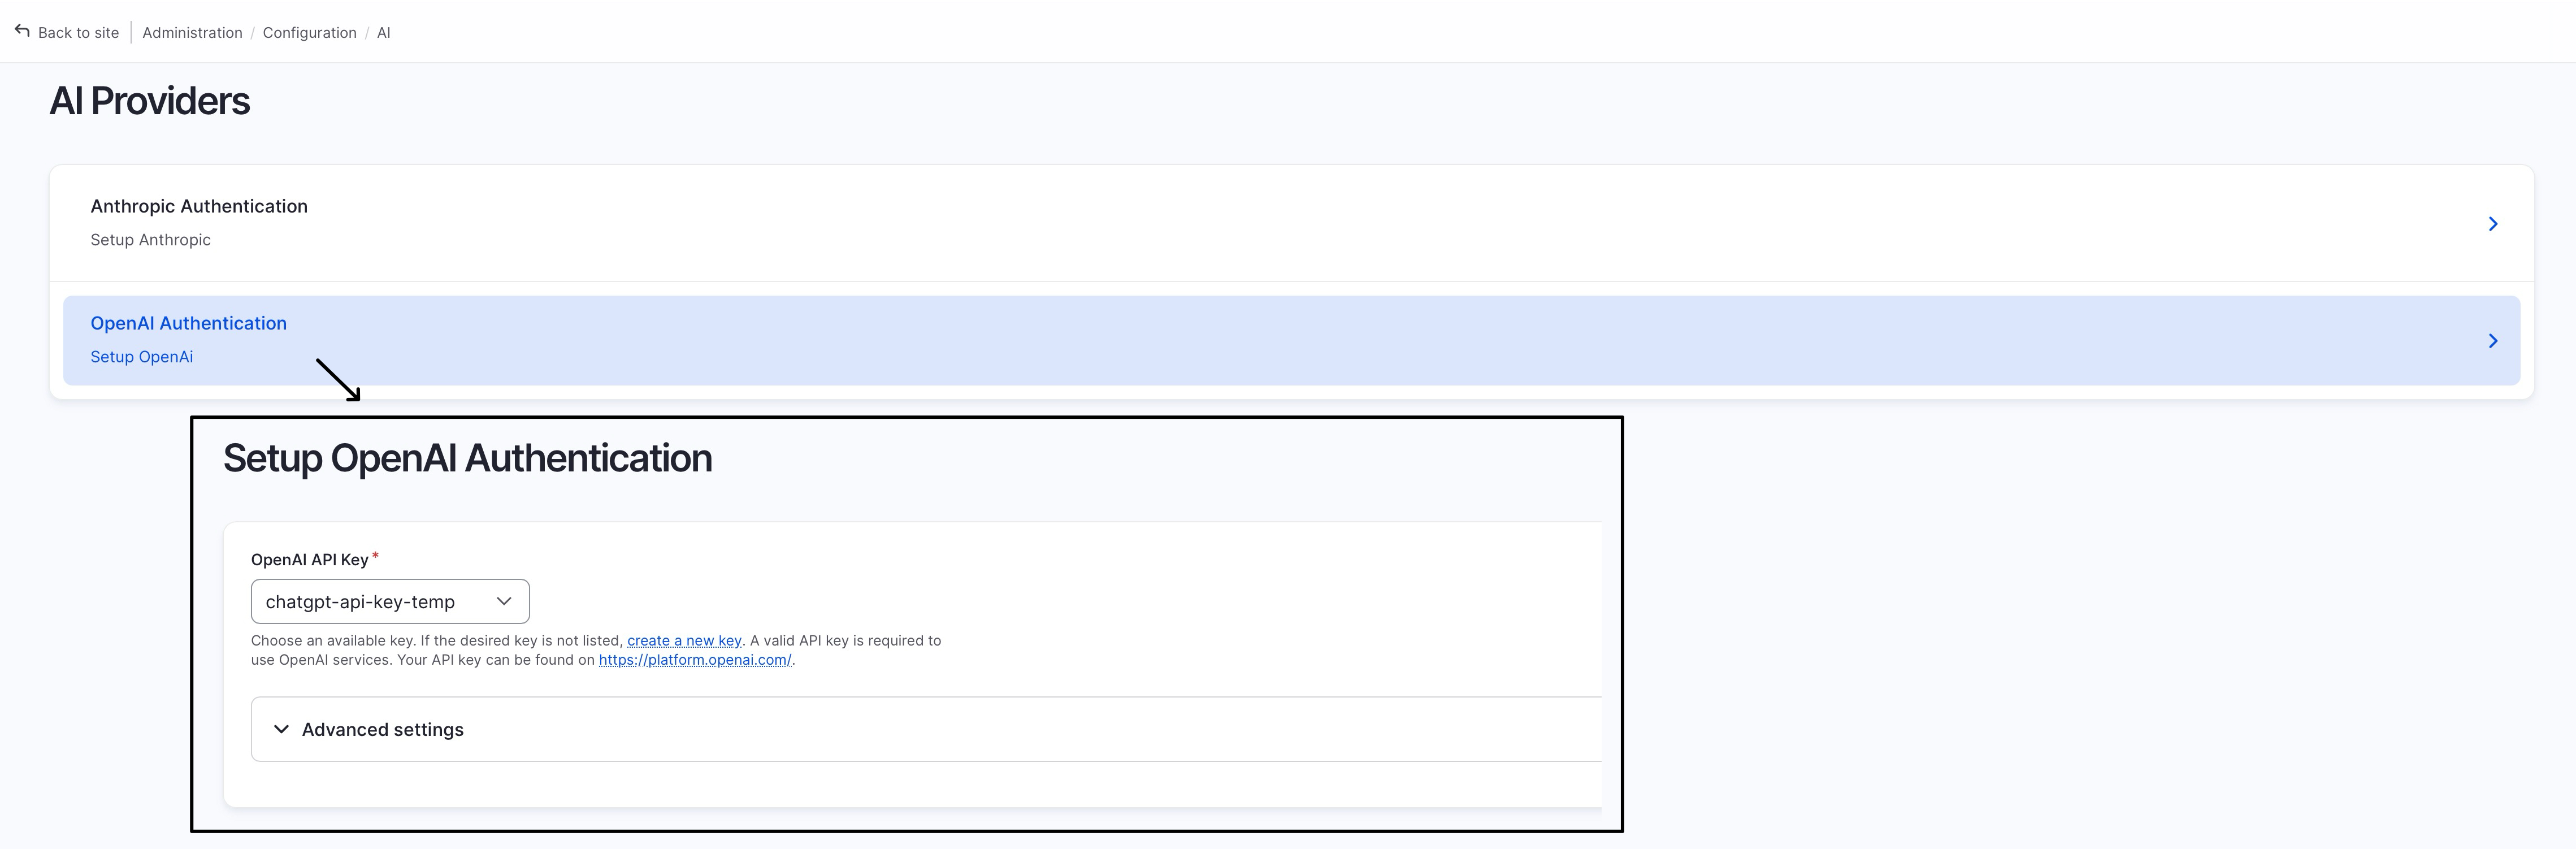
Configure “AI Provider > OpenAI Authentication (/admin/config/ai/providers/openai)”:
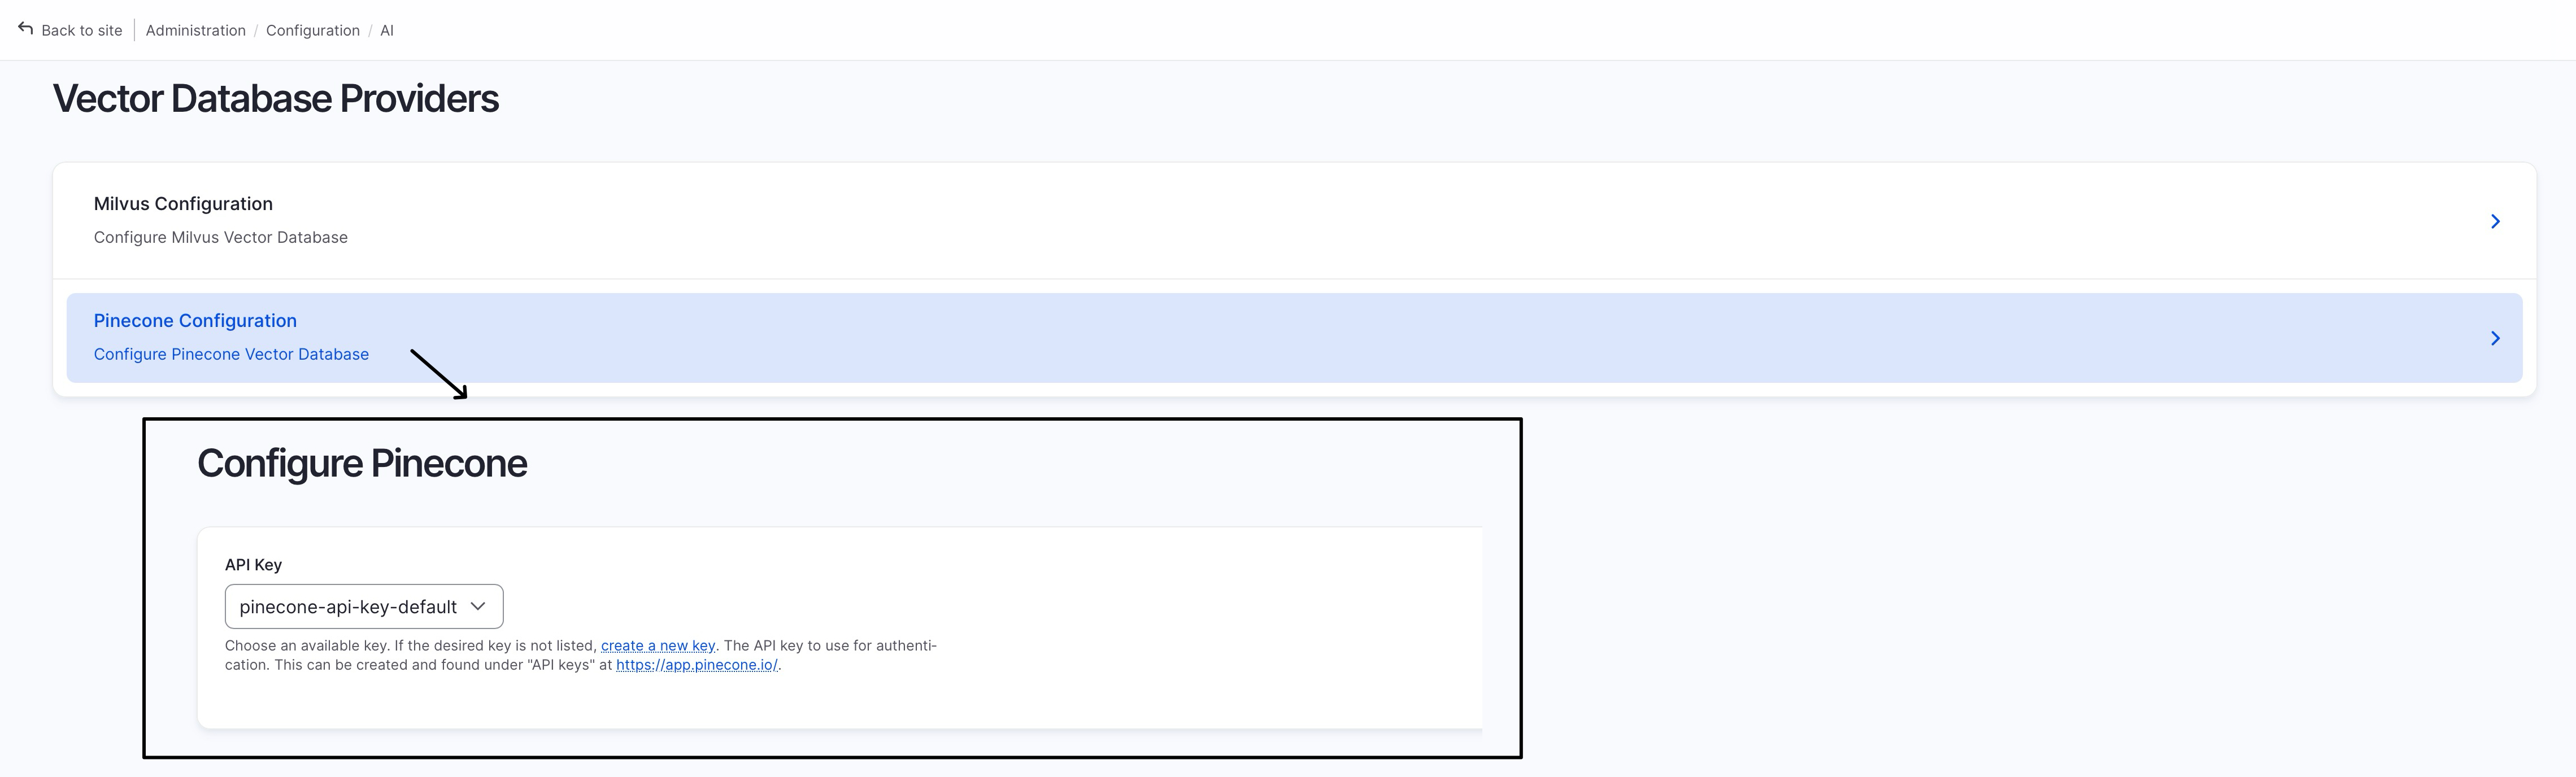
Configure “Vector Database Providers > Pinecone (/admin/config/ai/vdb_providers/pinecone)”:
Step-2: Search Server and Index
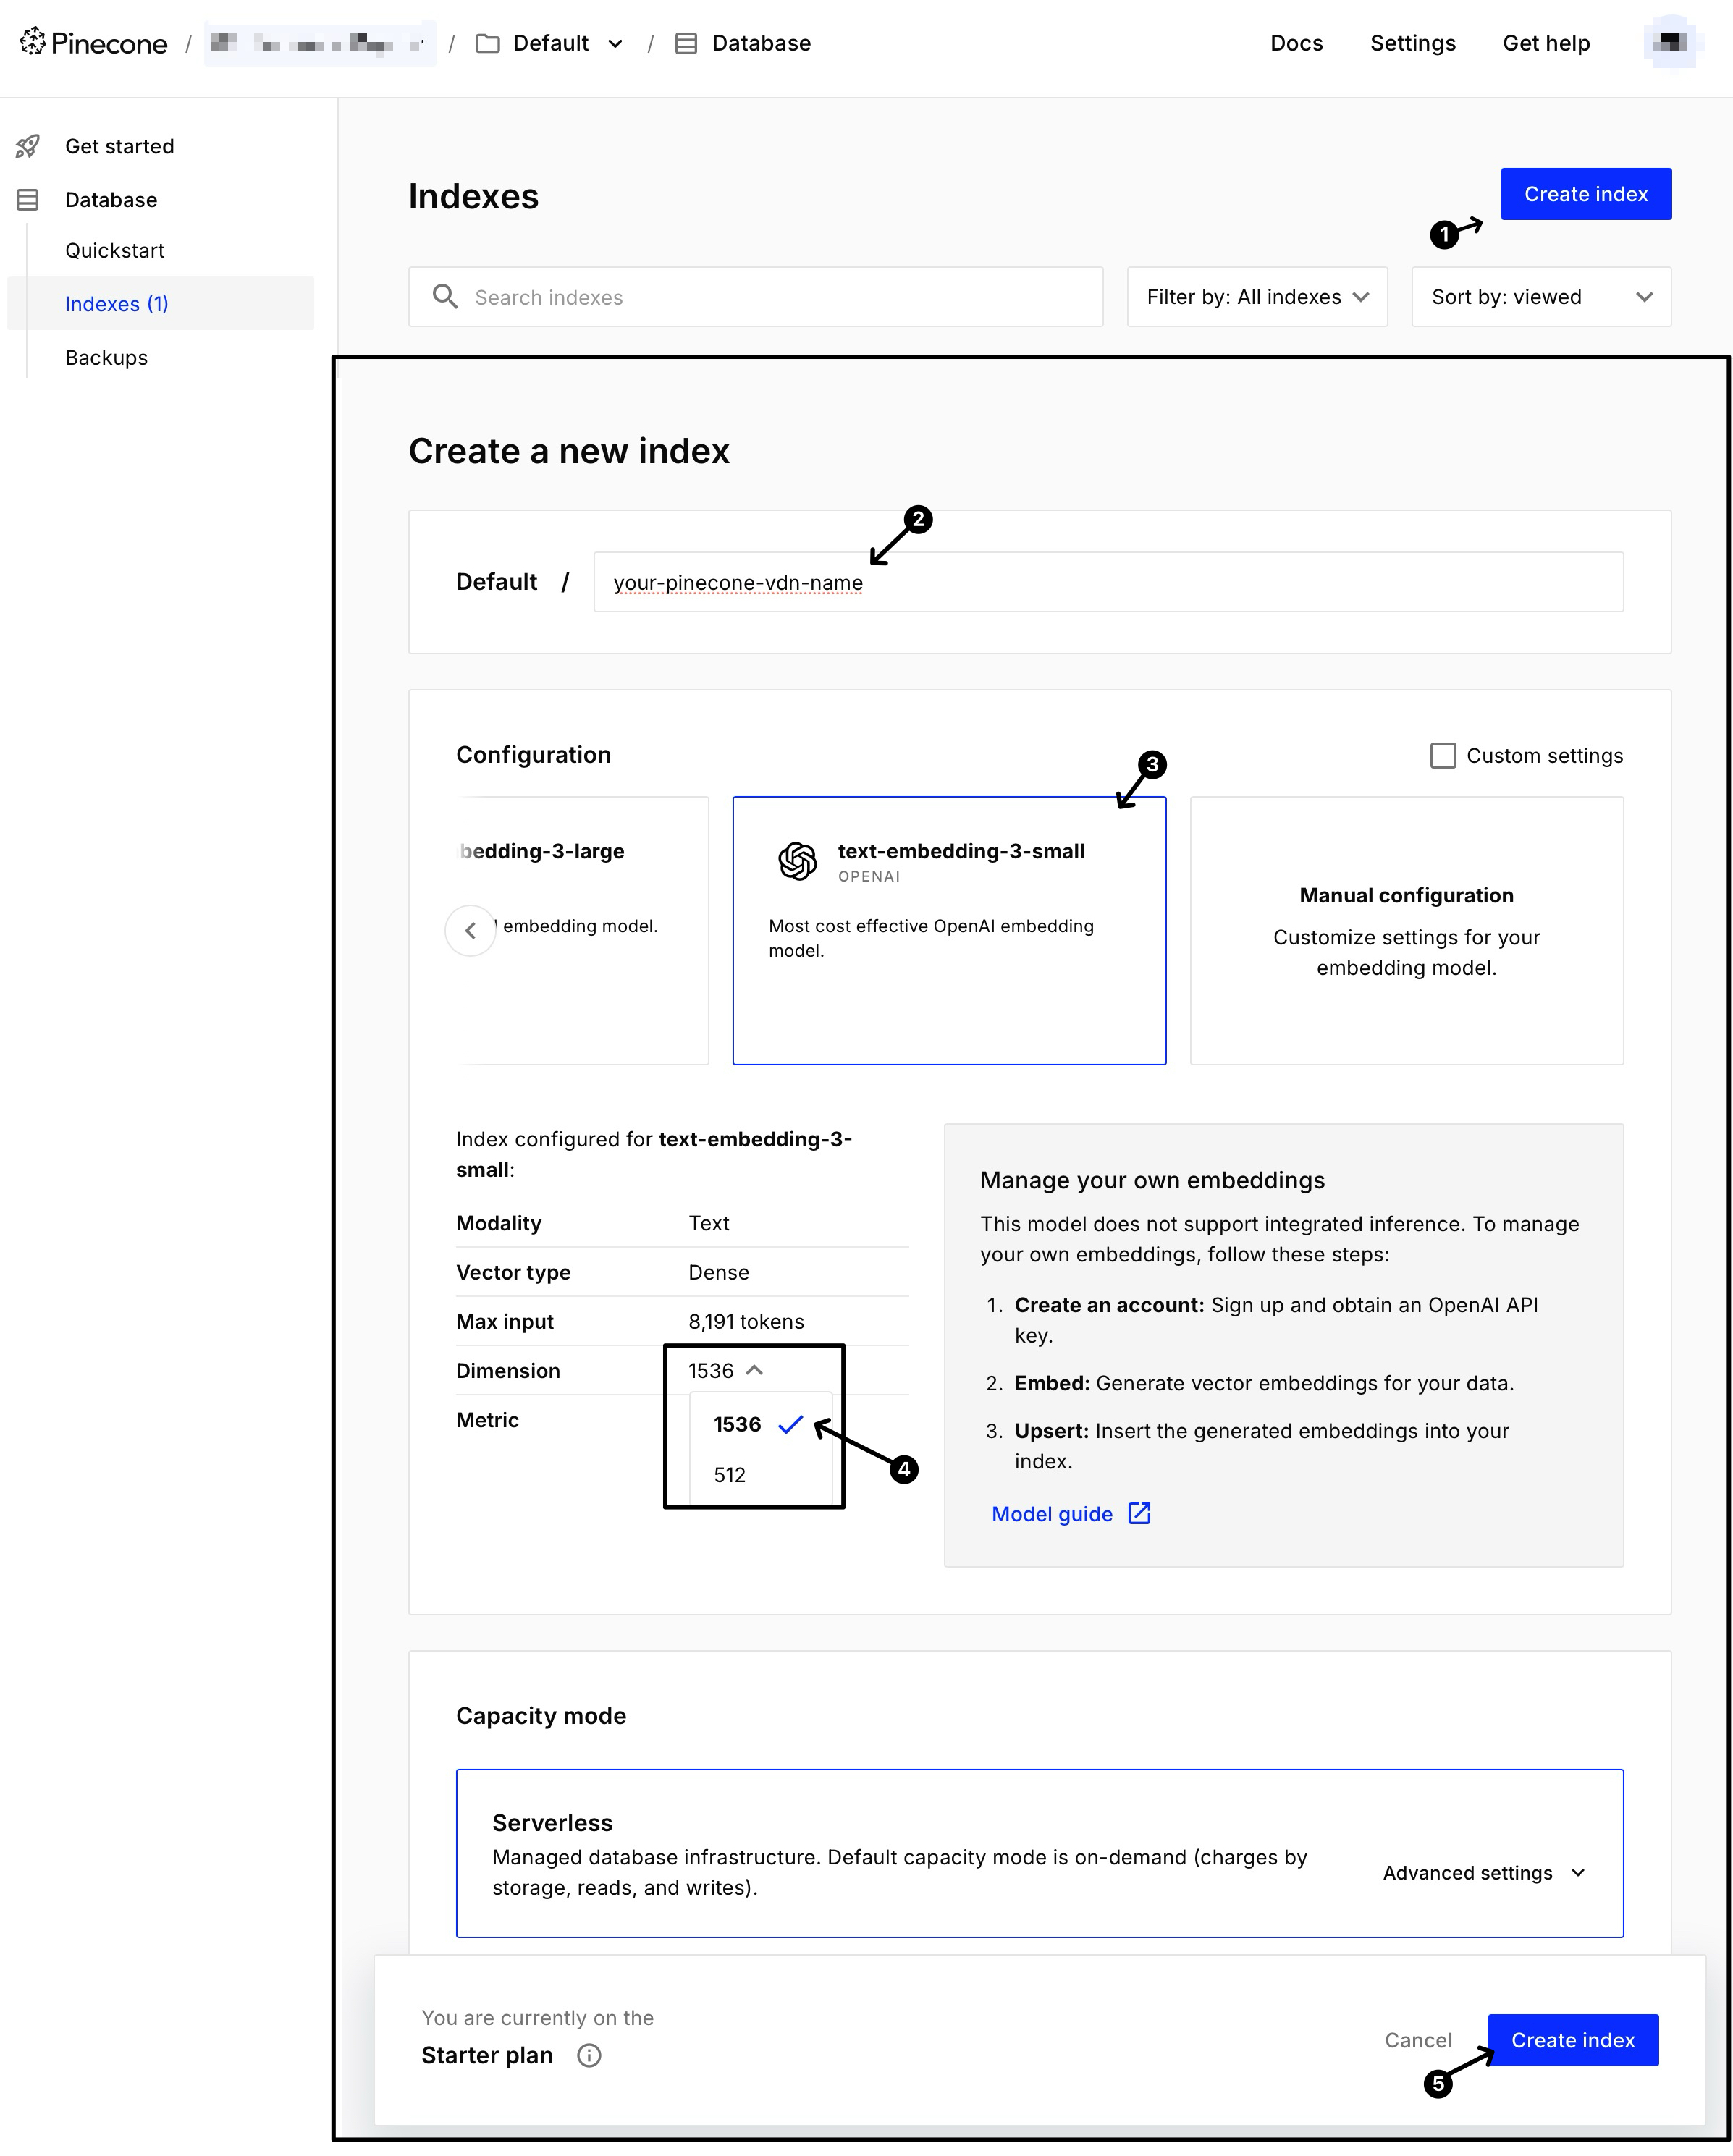
Create “Pinecone Vector Database”
See below screenshot, choose “text-embedding-3-small” as the embedding modal, and make sure you change dimension to 1536 (* you may use a different engine or dimension, just make sure your query and pinecone database uses the exact same engine and dimension)
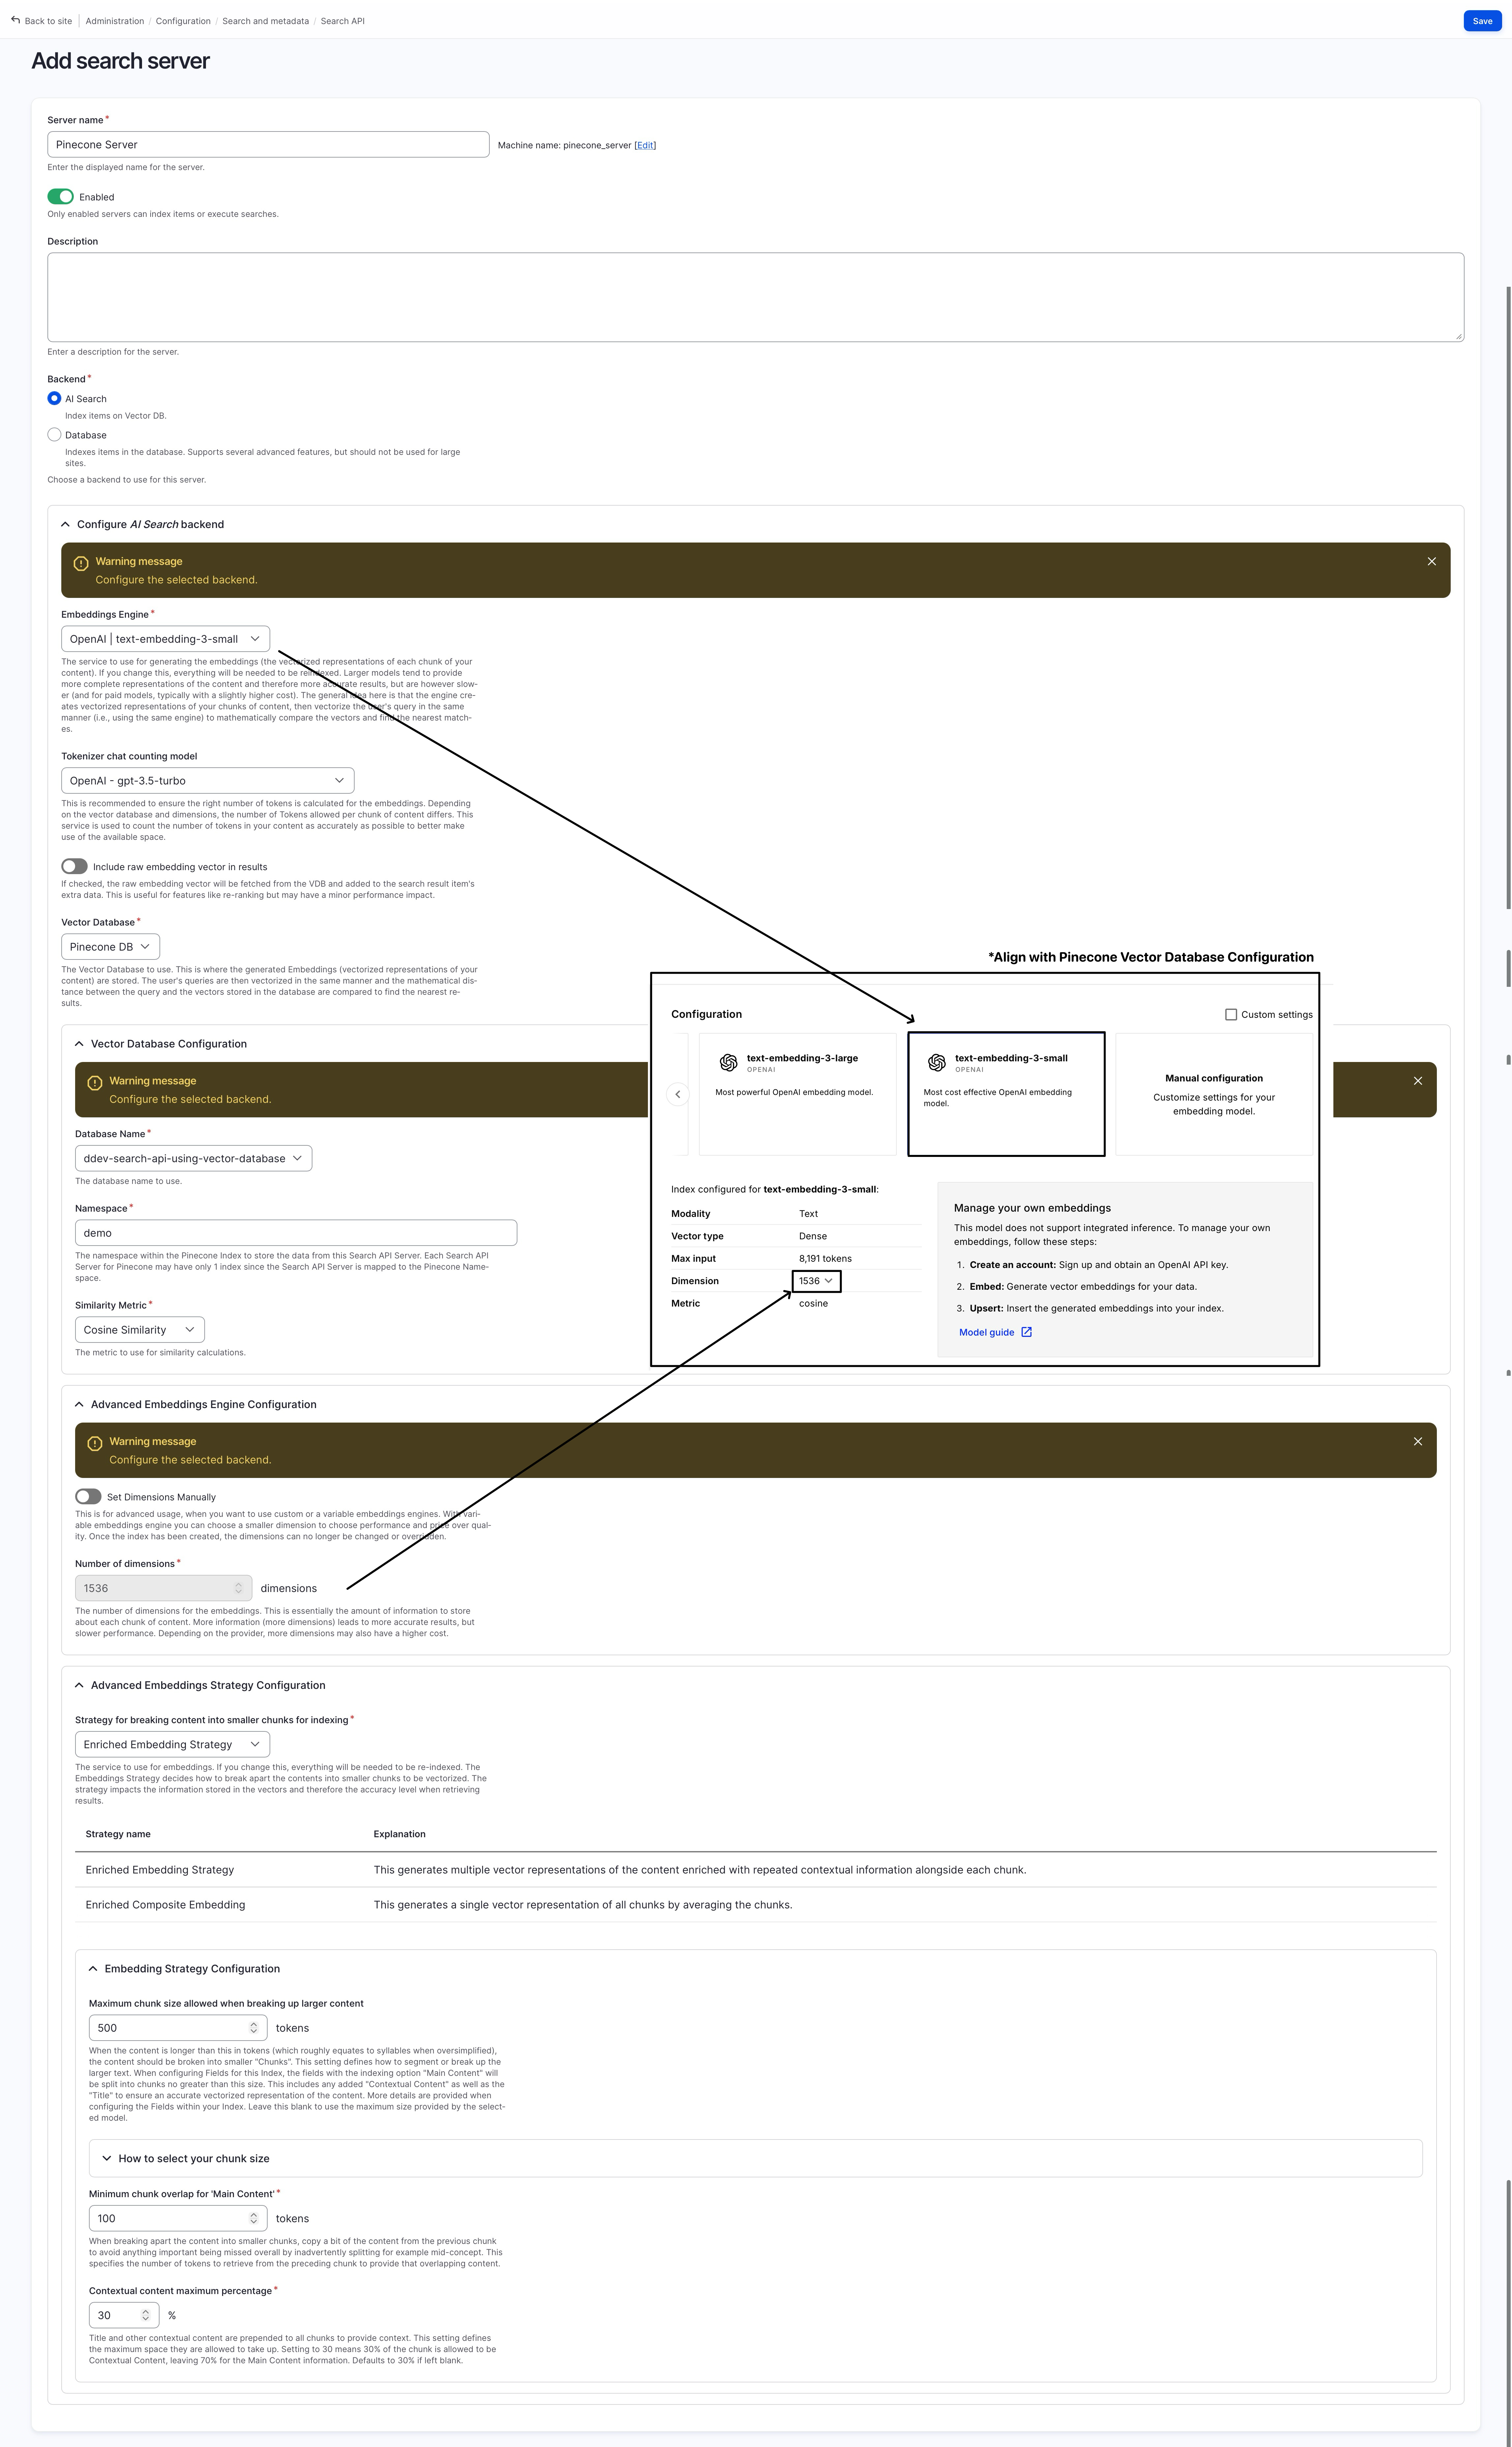
Create “Search API - Server”
In Search API configuration page: “Administration > Configuration > Search and metadata > Search API (/admin/config/search/search-api)” page create a new search server using the Pinecone vector database:
choose “Backend: AI Search”
choose “Vector Database: Pinecone DB”
choose “Vector Database > Database Name: your-pinecone-vdb-name”
choose “OpenAl | text-embedding-3-small” for embedding engine
note the name of the embedding engine down, this will be used later
under “Advanced Embedding Engine Configuration "
note down the “Number of dimensions” (by default 1536 for text-emedding-3-small)
(* you may use a different engine and dimension, just make sure your query and pinecone database uses the same engine and dimensions)
You can refer to the screenshot blow for more details:
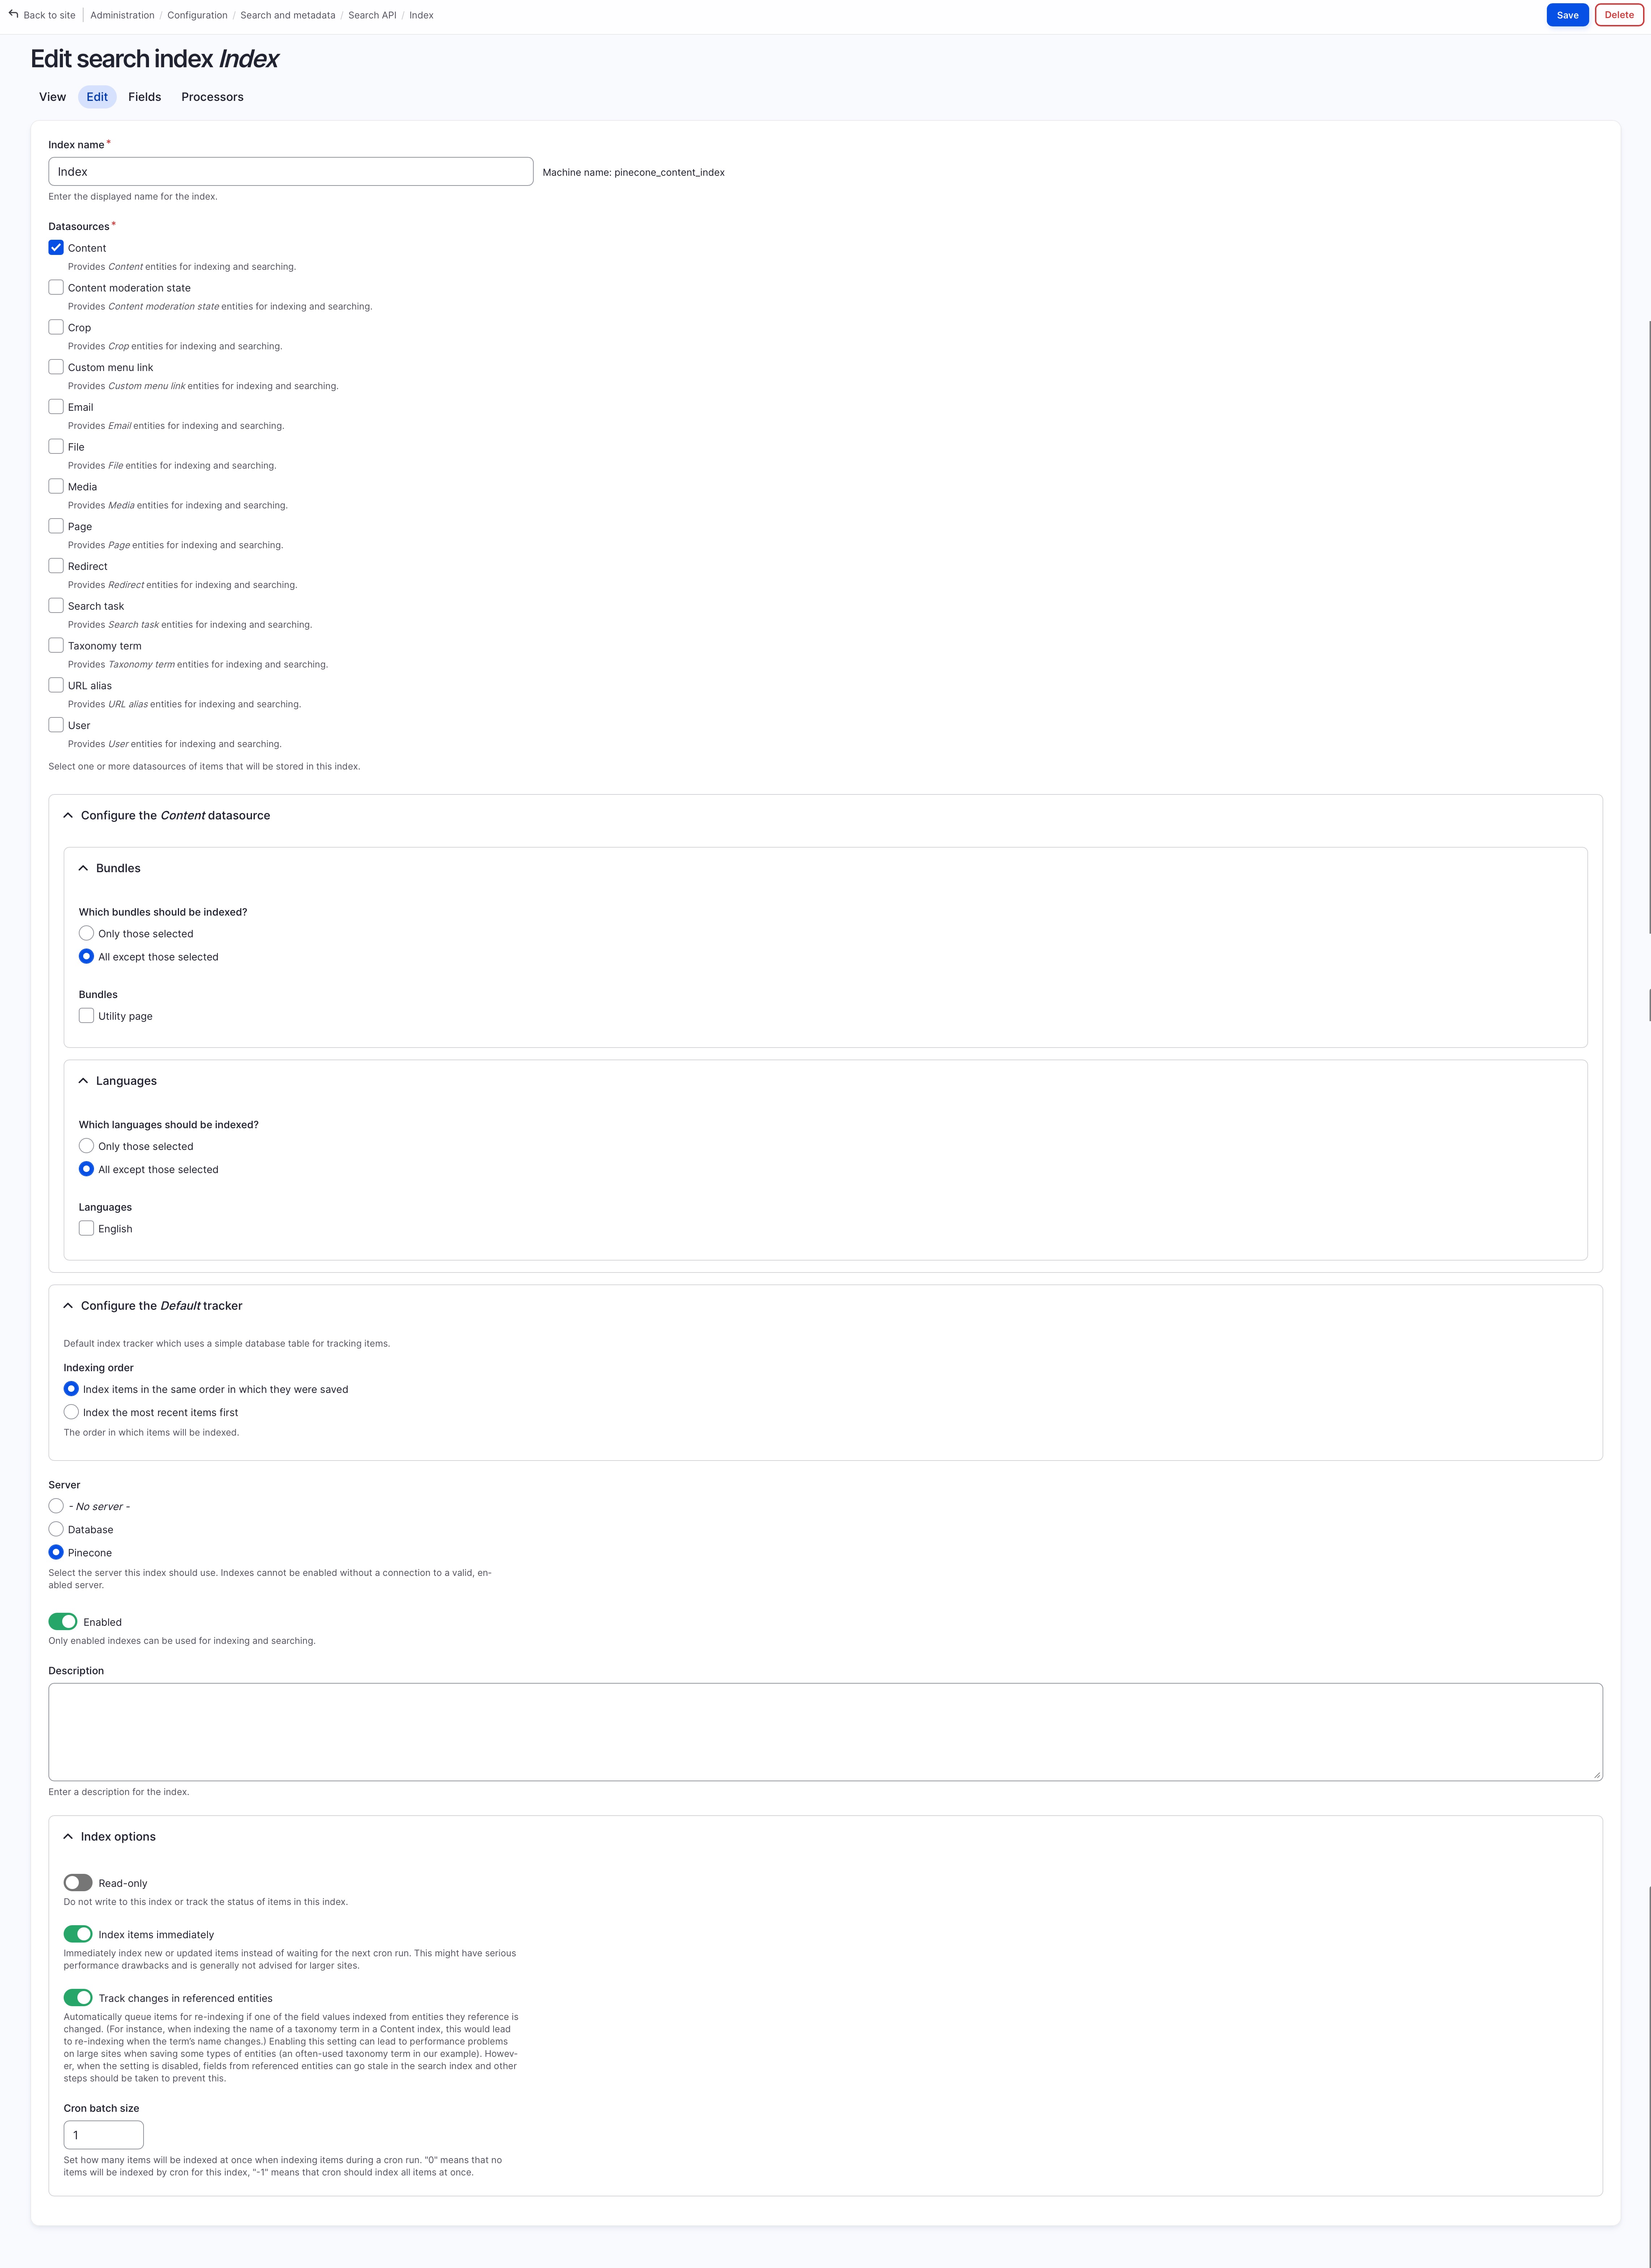
Create “Search API - Index”
In Search API configuration page: “Administration > Configuration > Search and metadata > Search API (/admin/config/search/search-api)” page create a new search index using the newly created server:
Edit (Basic) Setting
- Choose “Datasource: content”
- Choose “Server: Pinecone”
- Choose “Batch size: 1~5” (do not use the default batch size = 50, as embedding translation may take longer than the regular database keyword index generation, you might hit a api quota limit if you go with large batch)
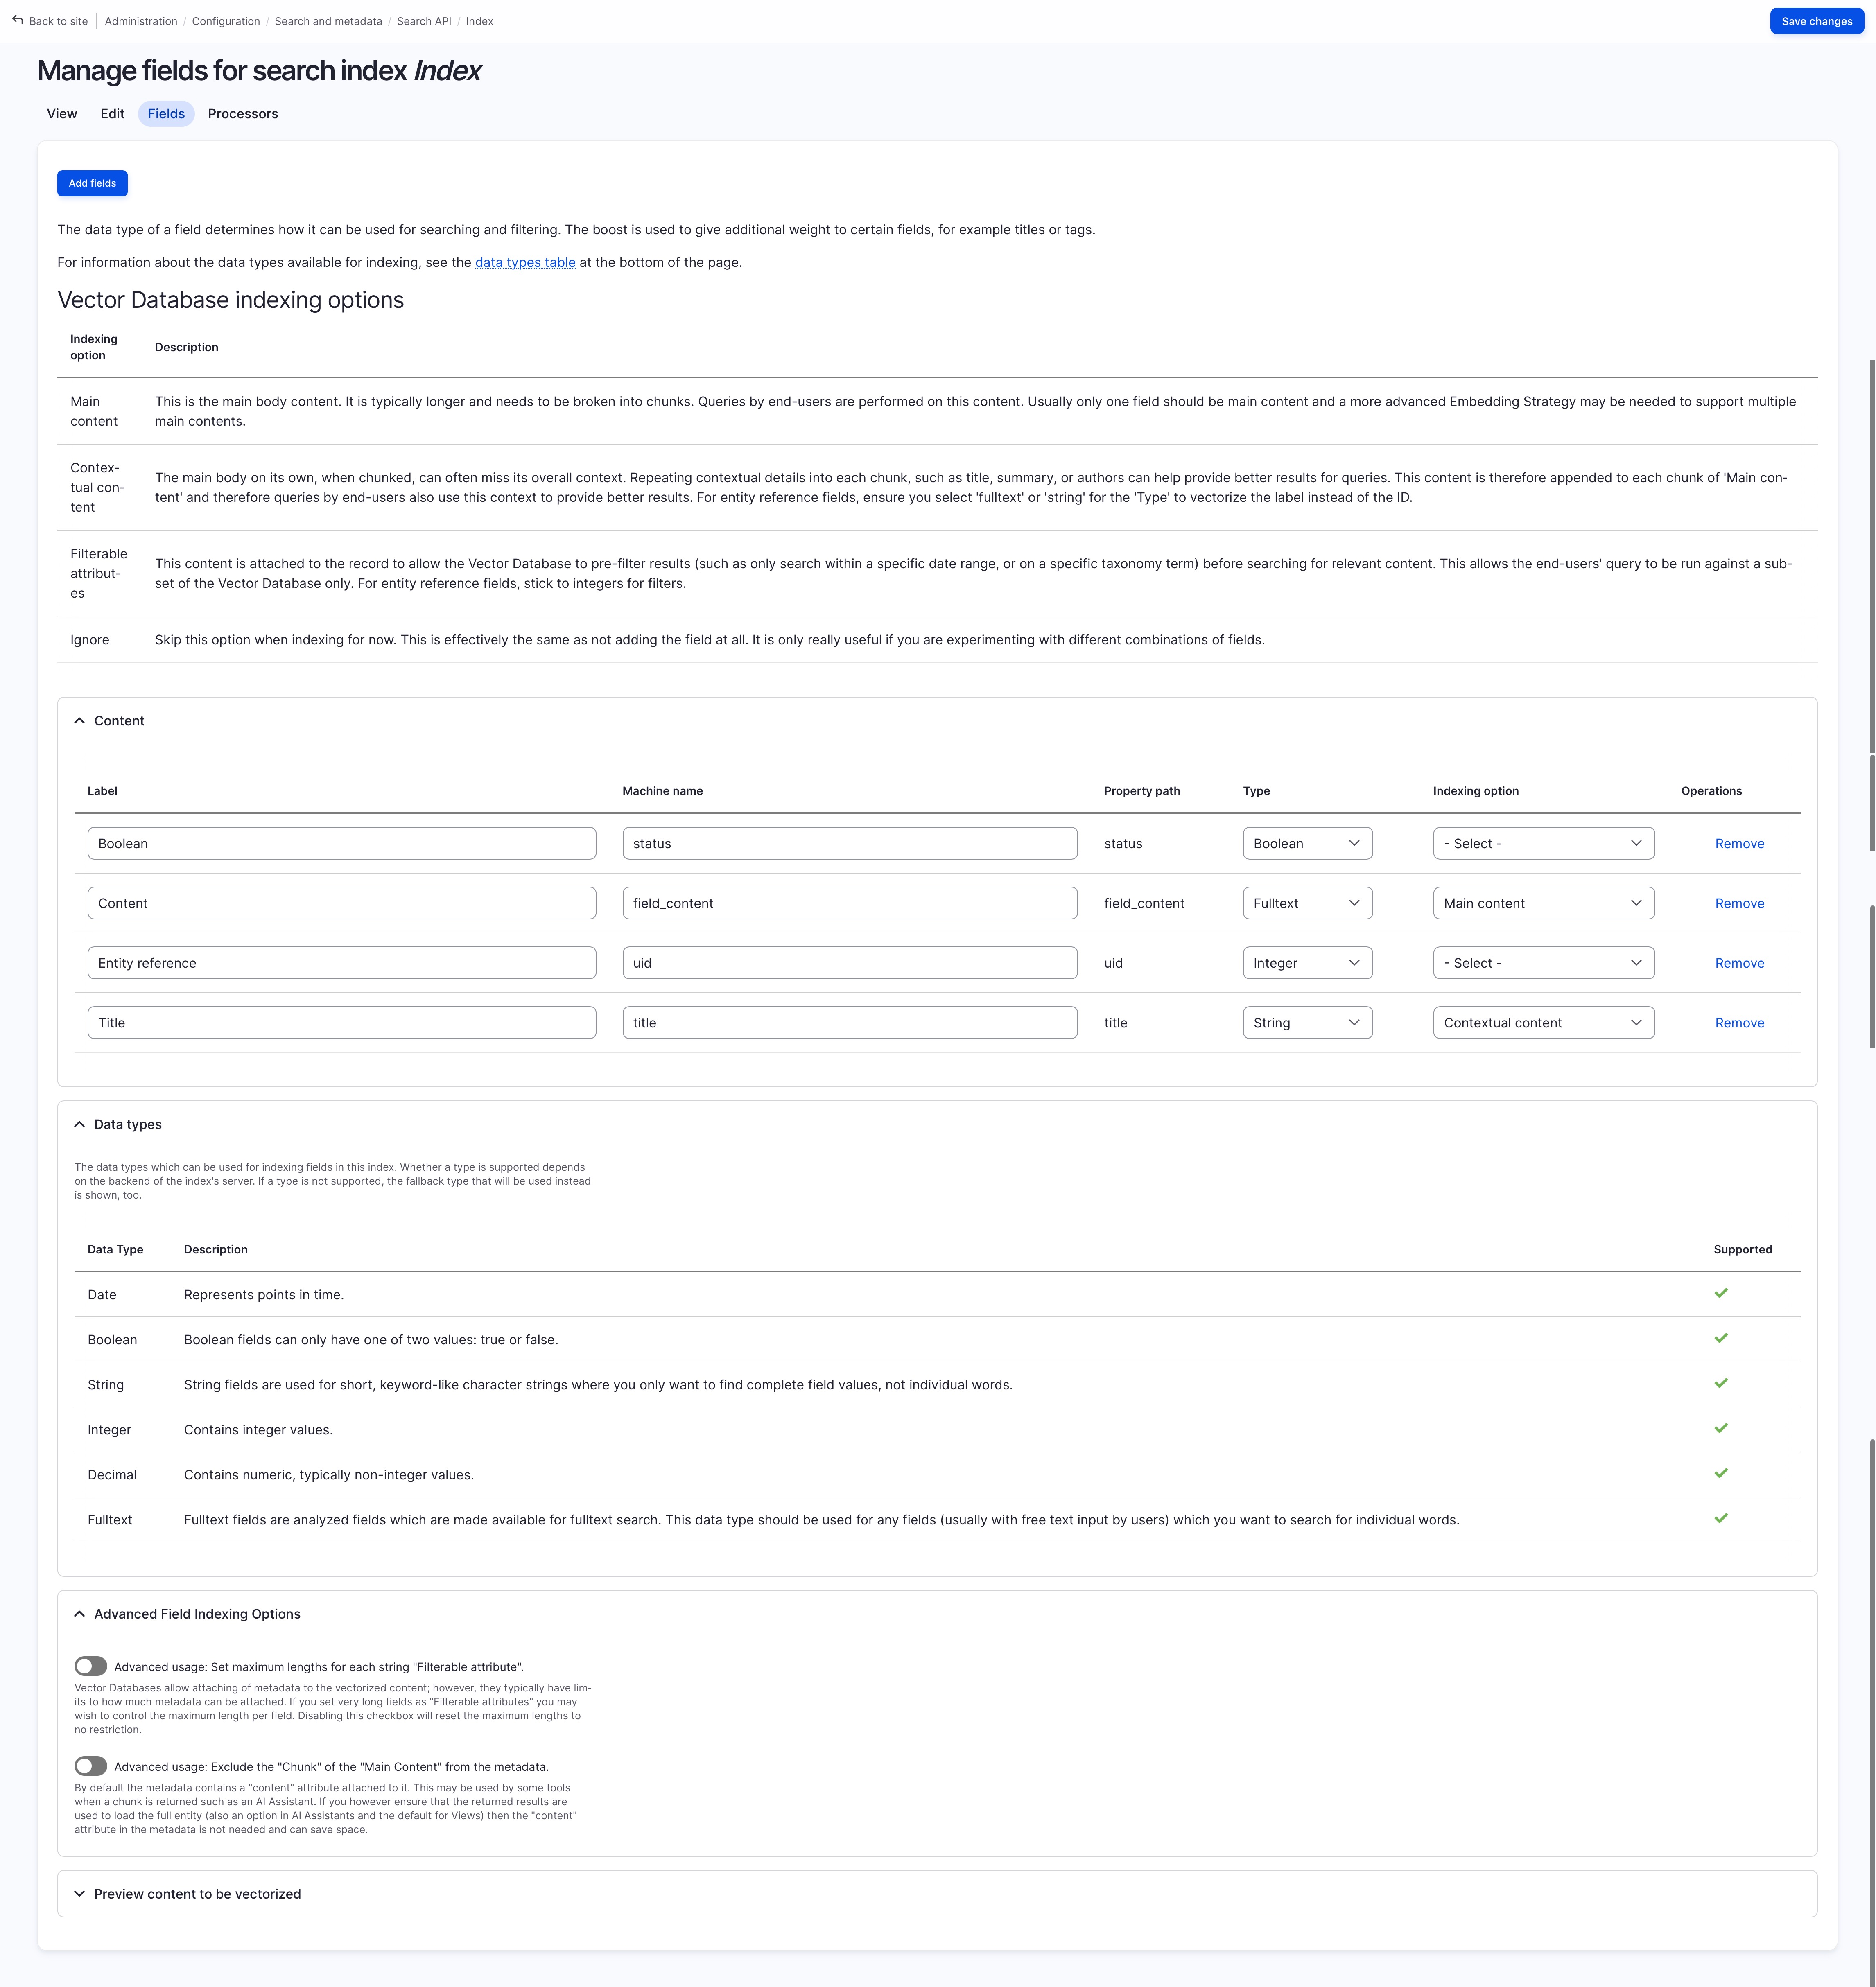
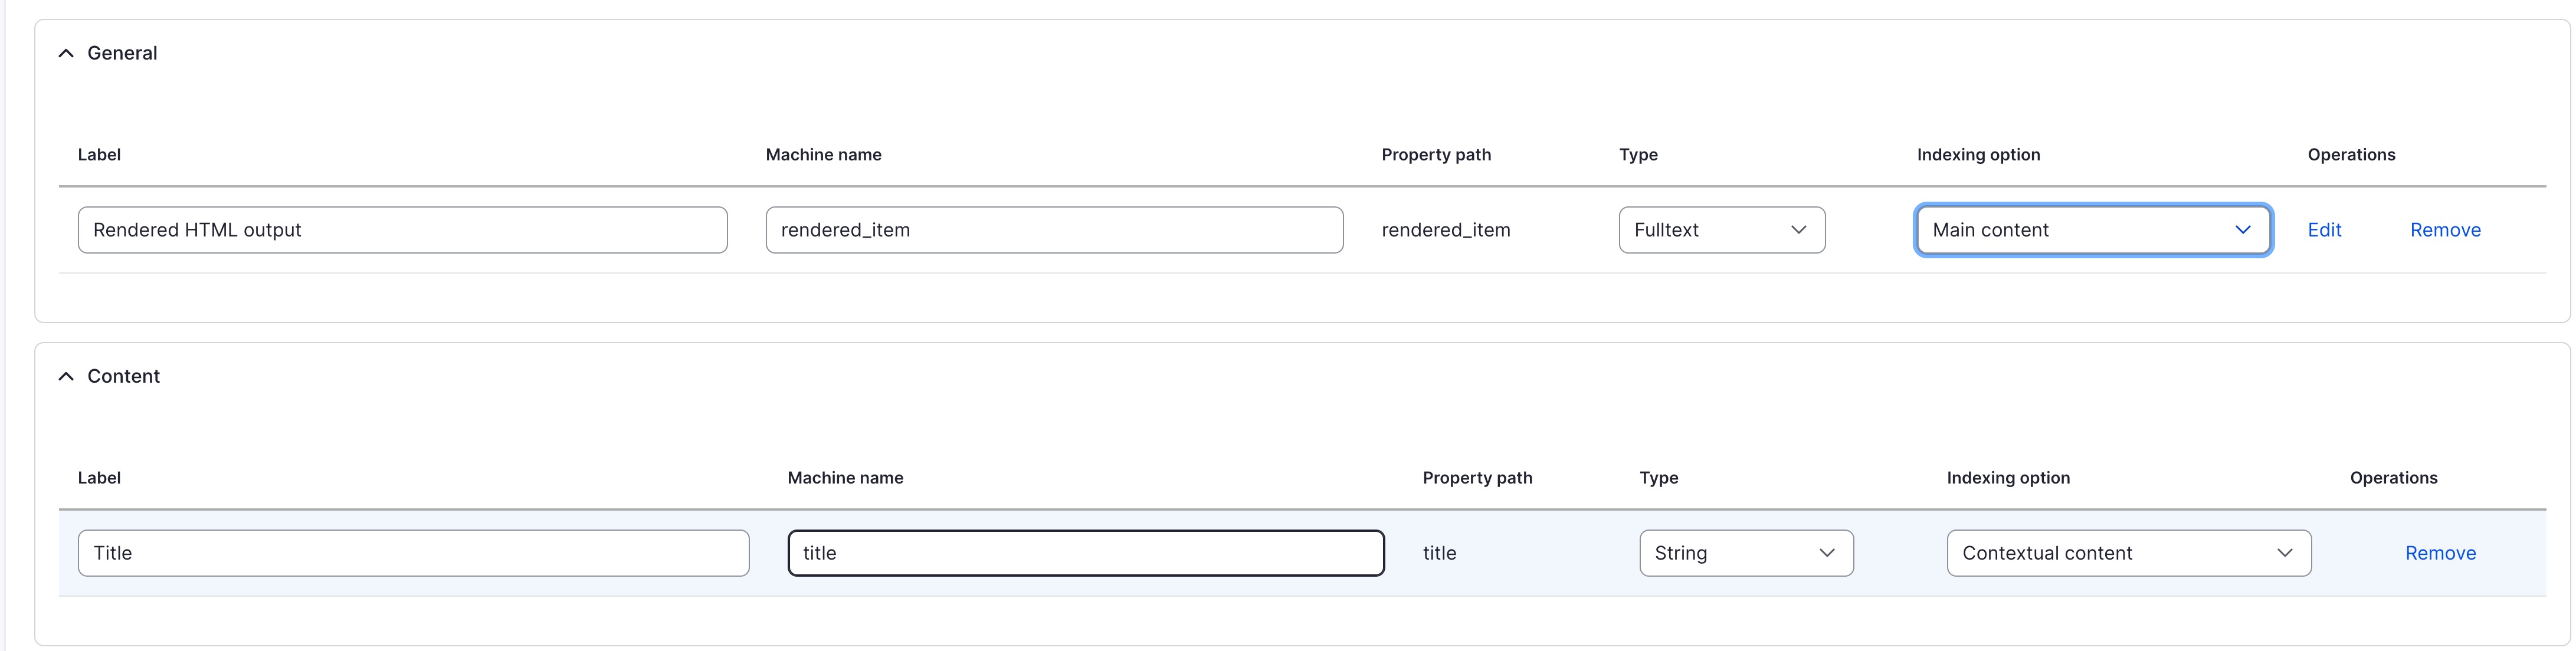
Field Settings
use “Add Field” button to add your required field (here I’ve added “content” and “title”)
select the “indexing option” for the added fields
read the instruction to figure out what you should set:
- Main content: This is the main body content. It is typically longer and needs to be broken into chunks. Queries by end-users are performed on this content. Usually only one field should be main content and a more advanced Embedding Strategy may be needed to support multiple main contents.
- Contextual content: The main body on its own, when chunked, can often miss its overall context. Repeating contextual details into each chunk, such as title, summary, or authors can help provide better results for queries. This content is therefore appended to each chunk of ‘Main content’ and therefore queries by end-users also use this context to provide better results. For entity reference fields, ensure you select fulltext’ or ‘string’ for the ‘Type’ to vectorize the label instead of the ID.
- Filterable attributes: This content is attached to the record to allow the Vector Database to pre-filter results (such as only search within a specific date range, or on a specific taxonomy term) before searching for relevant content. This allows the end-users’ query to be run against a subset of the Vector Database only. For entity reference fields, stick to integers for filters.
- Ignore: Skip this option when indexing for now. This is effectively
choose “Main Content” for “Content”
choose “Contextual Content” for “Title” (such that it is added to the chunked data for main content)
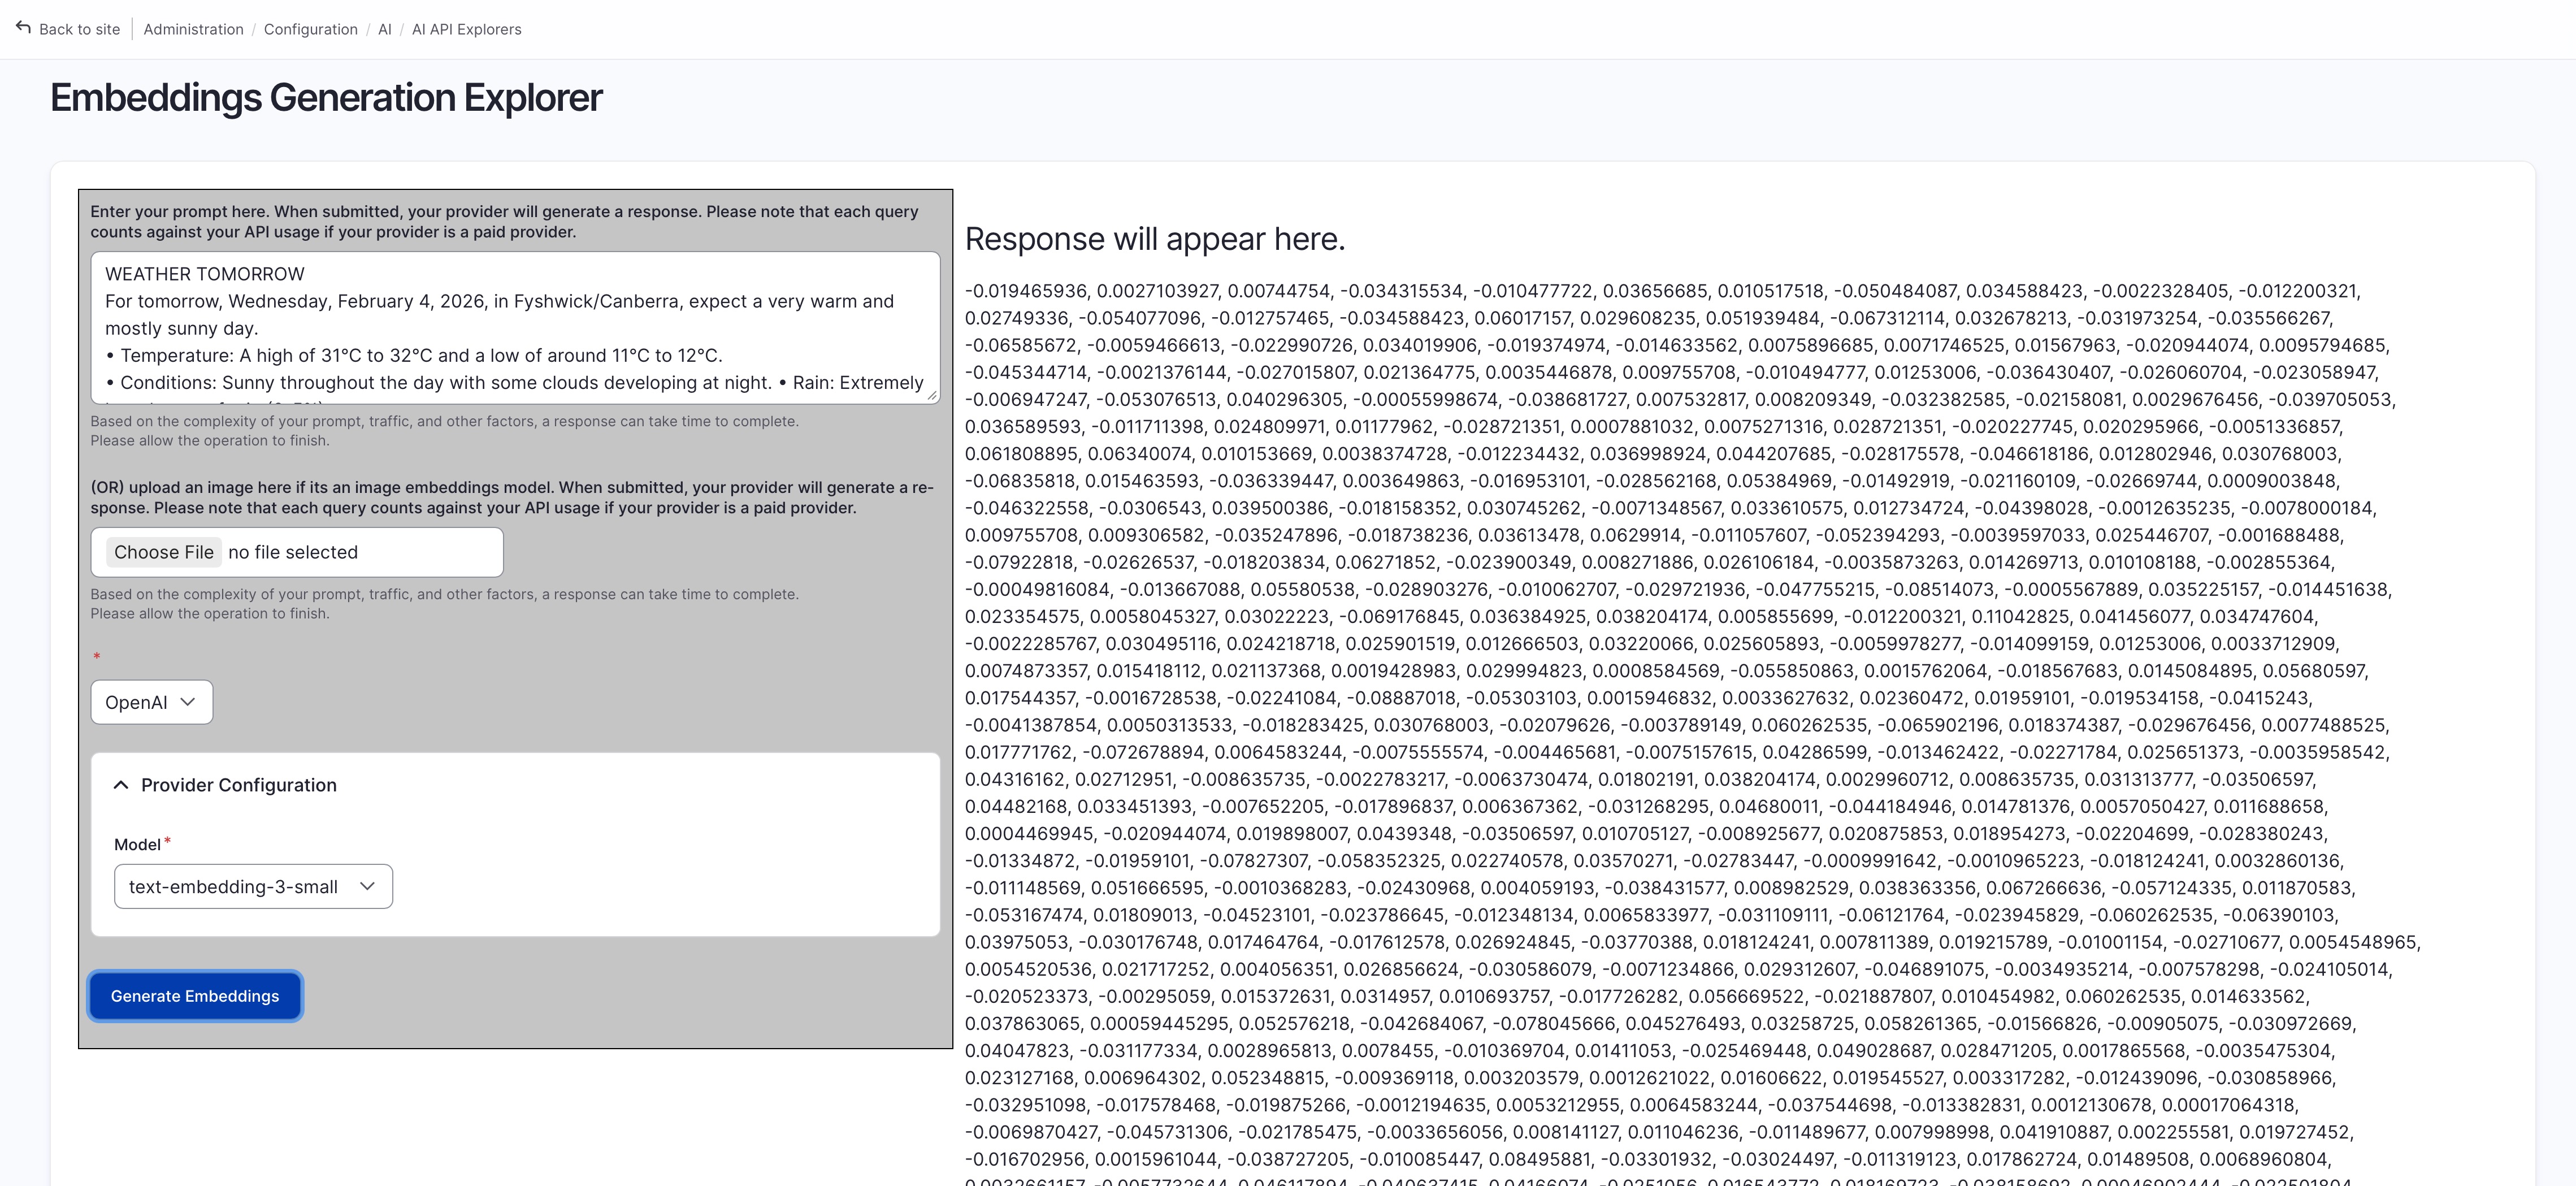
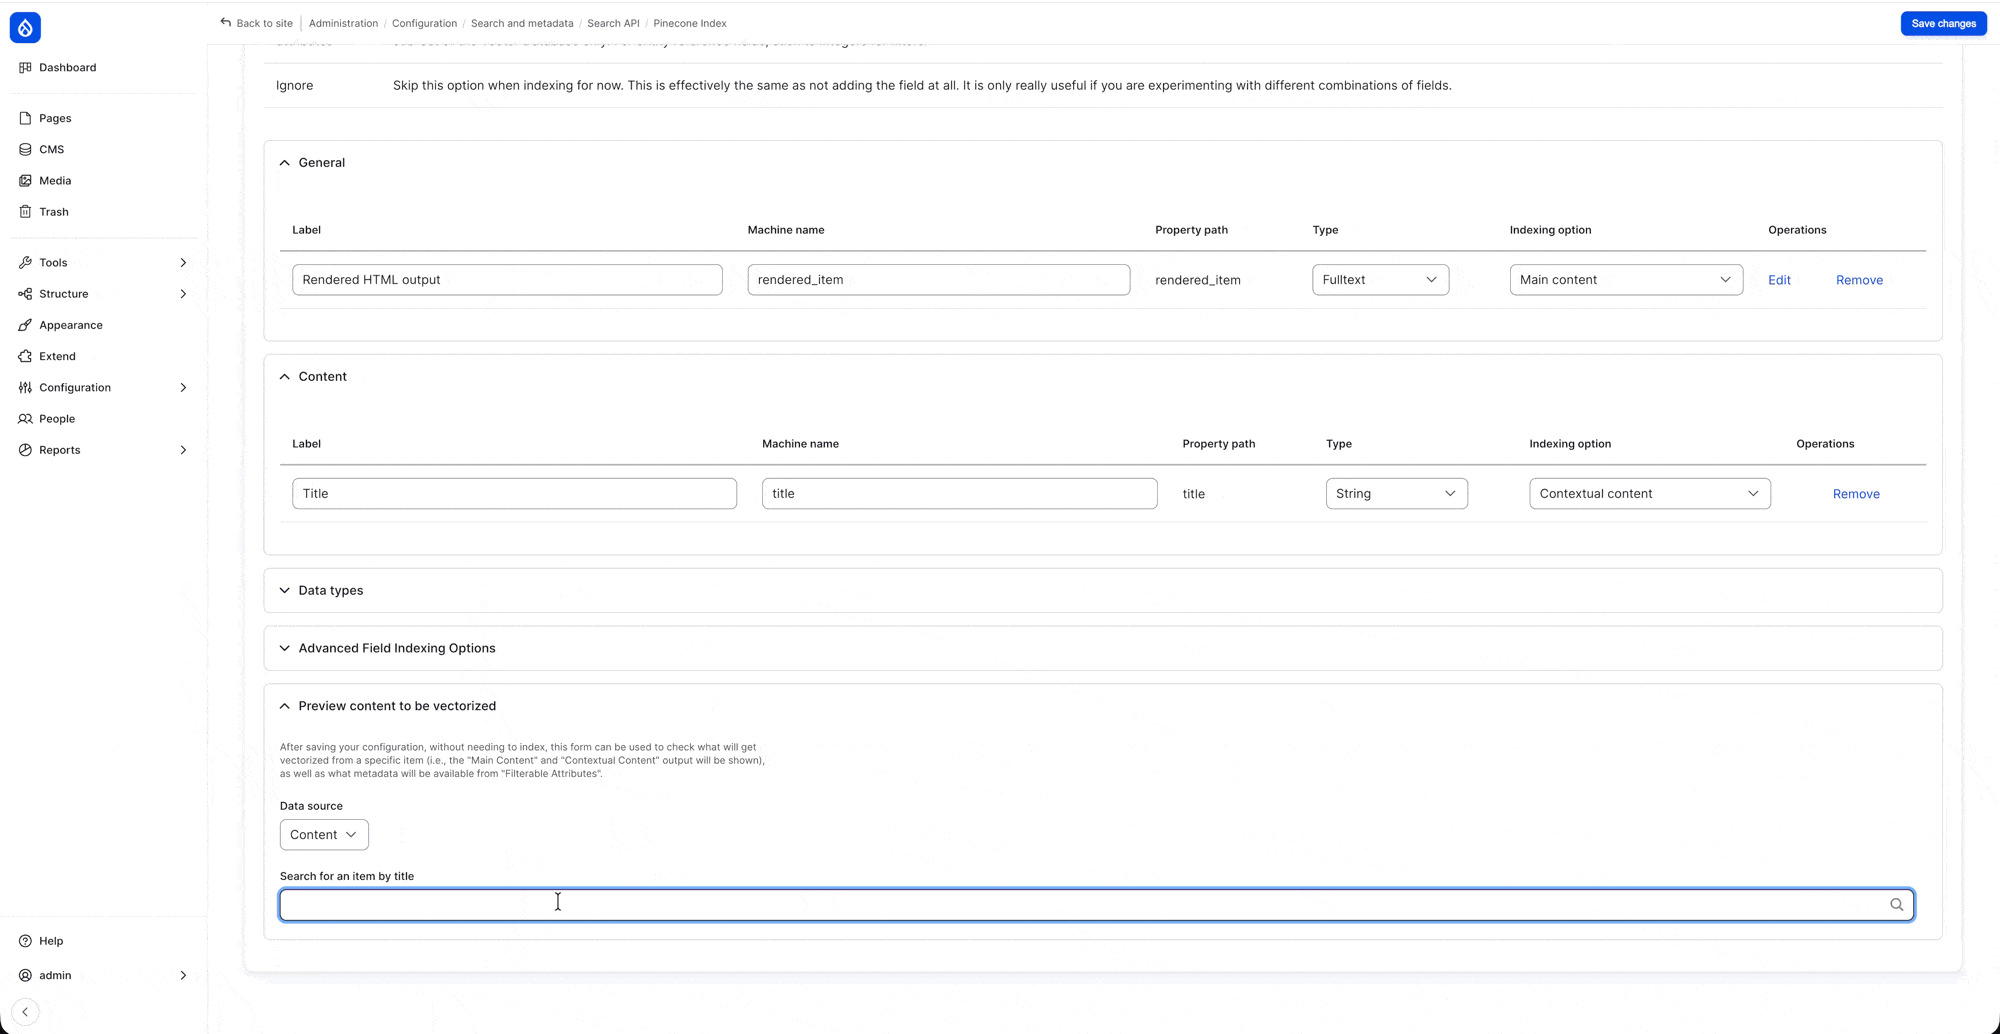
Preview Generated Embedding / Vector
you can test / preview content to be vectorized using either:
- the bottom panel in search index’s field setting: “Preview content to be vectorized”
the “Embeddings Generation Explorer” tool comes with “AI API Explorer”
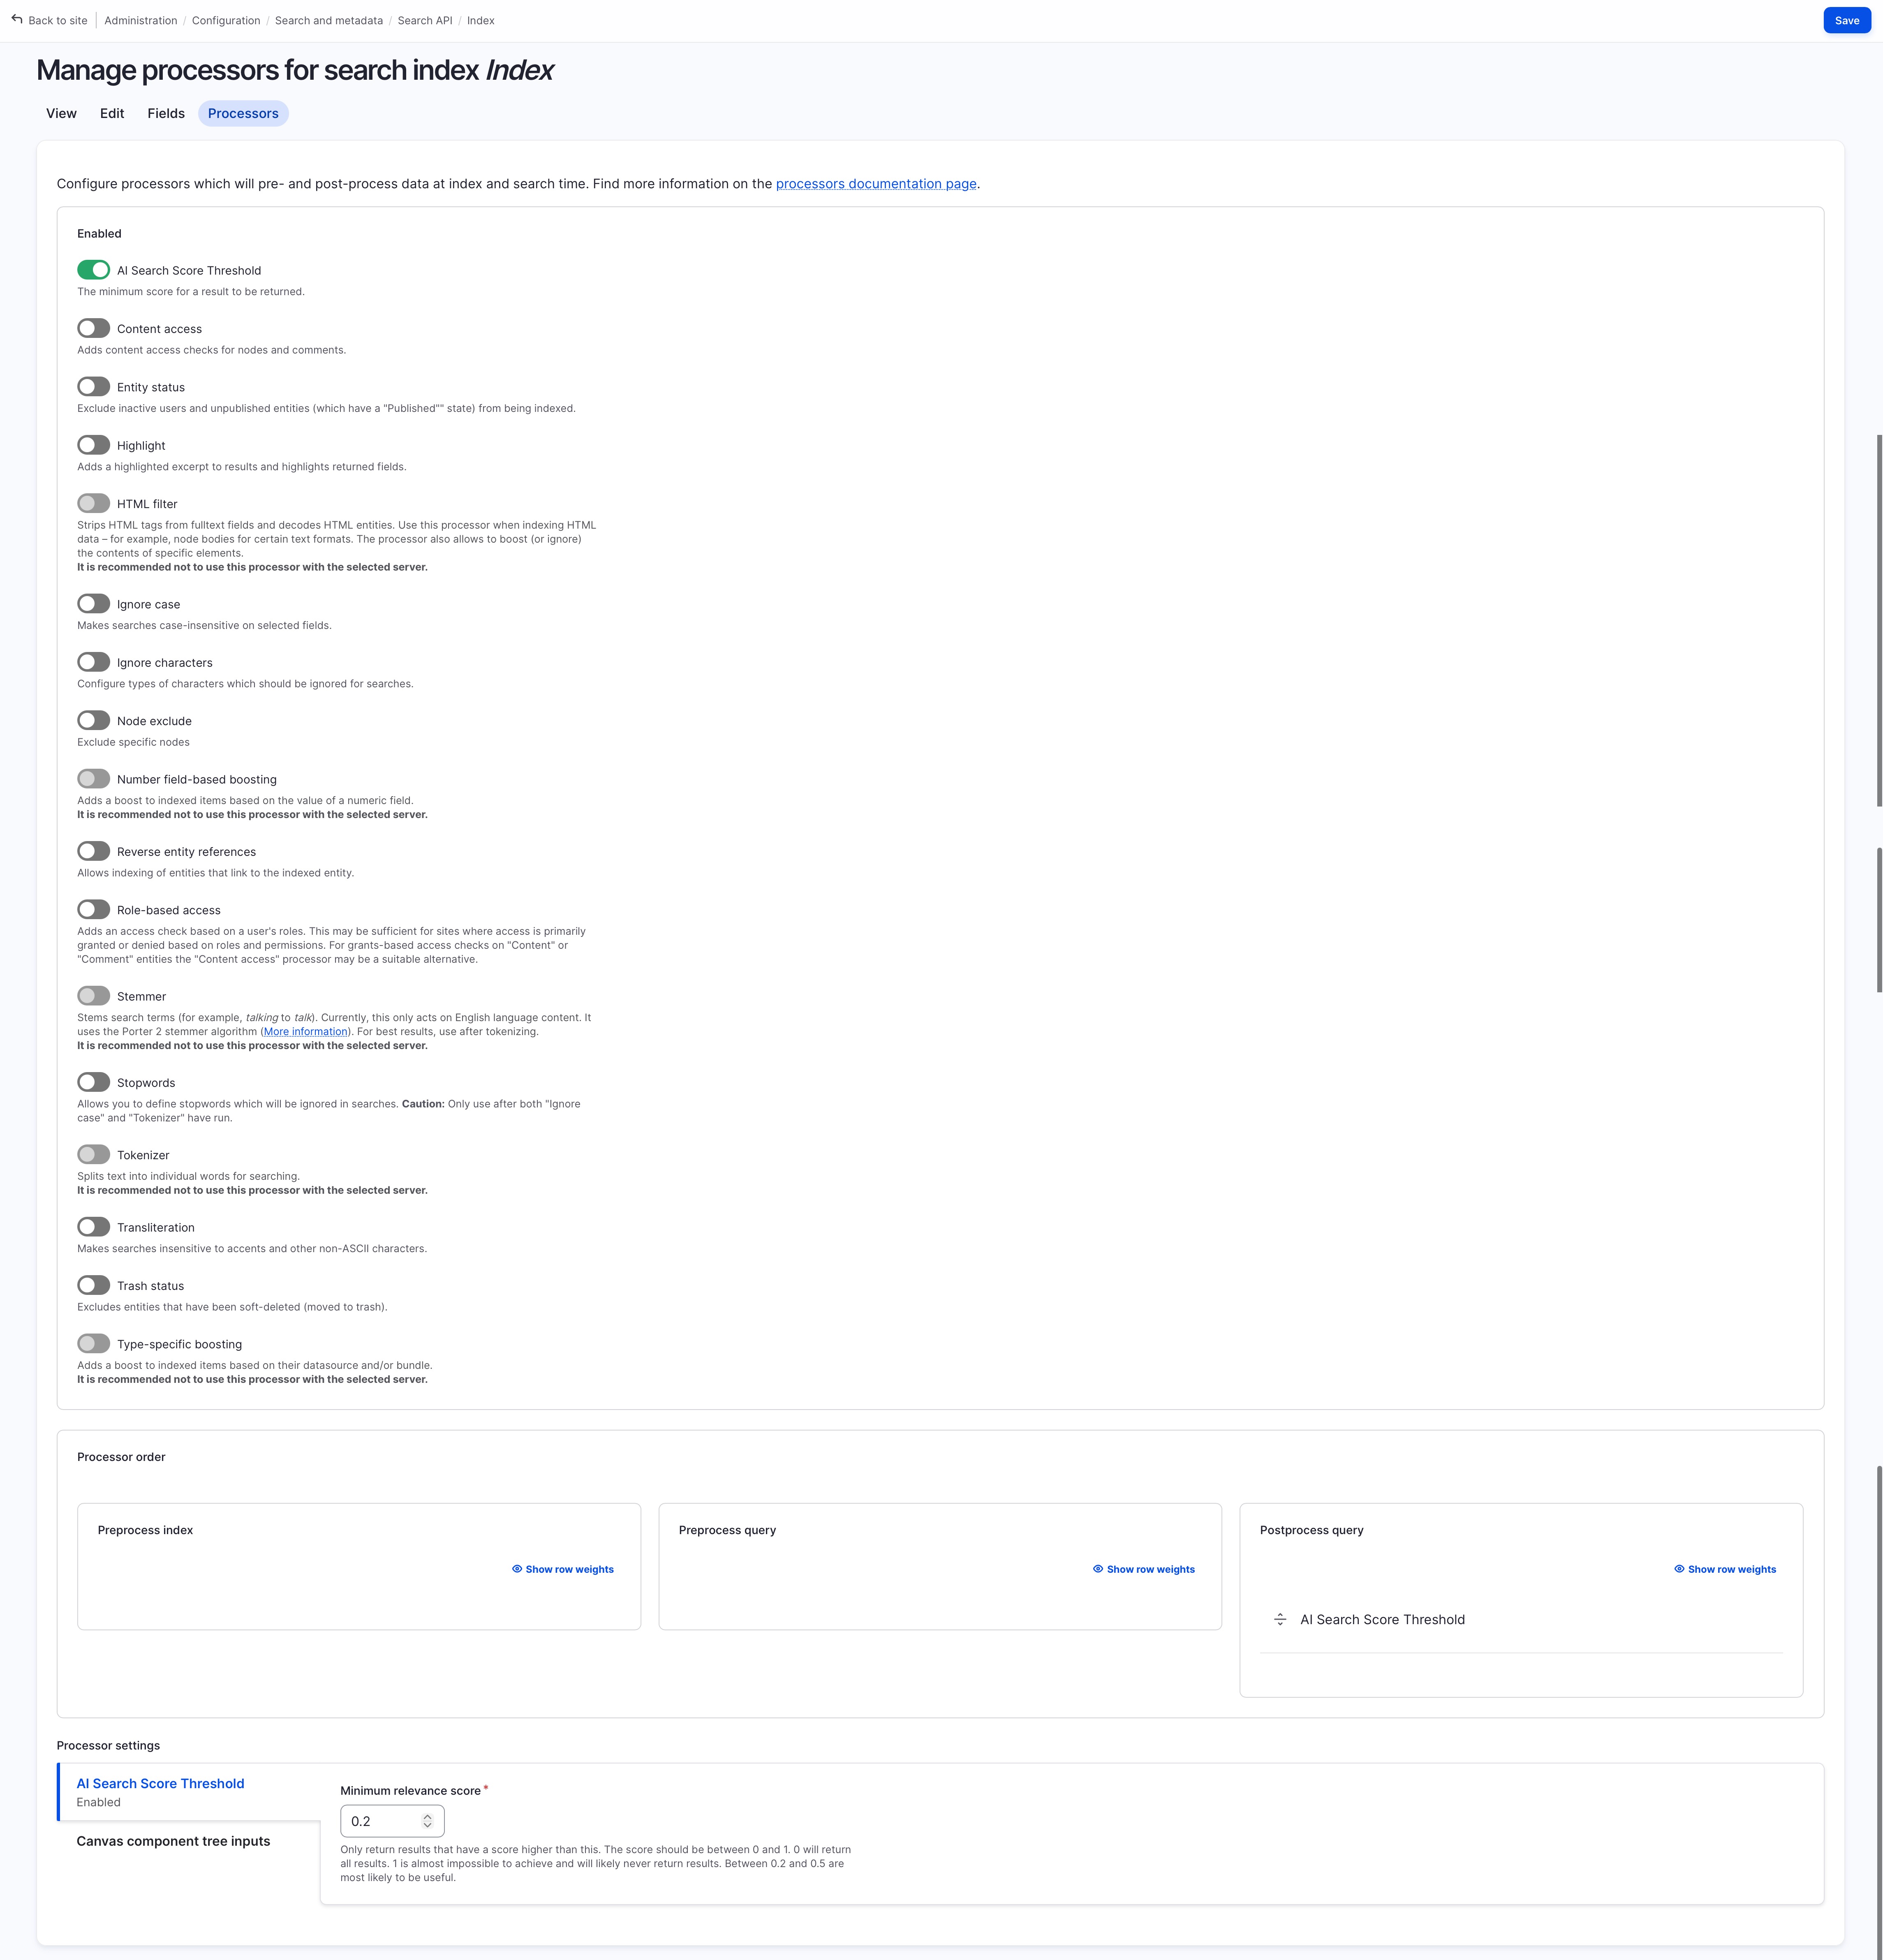
Processors Settings
- enable “Al Search Score Threshold” if you want only result above certain similarity / relevance score to be shown, and set a minimum relevance score (The score should be between 0 and 1. 0 will return all results. 1 is almost impossible to achieve and will likely never return results. Between 0.2 and 0.5 are most likely to be useful.)
- enable “content access” if you want to enforce content access check before index… (disabled for simplicity of demo)
- enable “entity status” if you only want published content to be indexed … (disabled for simplicity of demo)
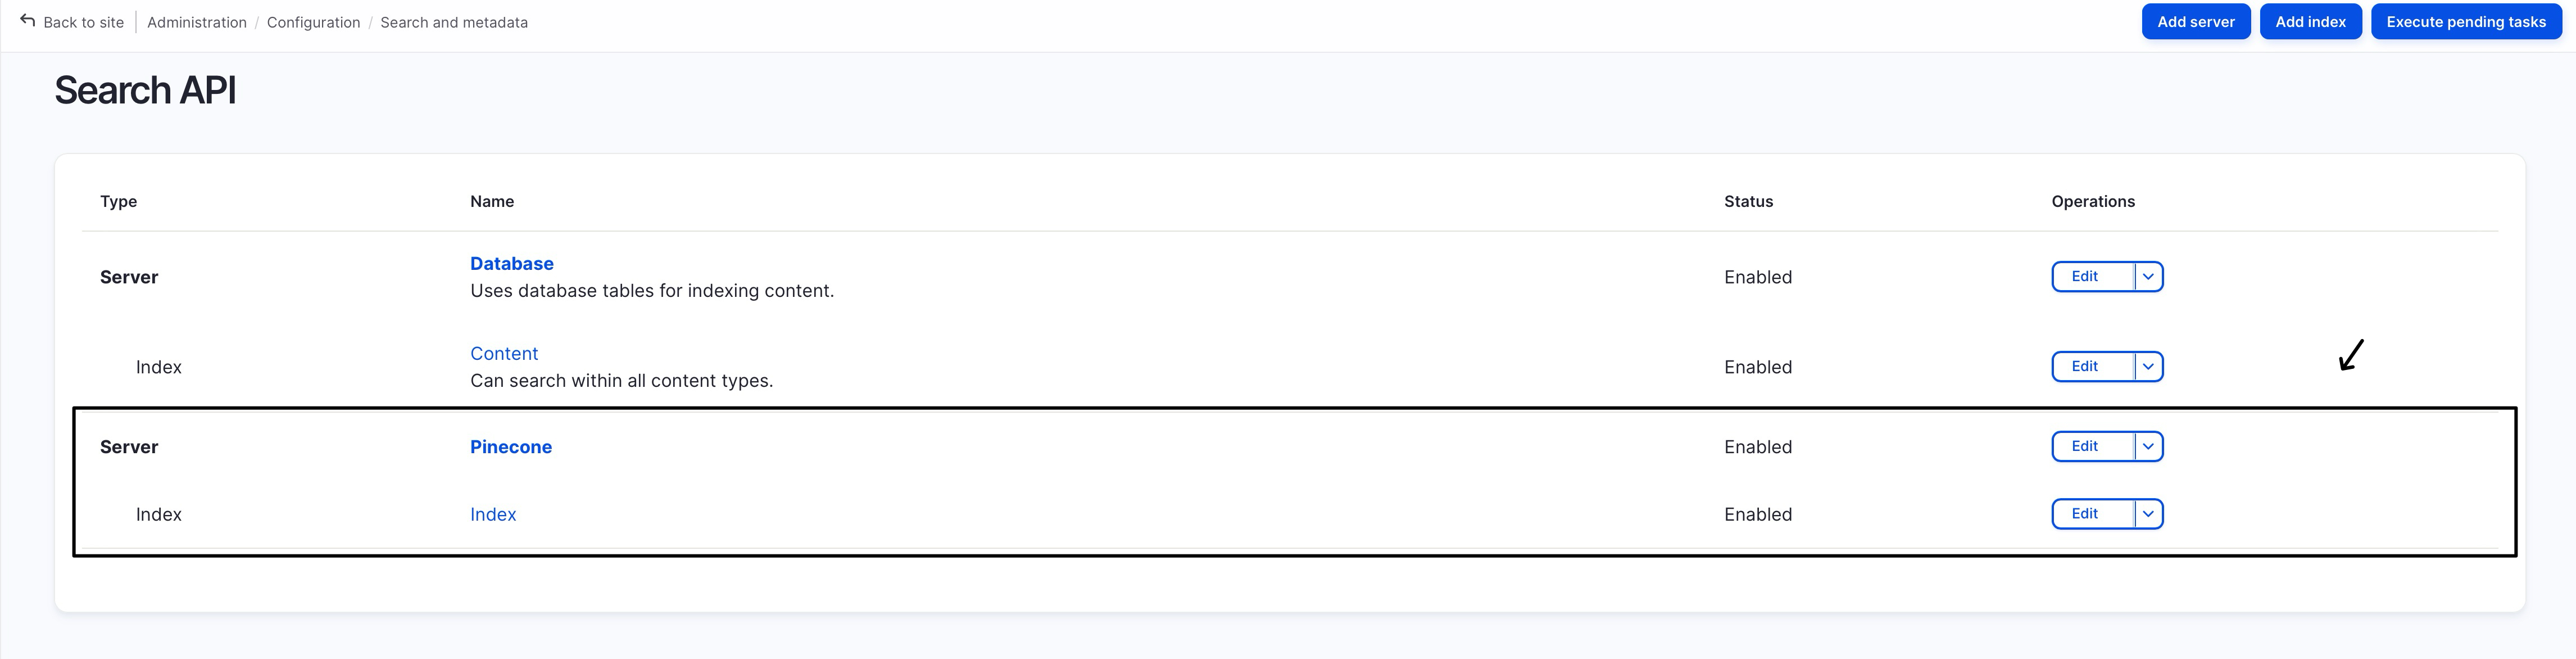
Final Search API Page Outcome
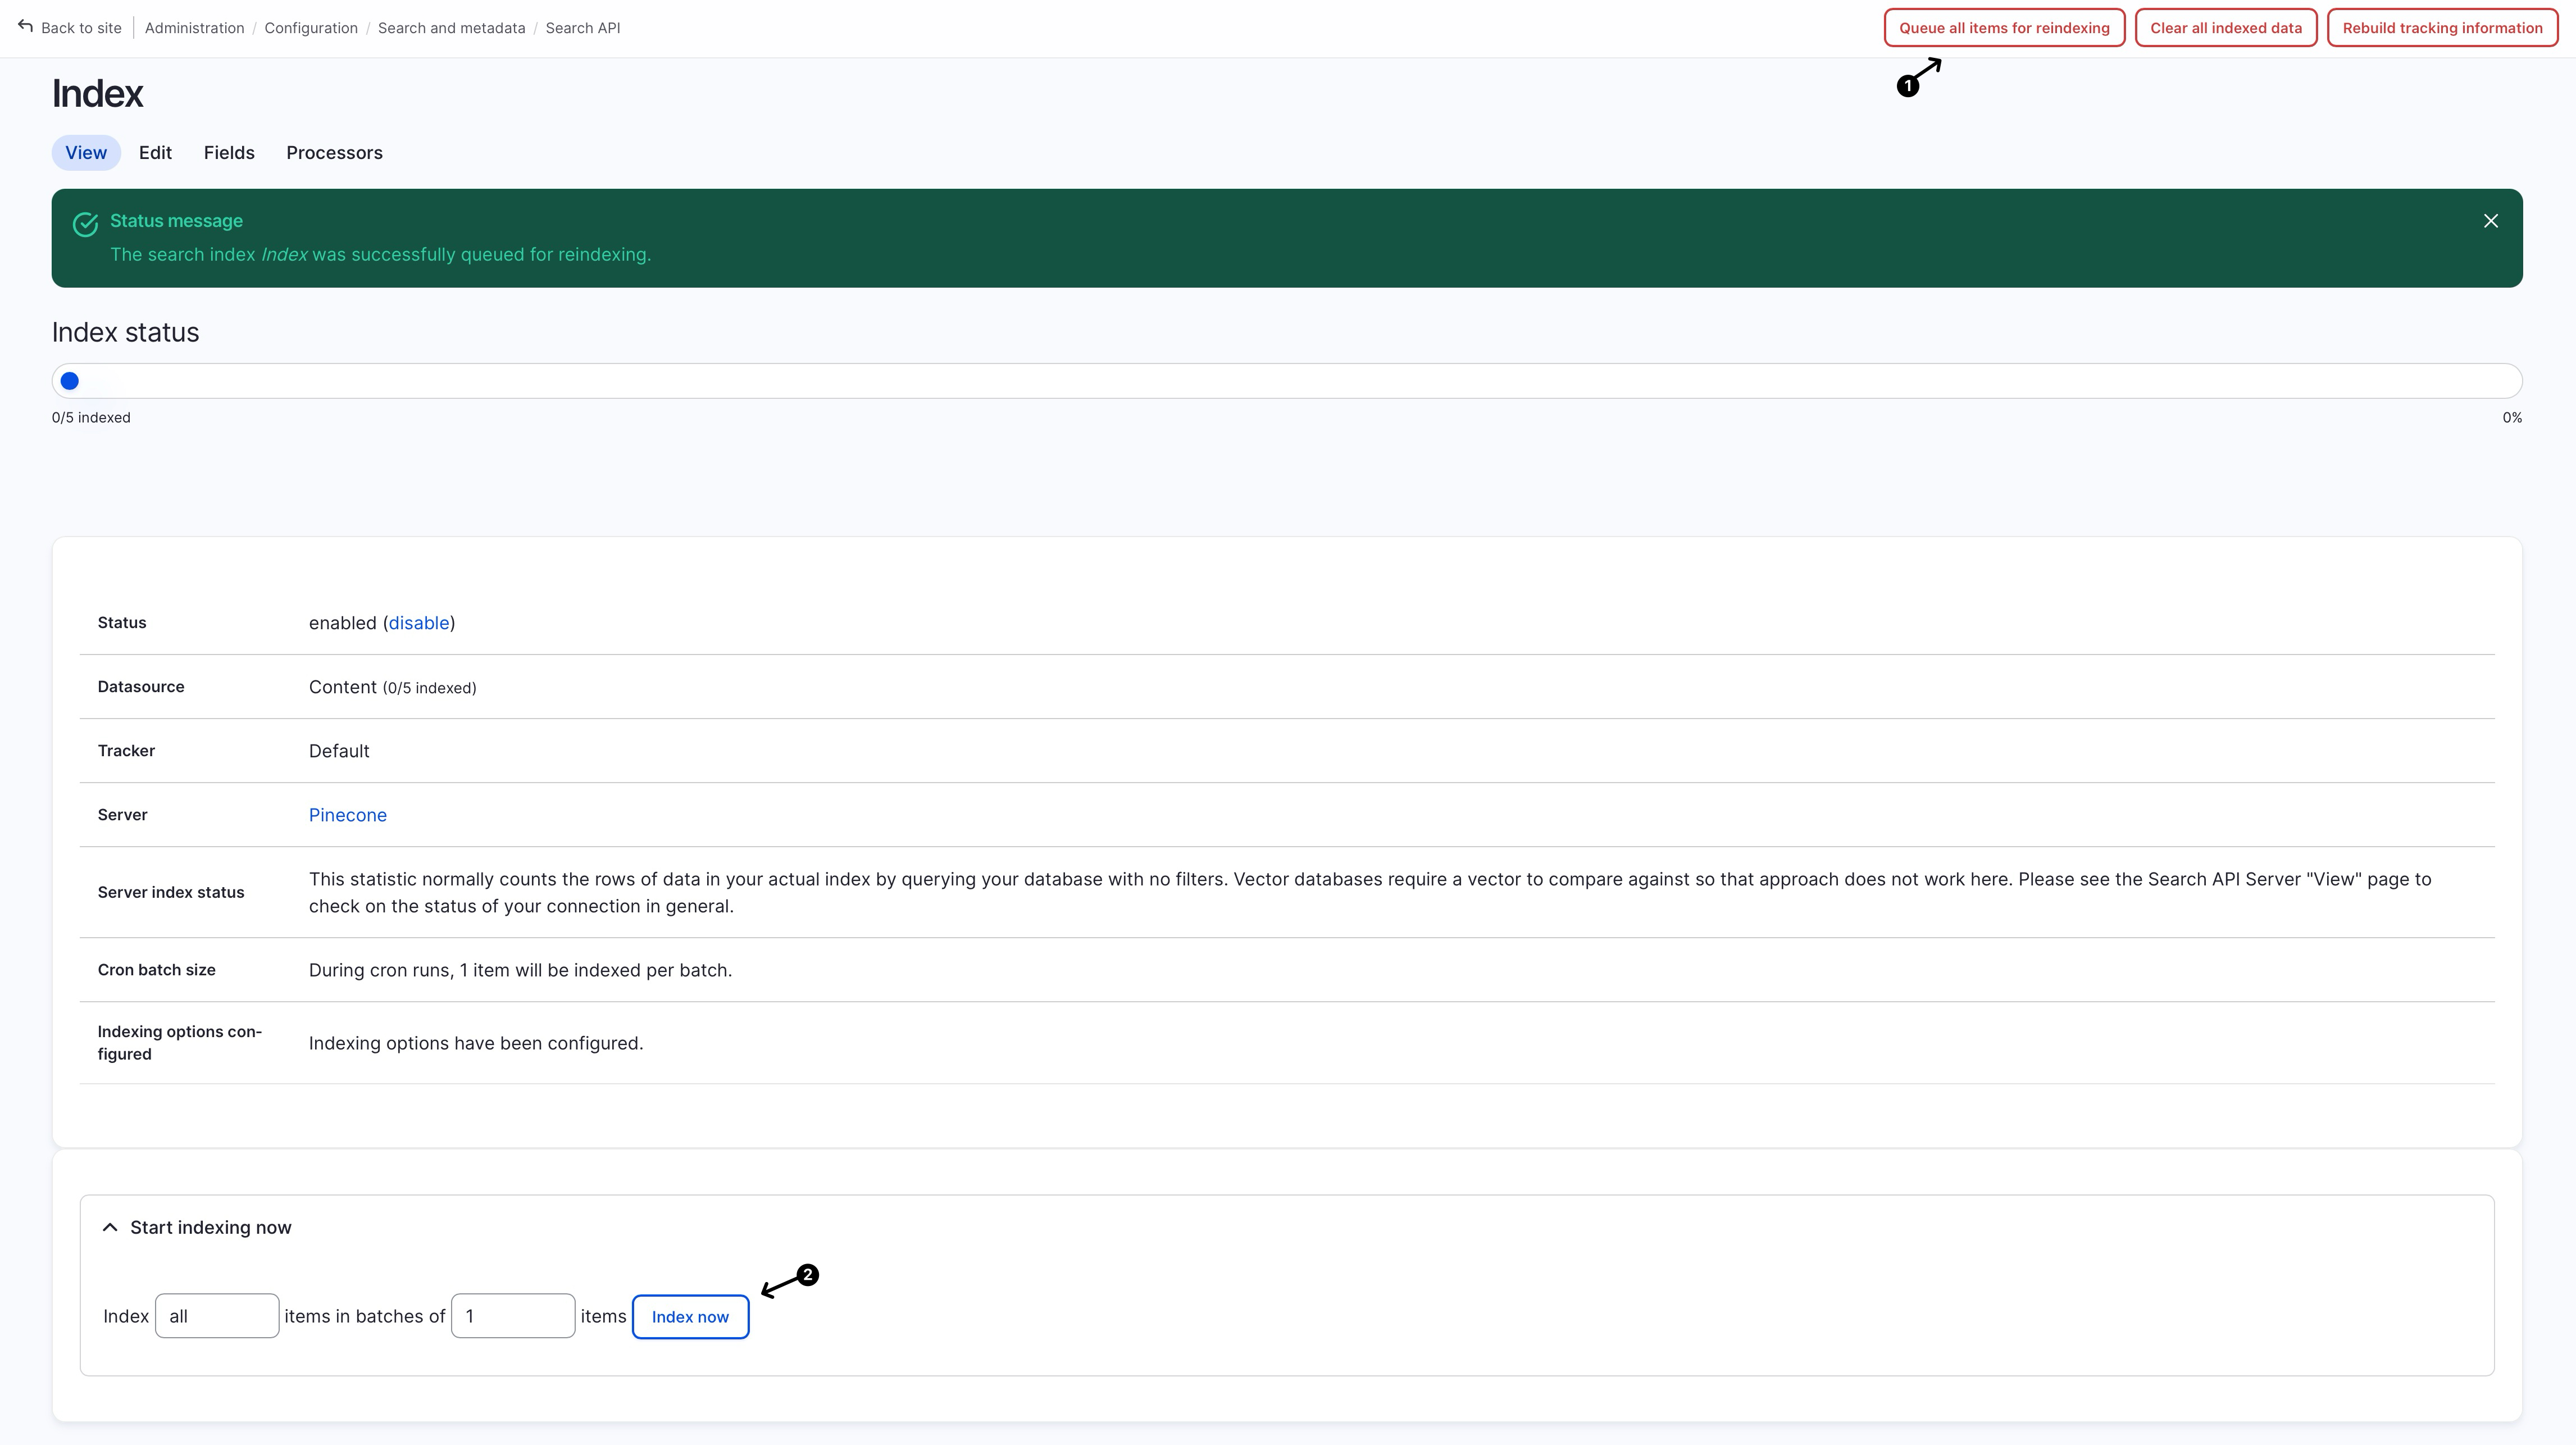
Step-3: Index Content
Go to the index we just created in the previous step, and click on the “Queue all items for reindexing” followed by clicking on “Start indexing now > Index now”:
Once the index is completed, you should see your indexes appear in your Pinecone database:
(if not then you may have made a mistake in one of the previous steps)
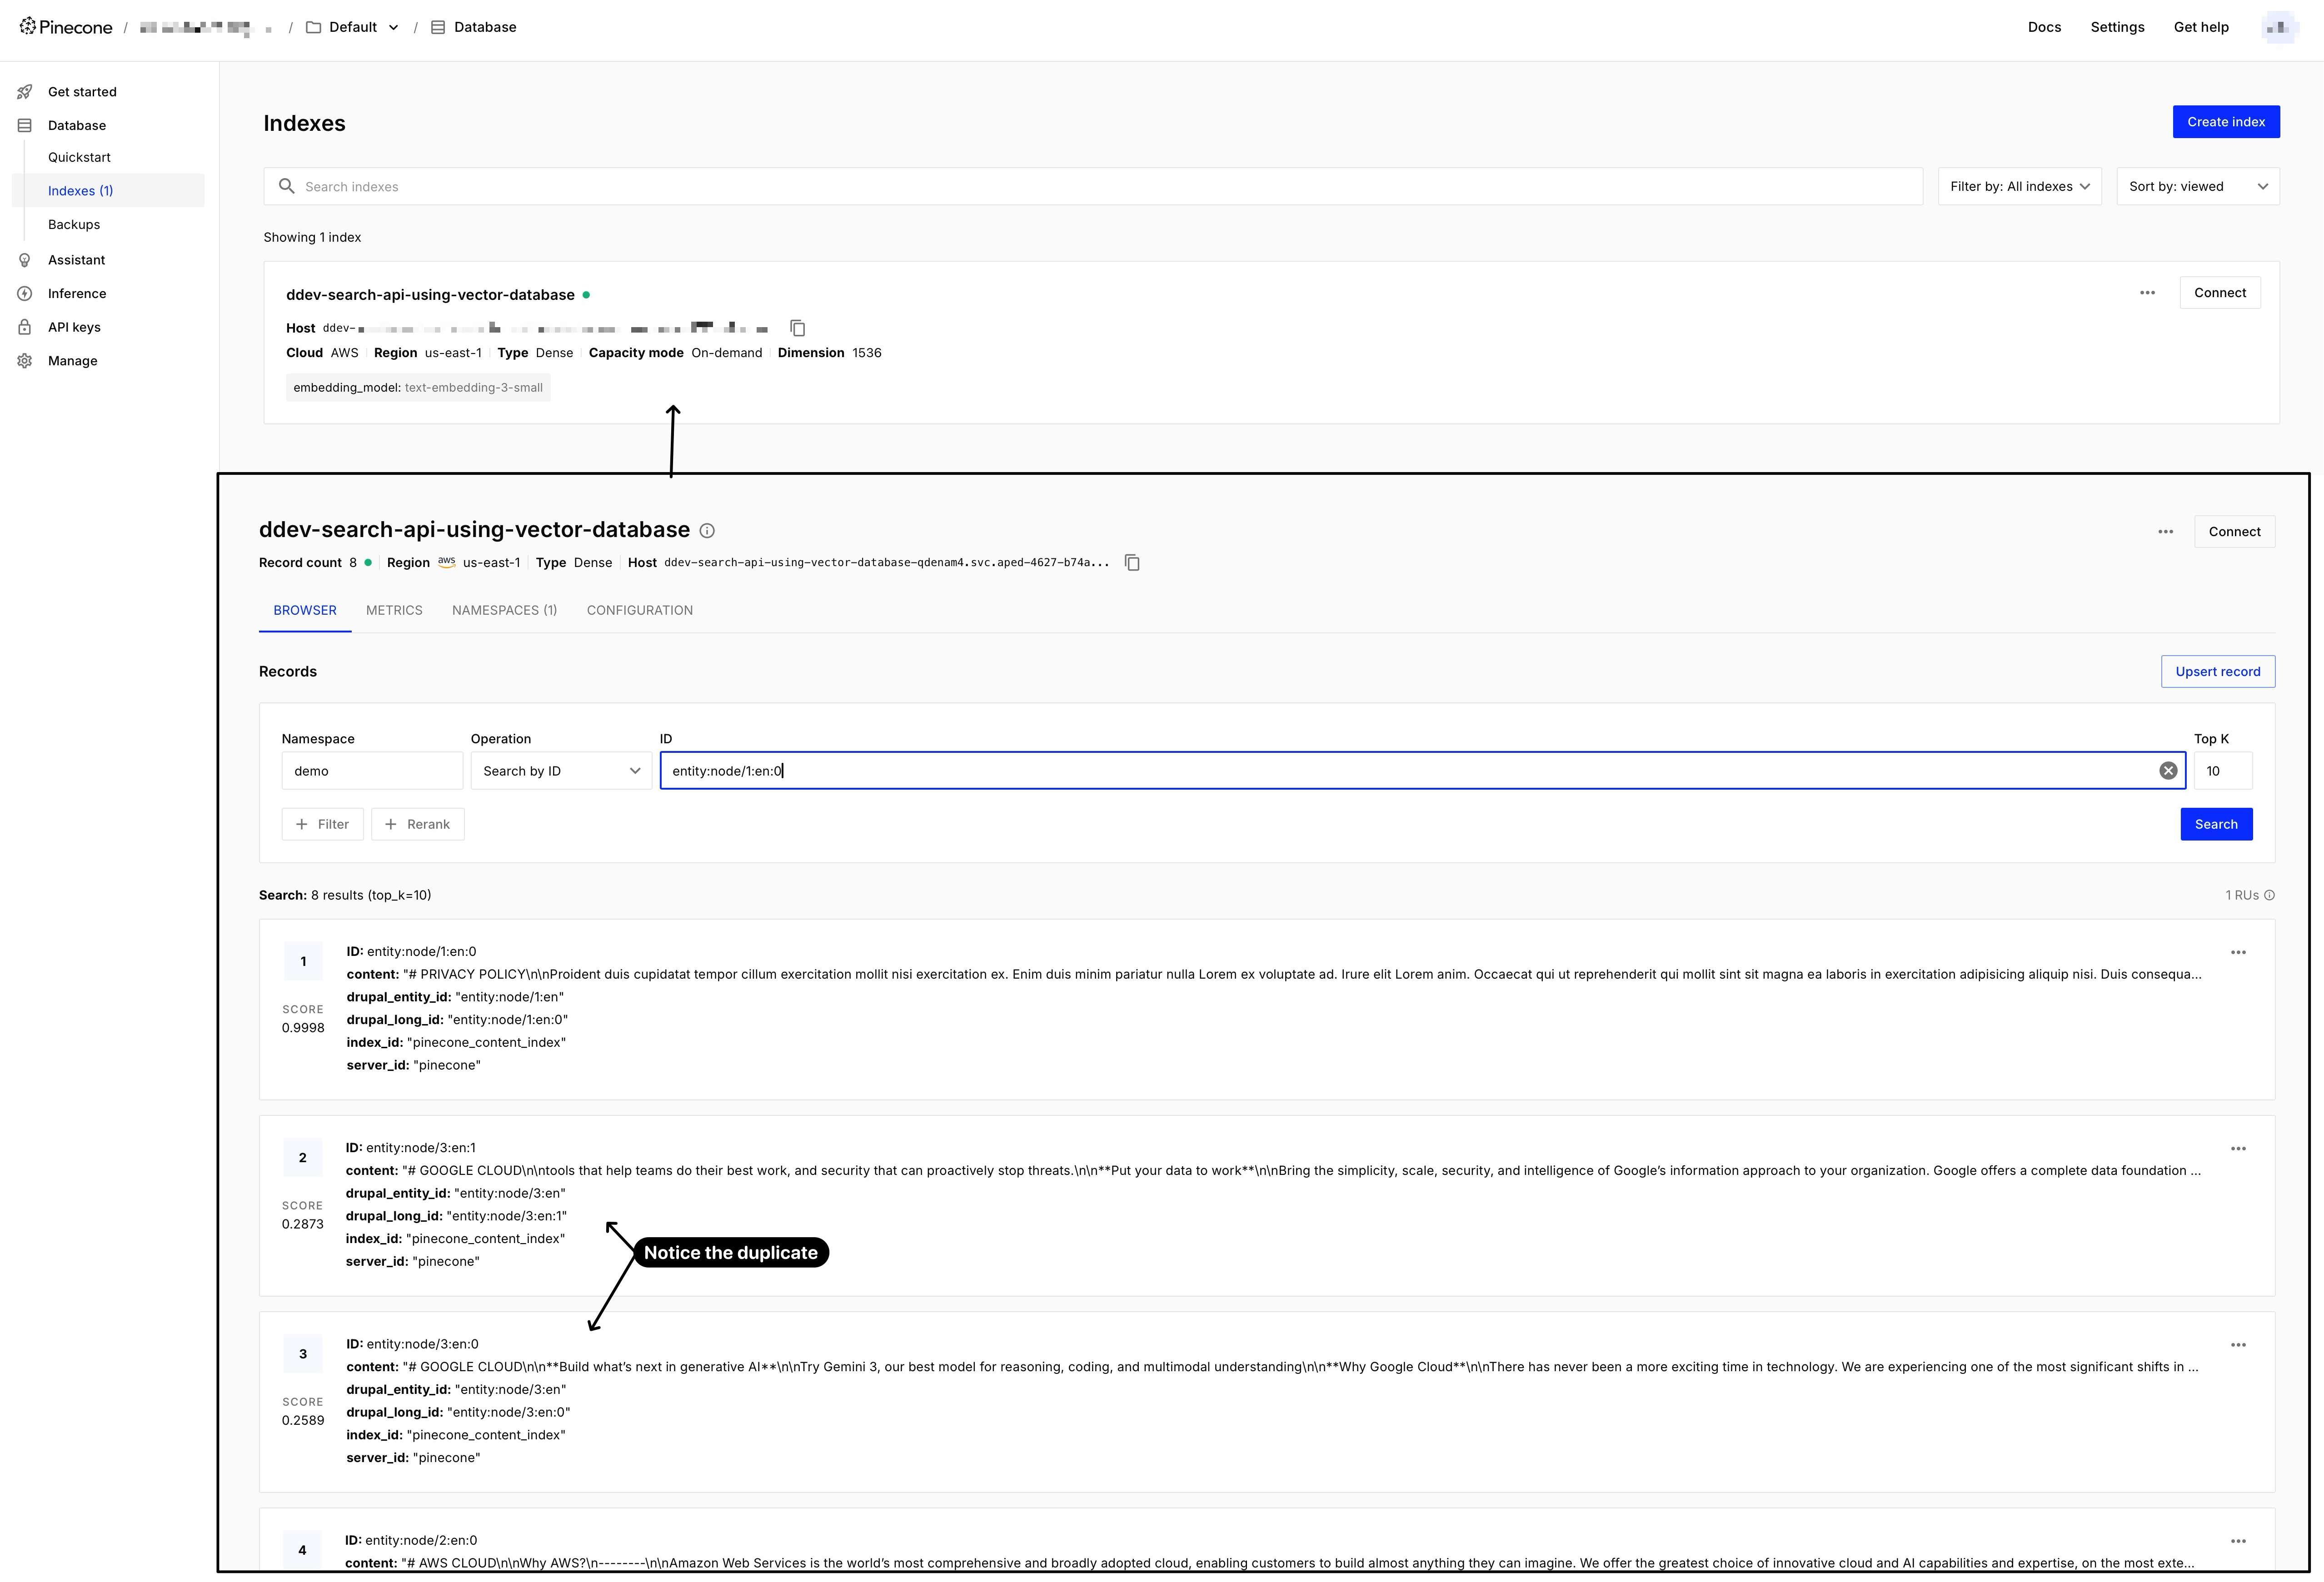
You might notice some duplicate nodes (same node having multiple entries), this is because their content is too long to be included in a single entry, and hence will need to be chunked before storing. If you recall we earlier have set “Title” to have “Contextual Content” being its indexing option, this is because we want to include it in all the entries (as you can see on the item 2, and item 3, both have #google cloud title included in its content)
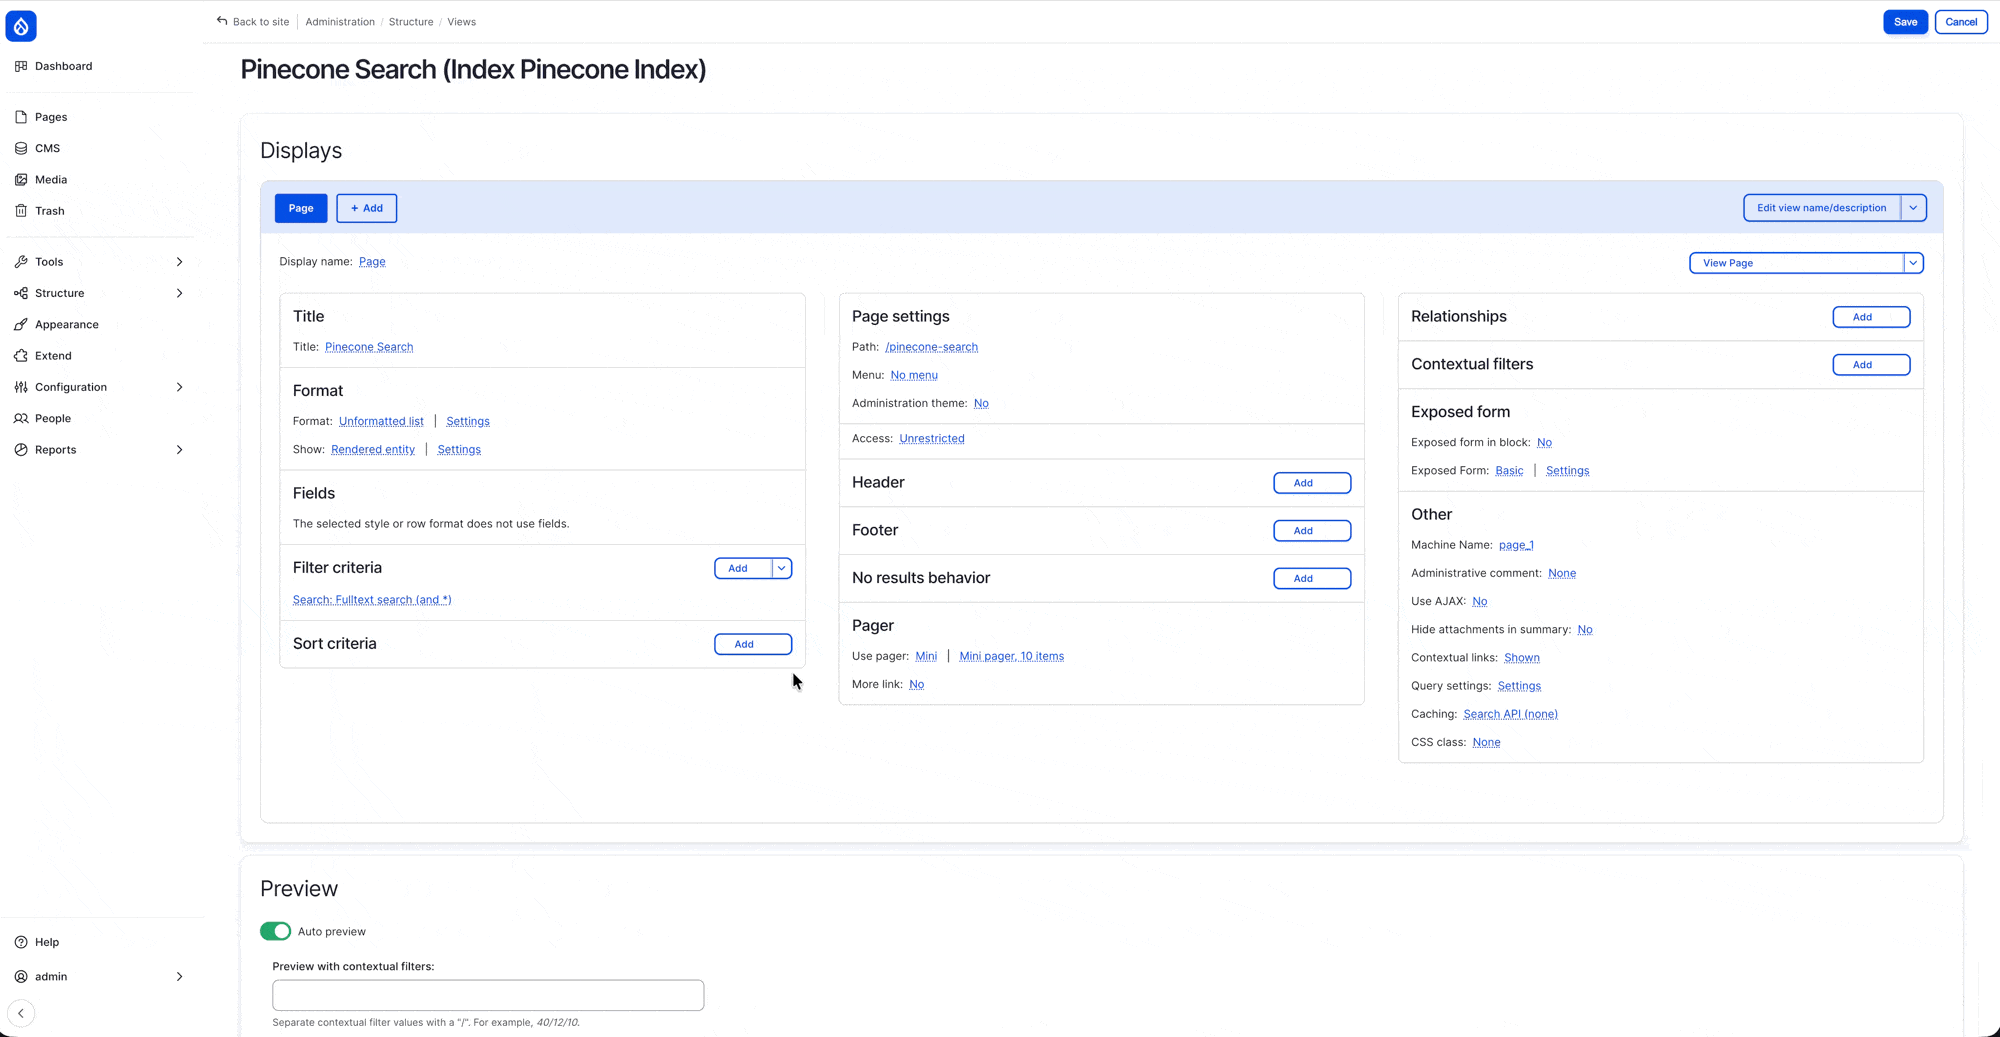
Step-4: Create Search View
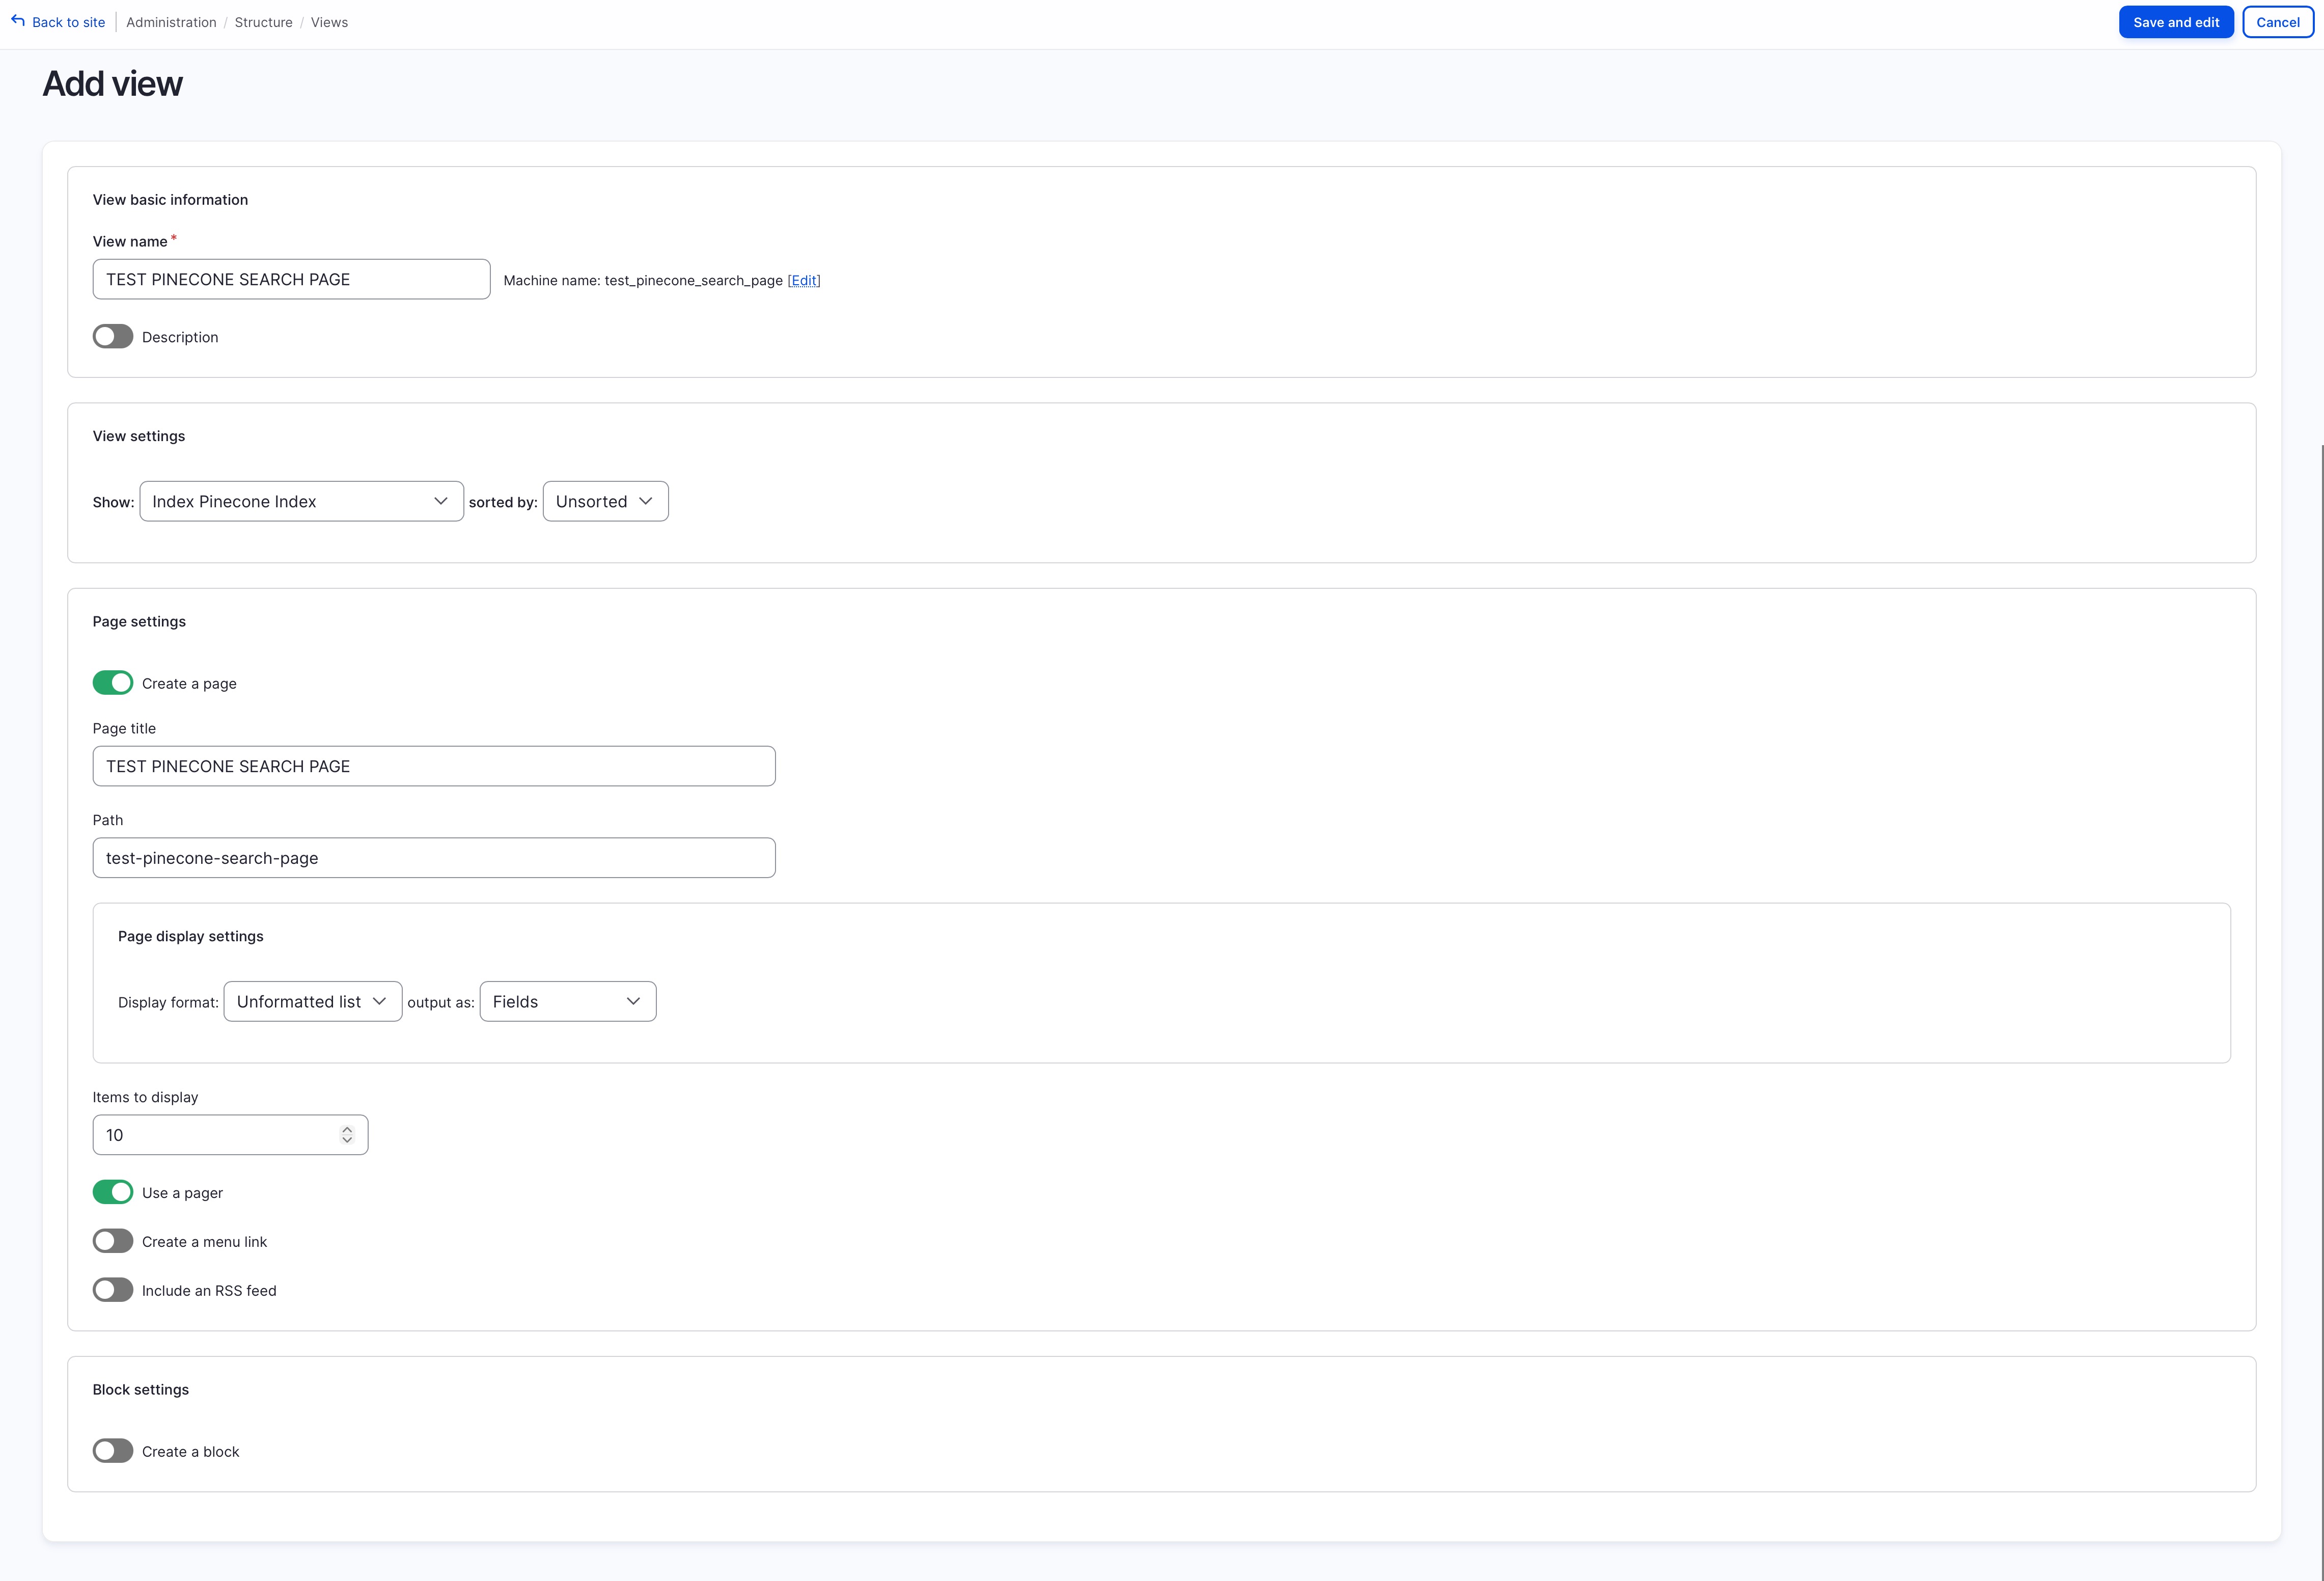
Finally we’ll create a search view using the newly created index, go to view and click on “Add View”:
- View Settings: choose “Show: Index Pinecone Index” (this will be “Index” + “your-pinecone-index-name”)
- Page Settings: toggle on create a page
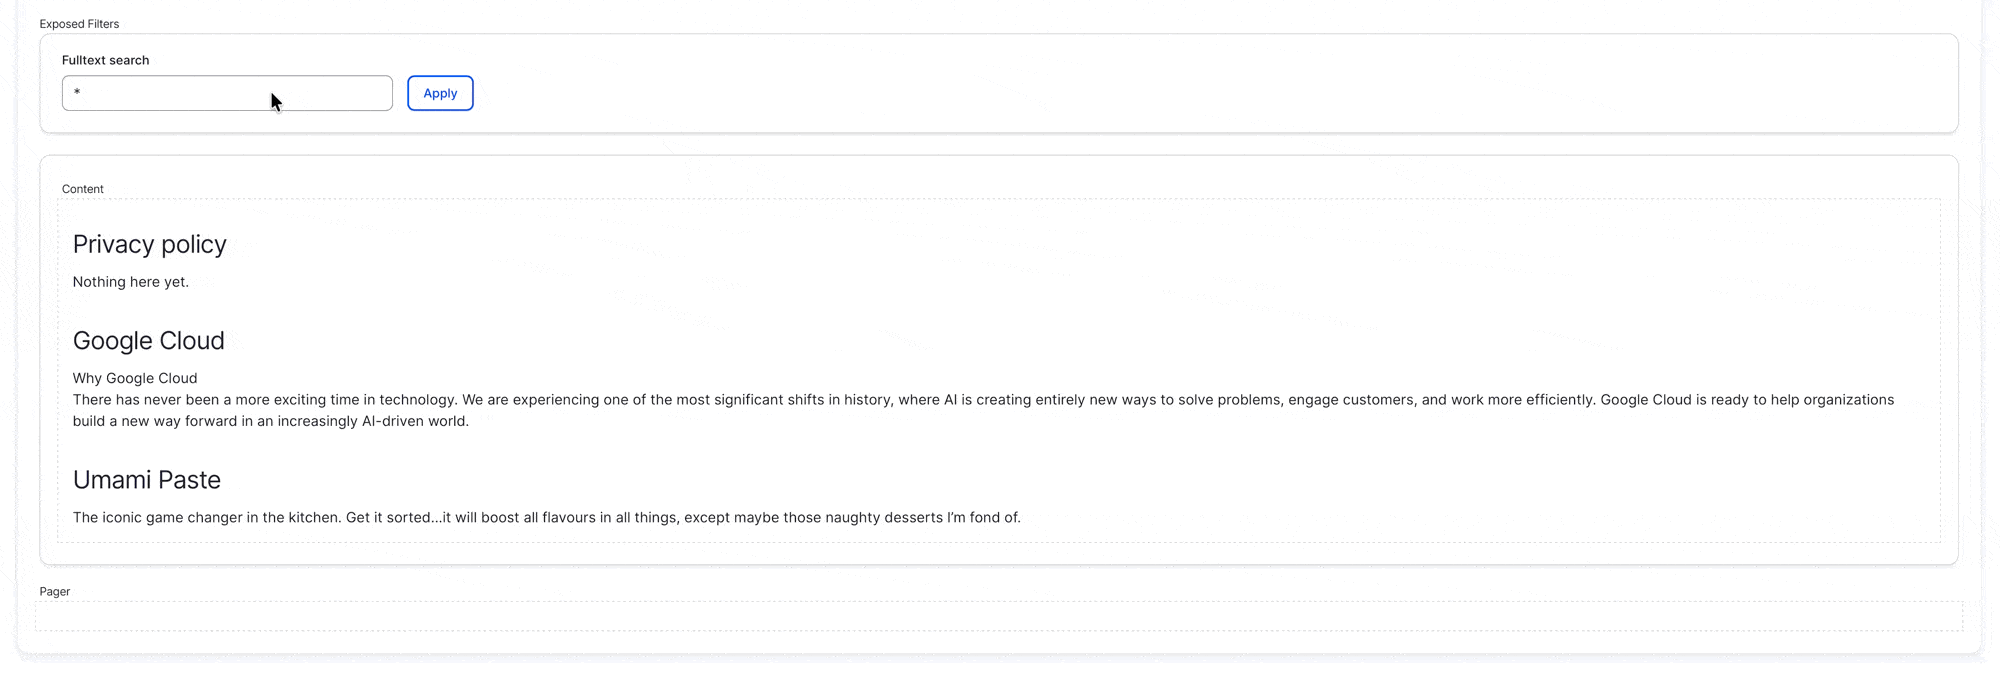
Once the view is created, add the “Fulltext Search (Search)” as an (Exposed) Filter Criteria, and save the view.
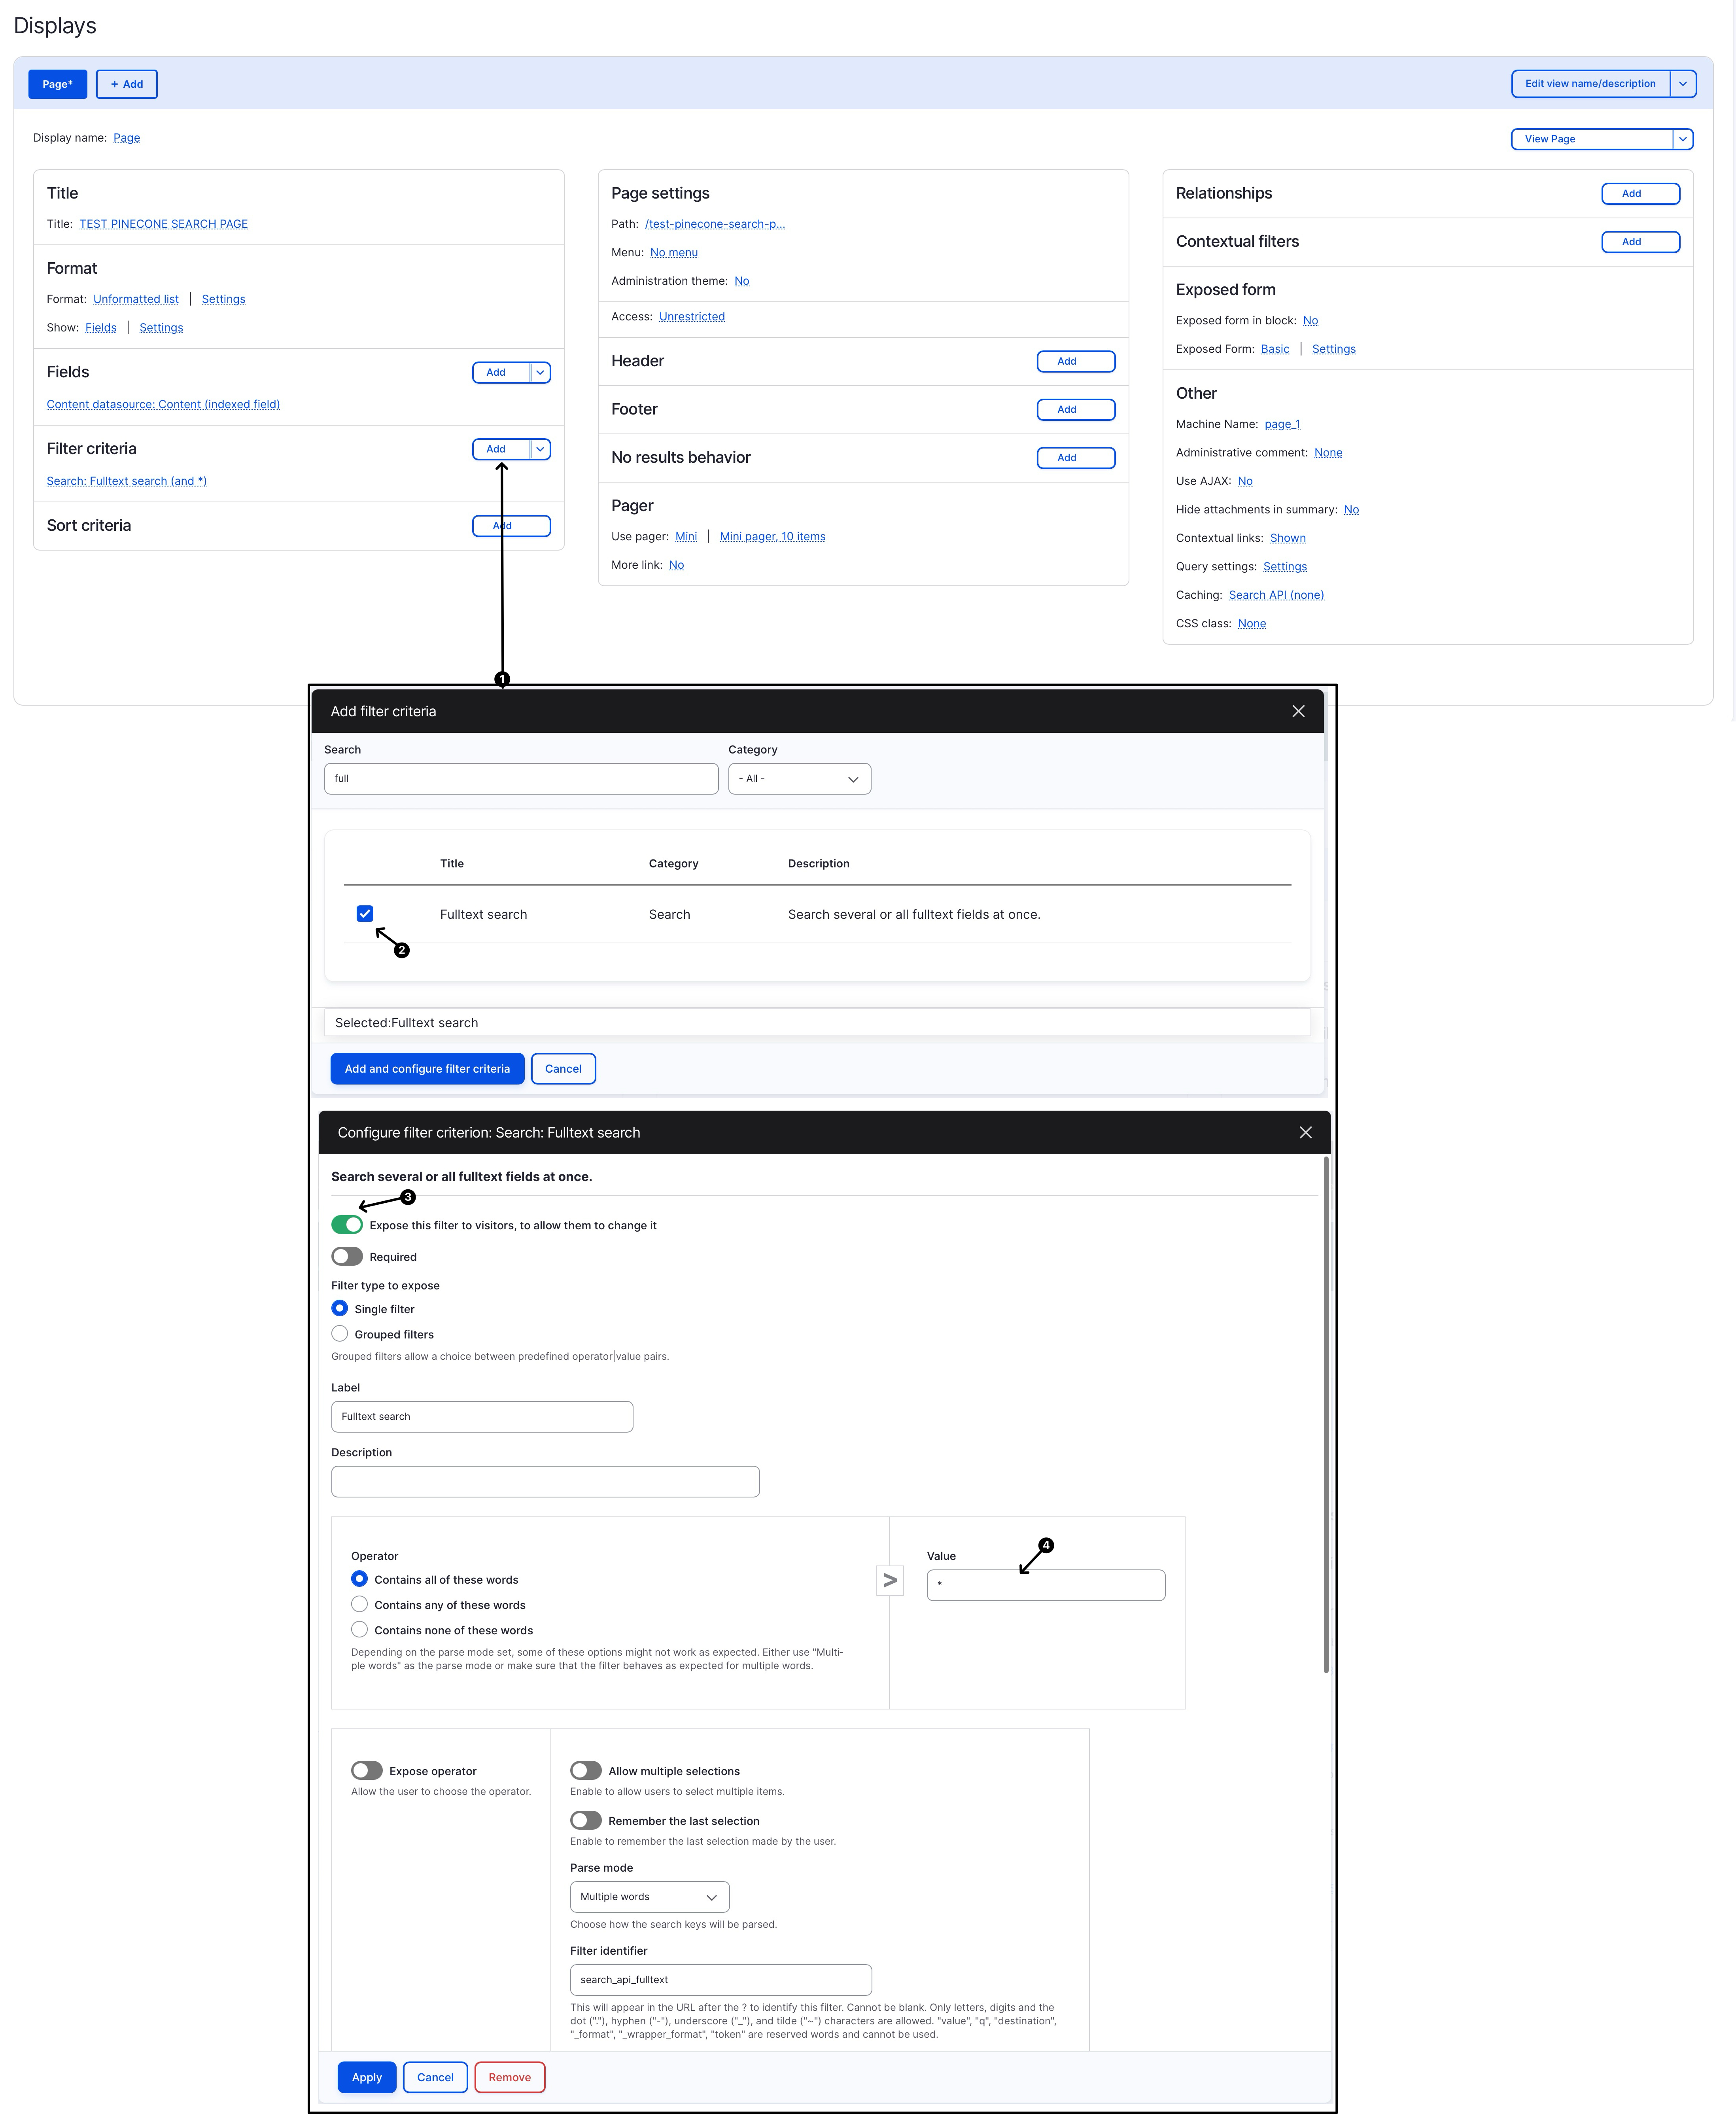
(* note that if you don’t set anything it will return no result, as no query has been provided, so I have set * to be the default search query)
Step-5: Review Final Outcome
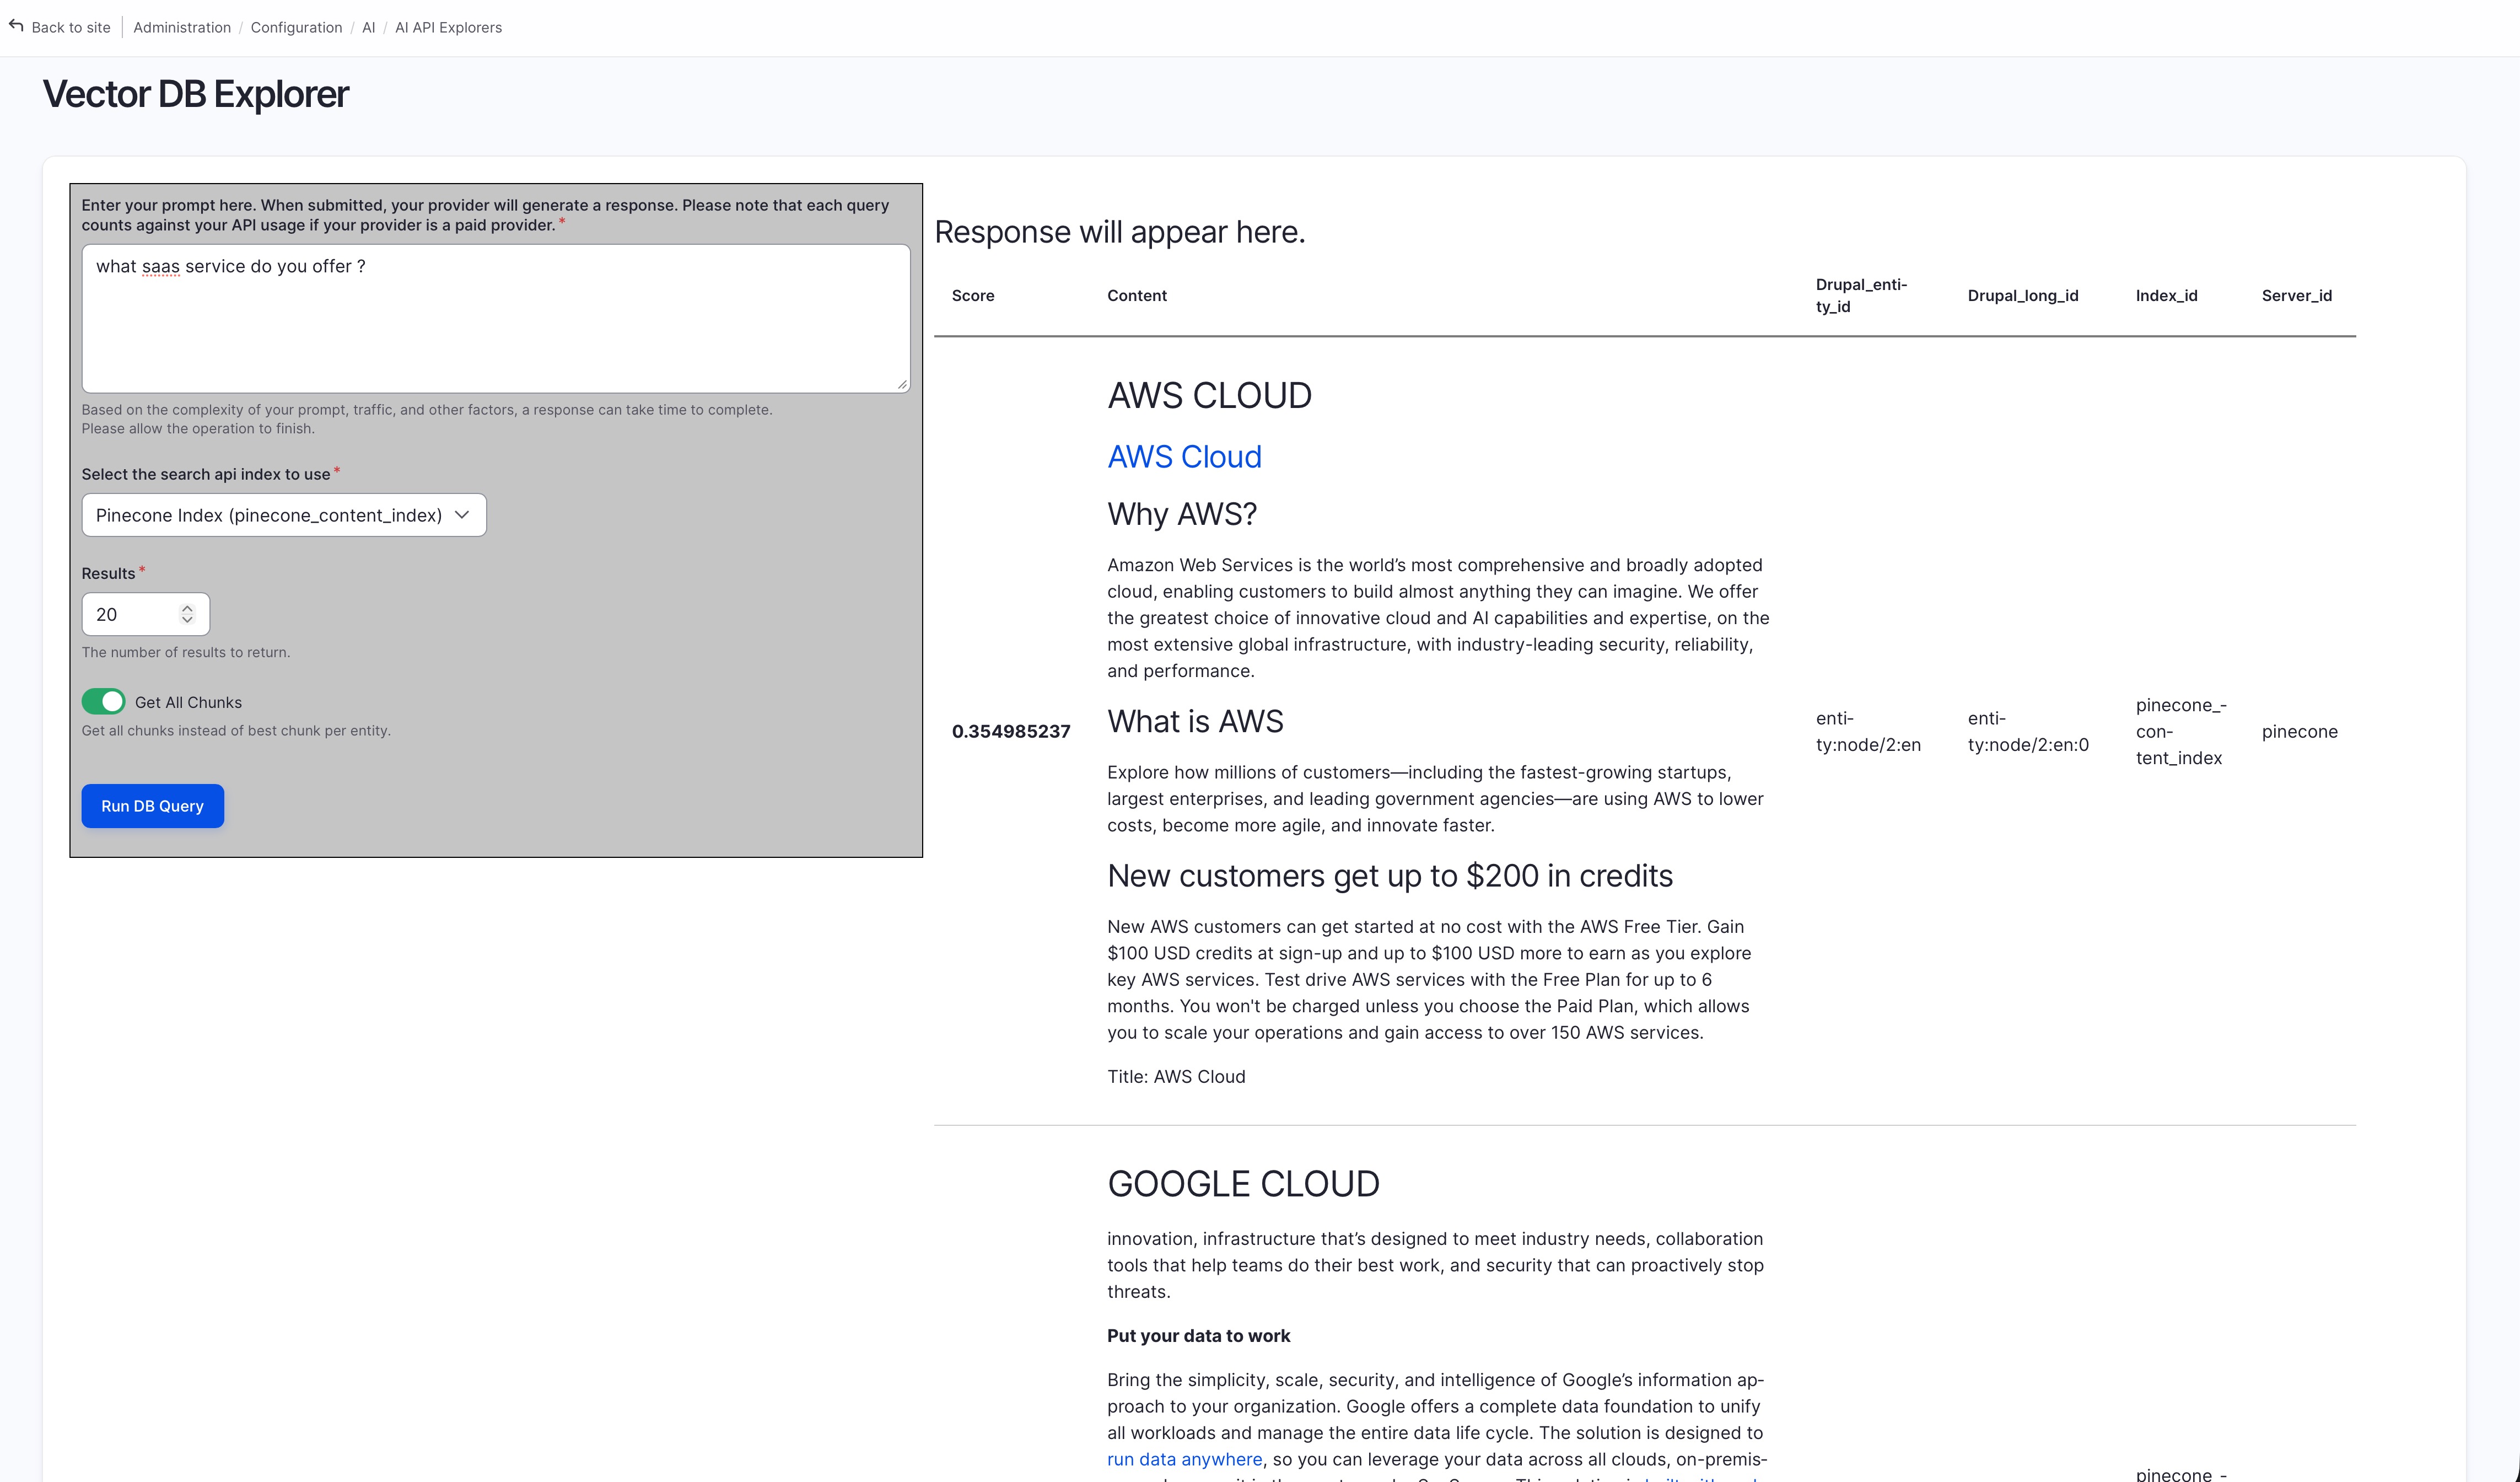
Once the view is completed setup, you will be able to search using natural language (instead of the keyword search/matching of the traditional solr/database search), see below GIF demonstration:
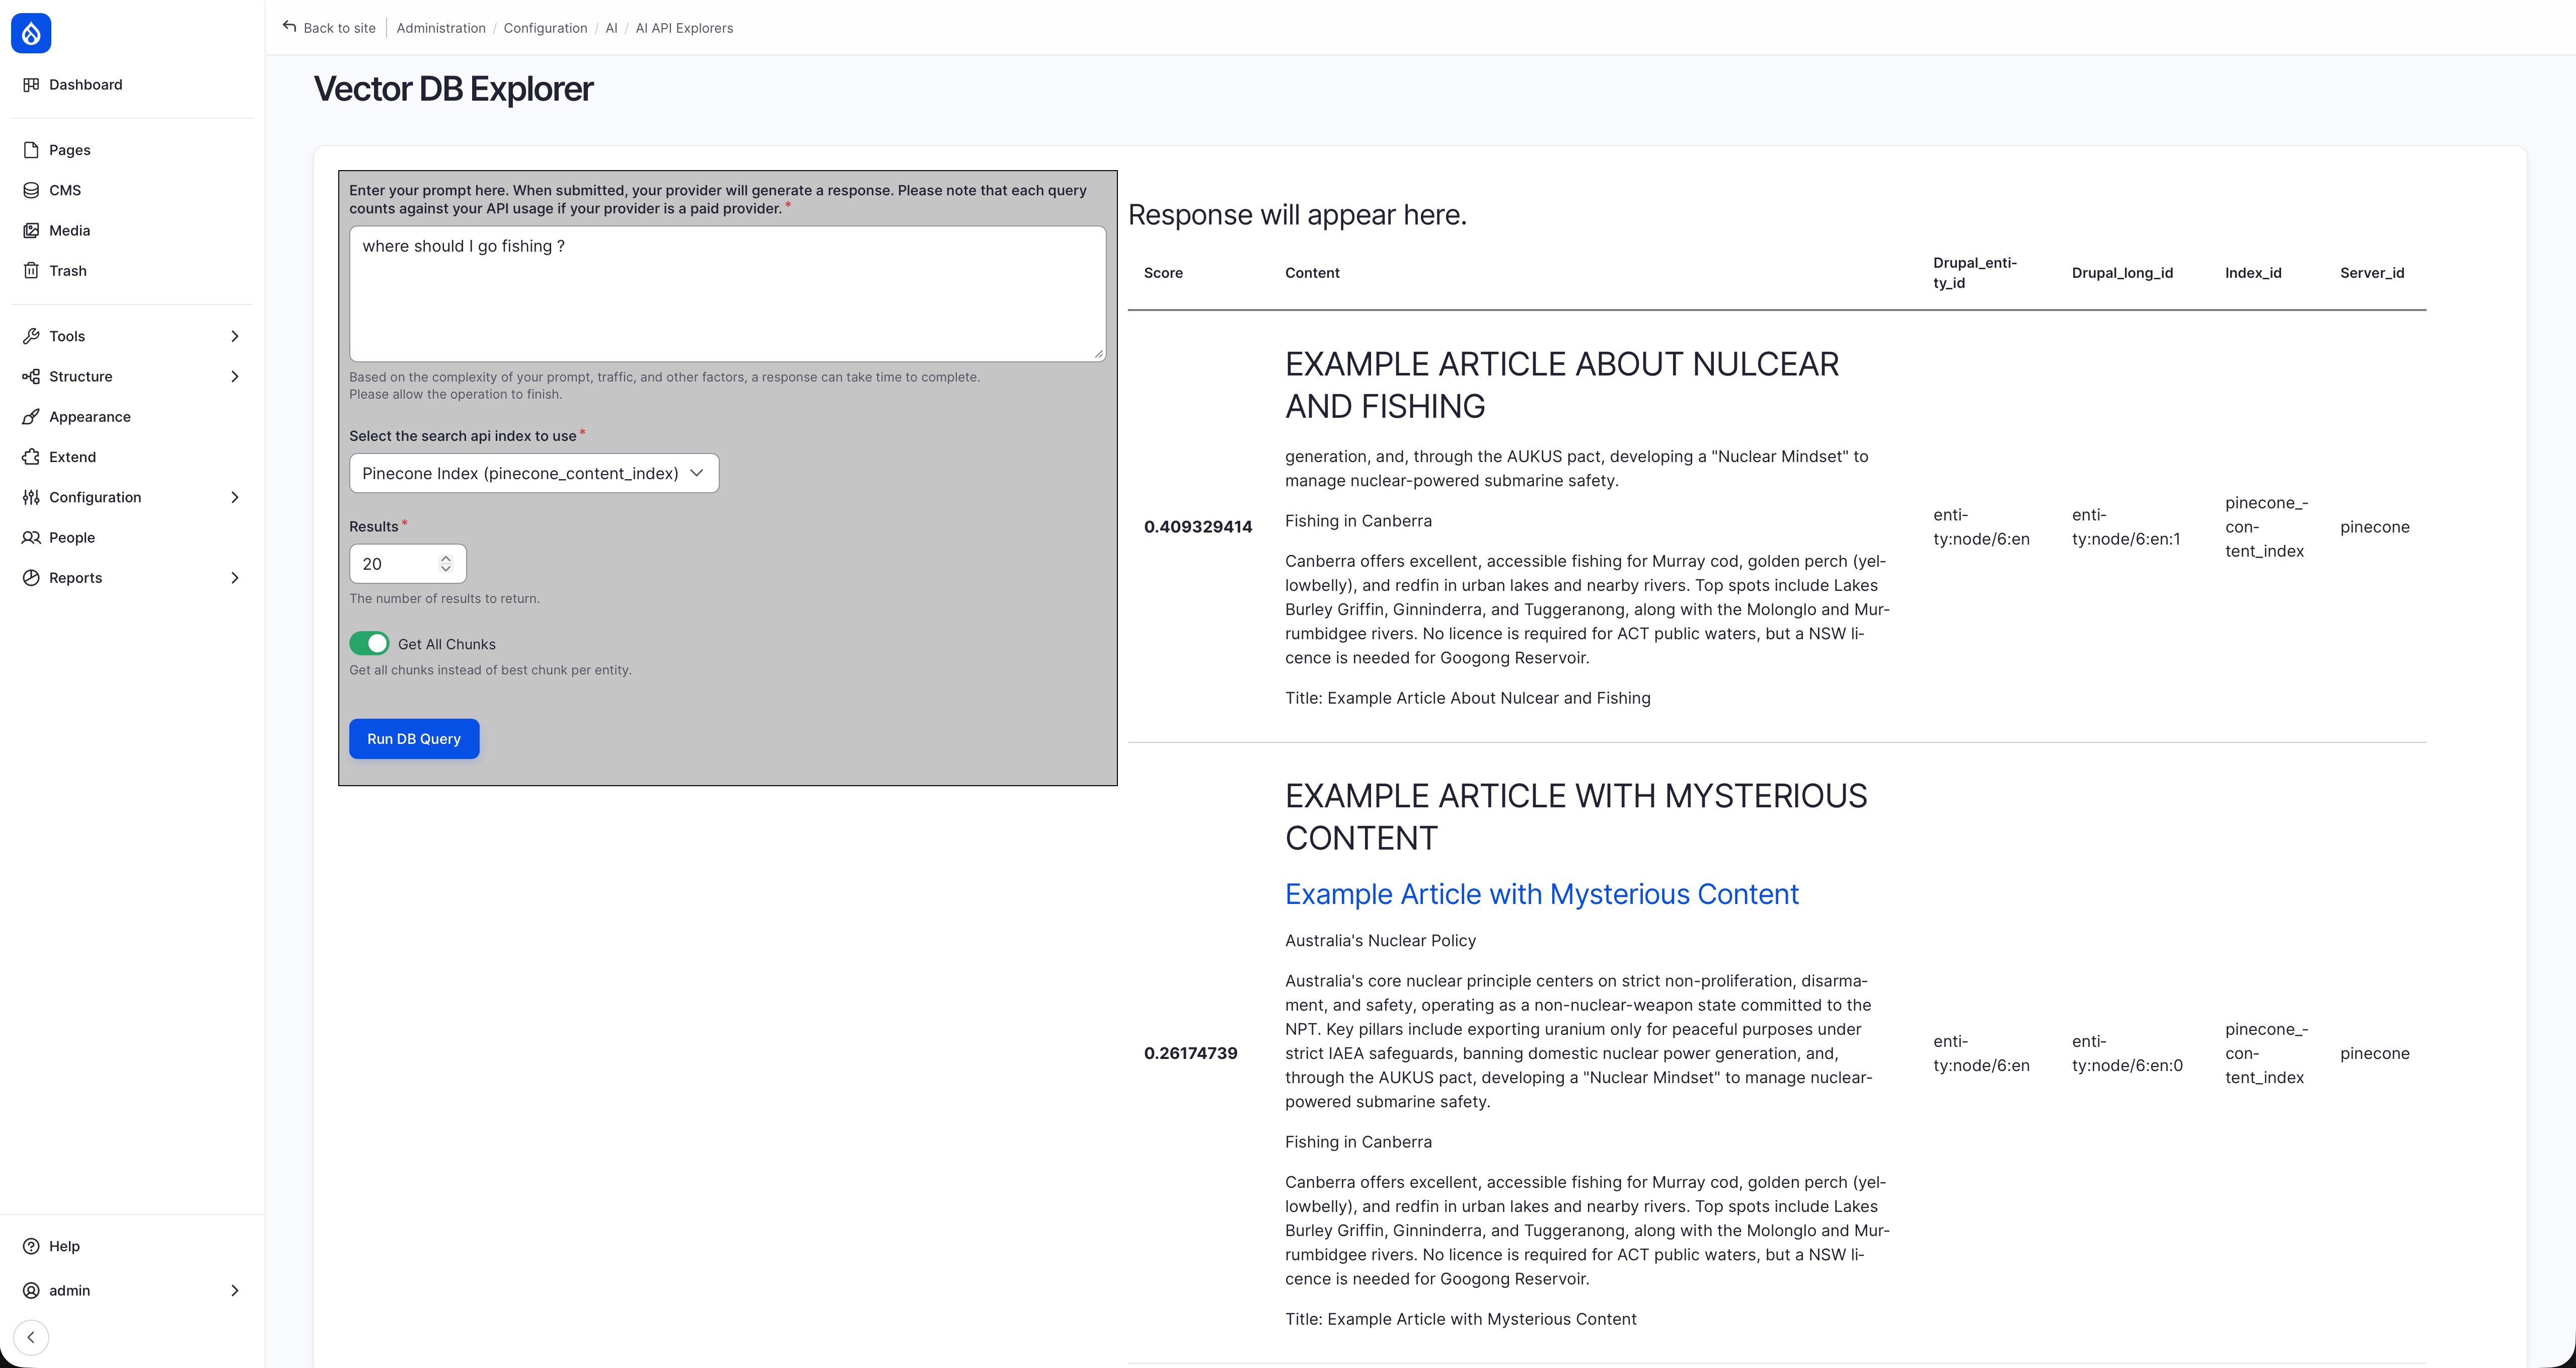
You can also preview the outcome without setting up a view using the “Vector DB Explorer” feature under “AI API Explorer” module:
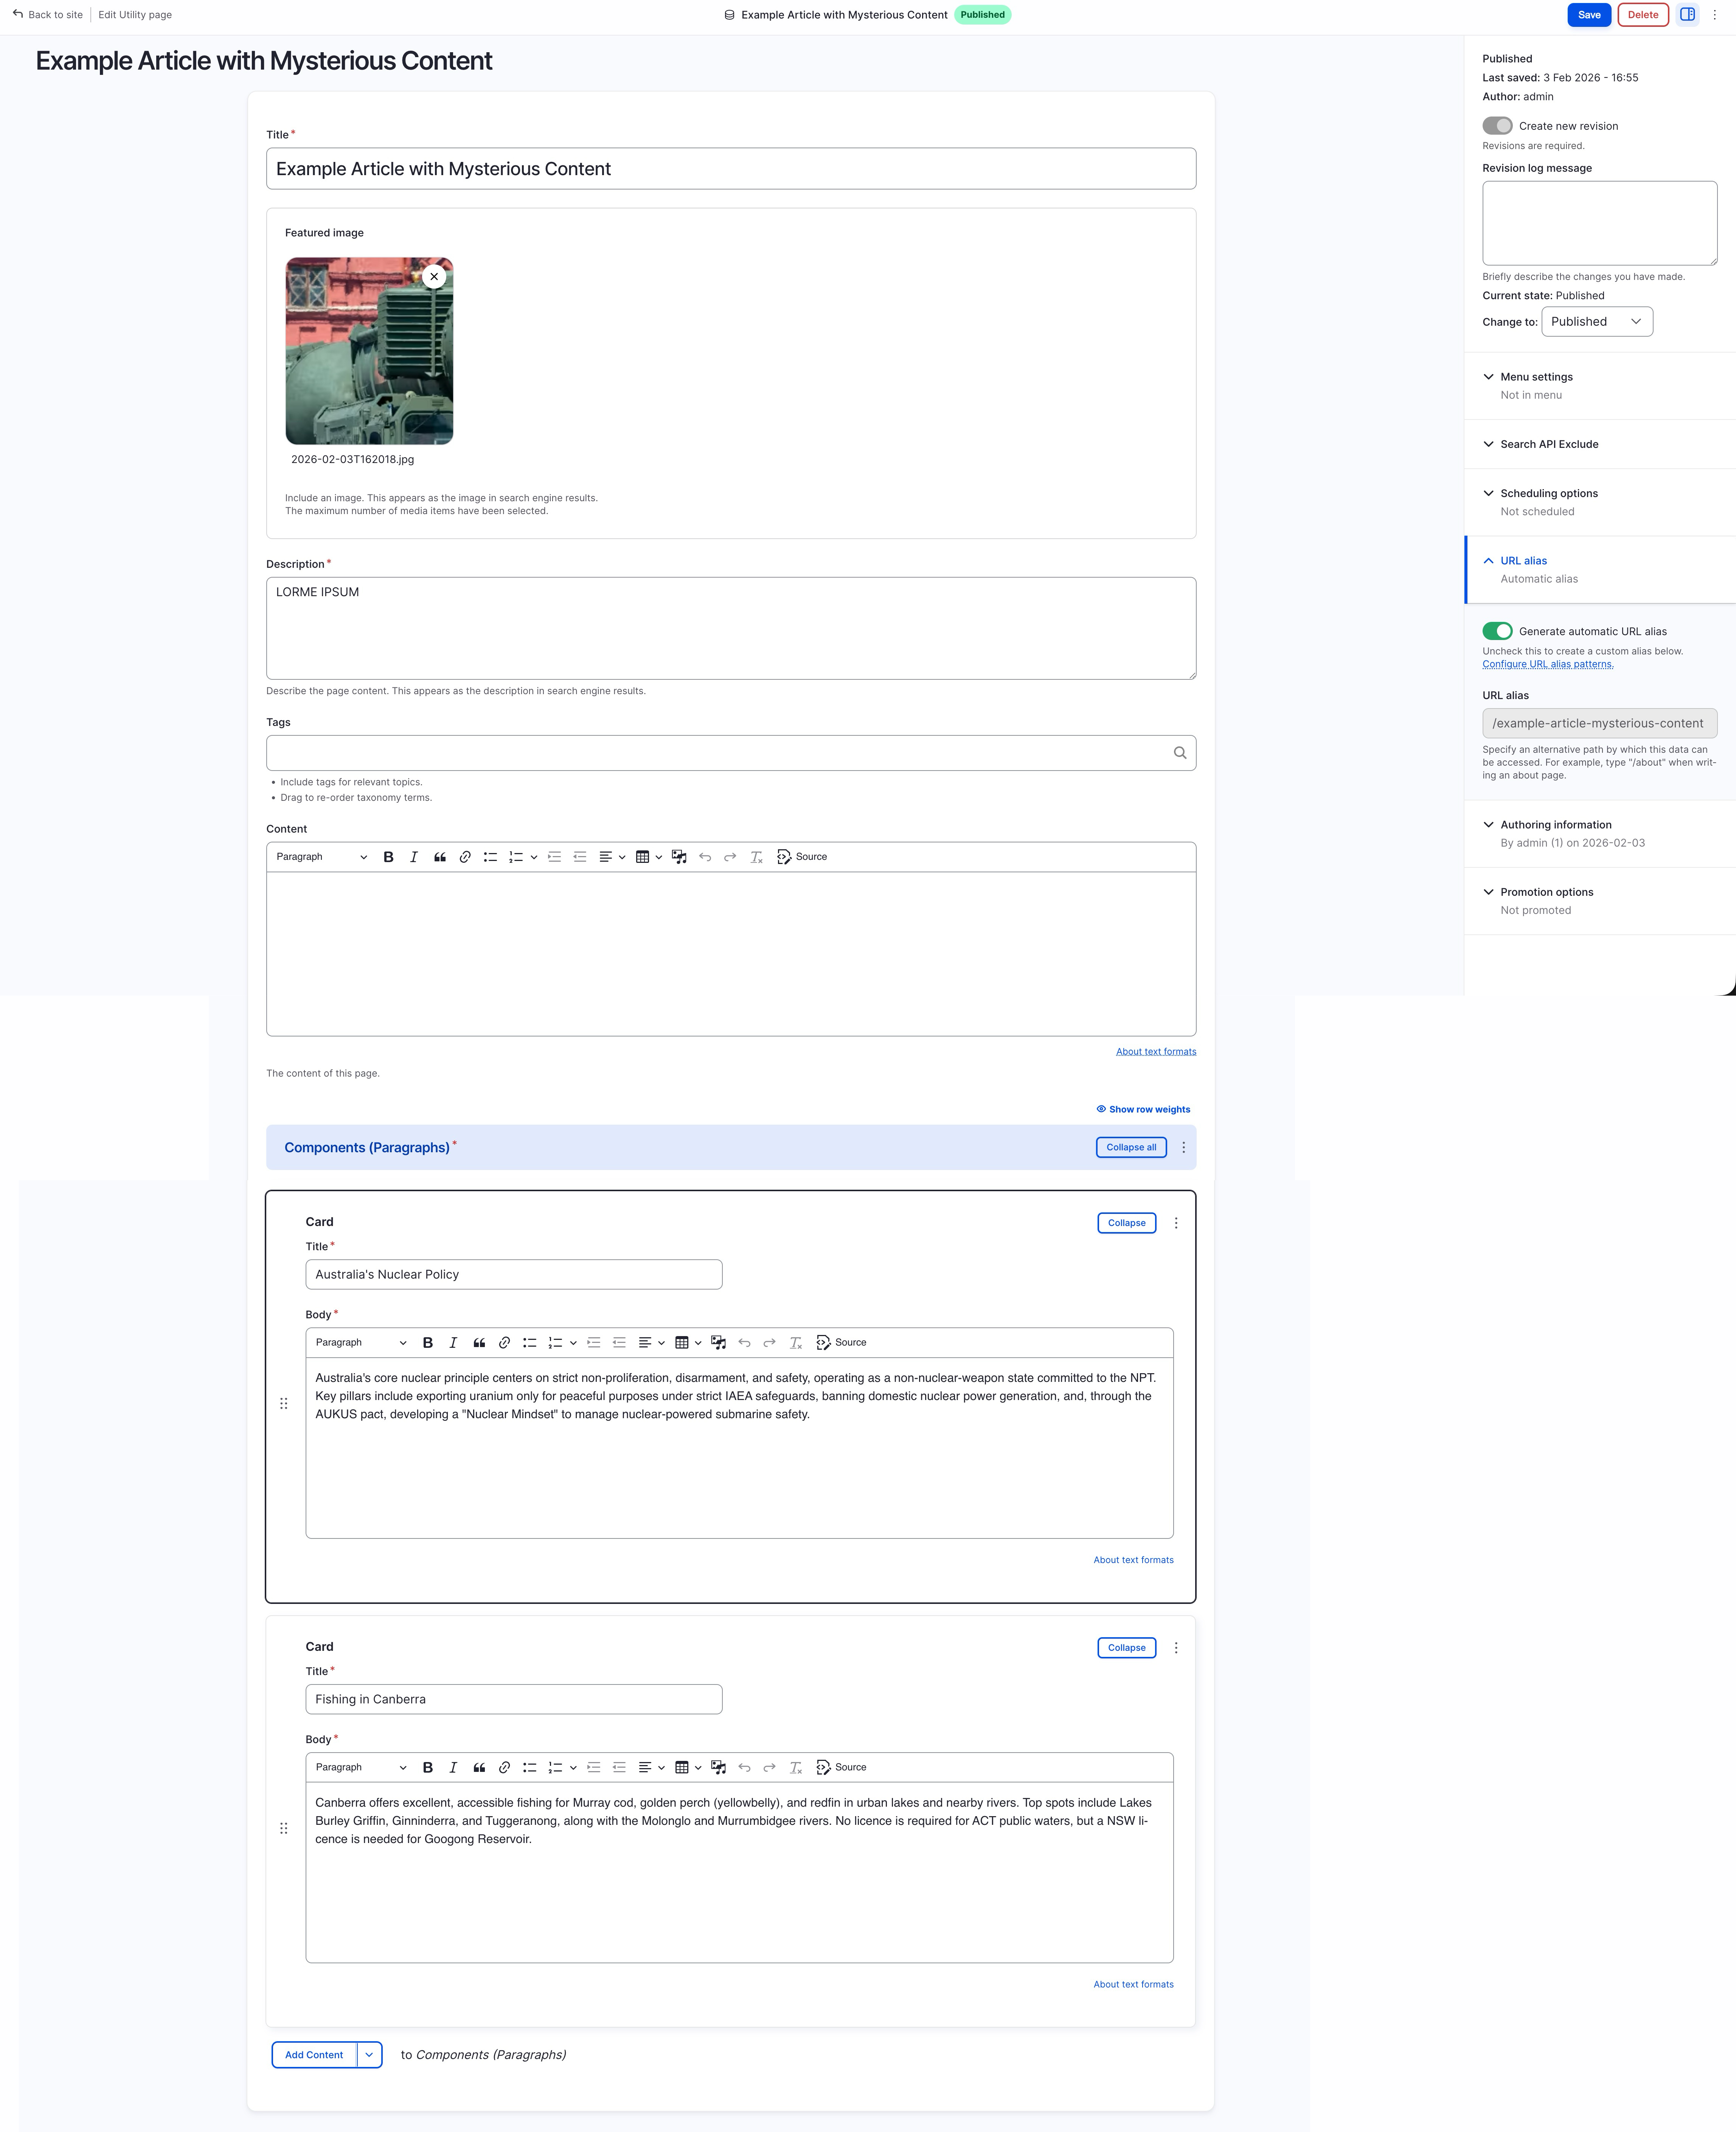
AI Search + Paragraph Module
If you want content with paragraph (i.e. component) to work with AI search, you’ll need to:
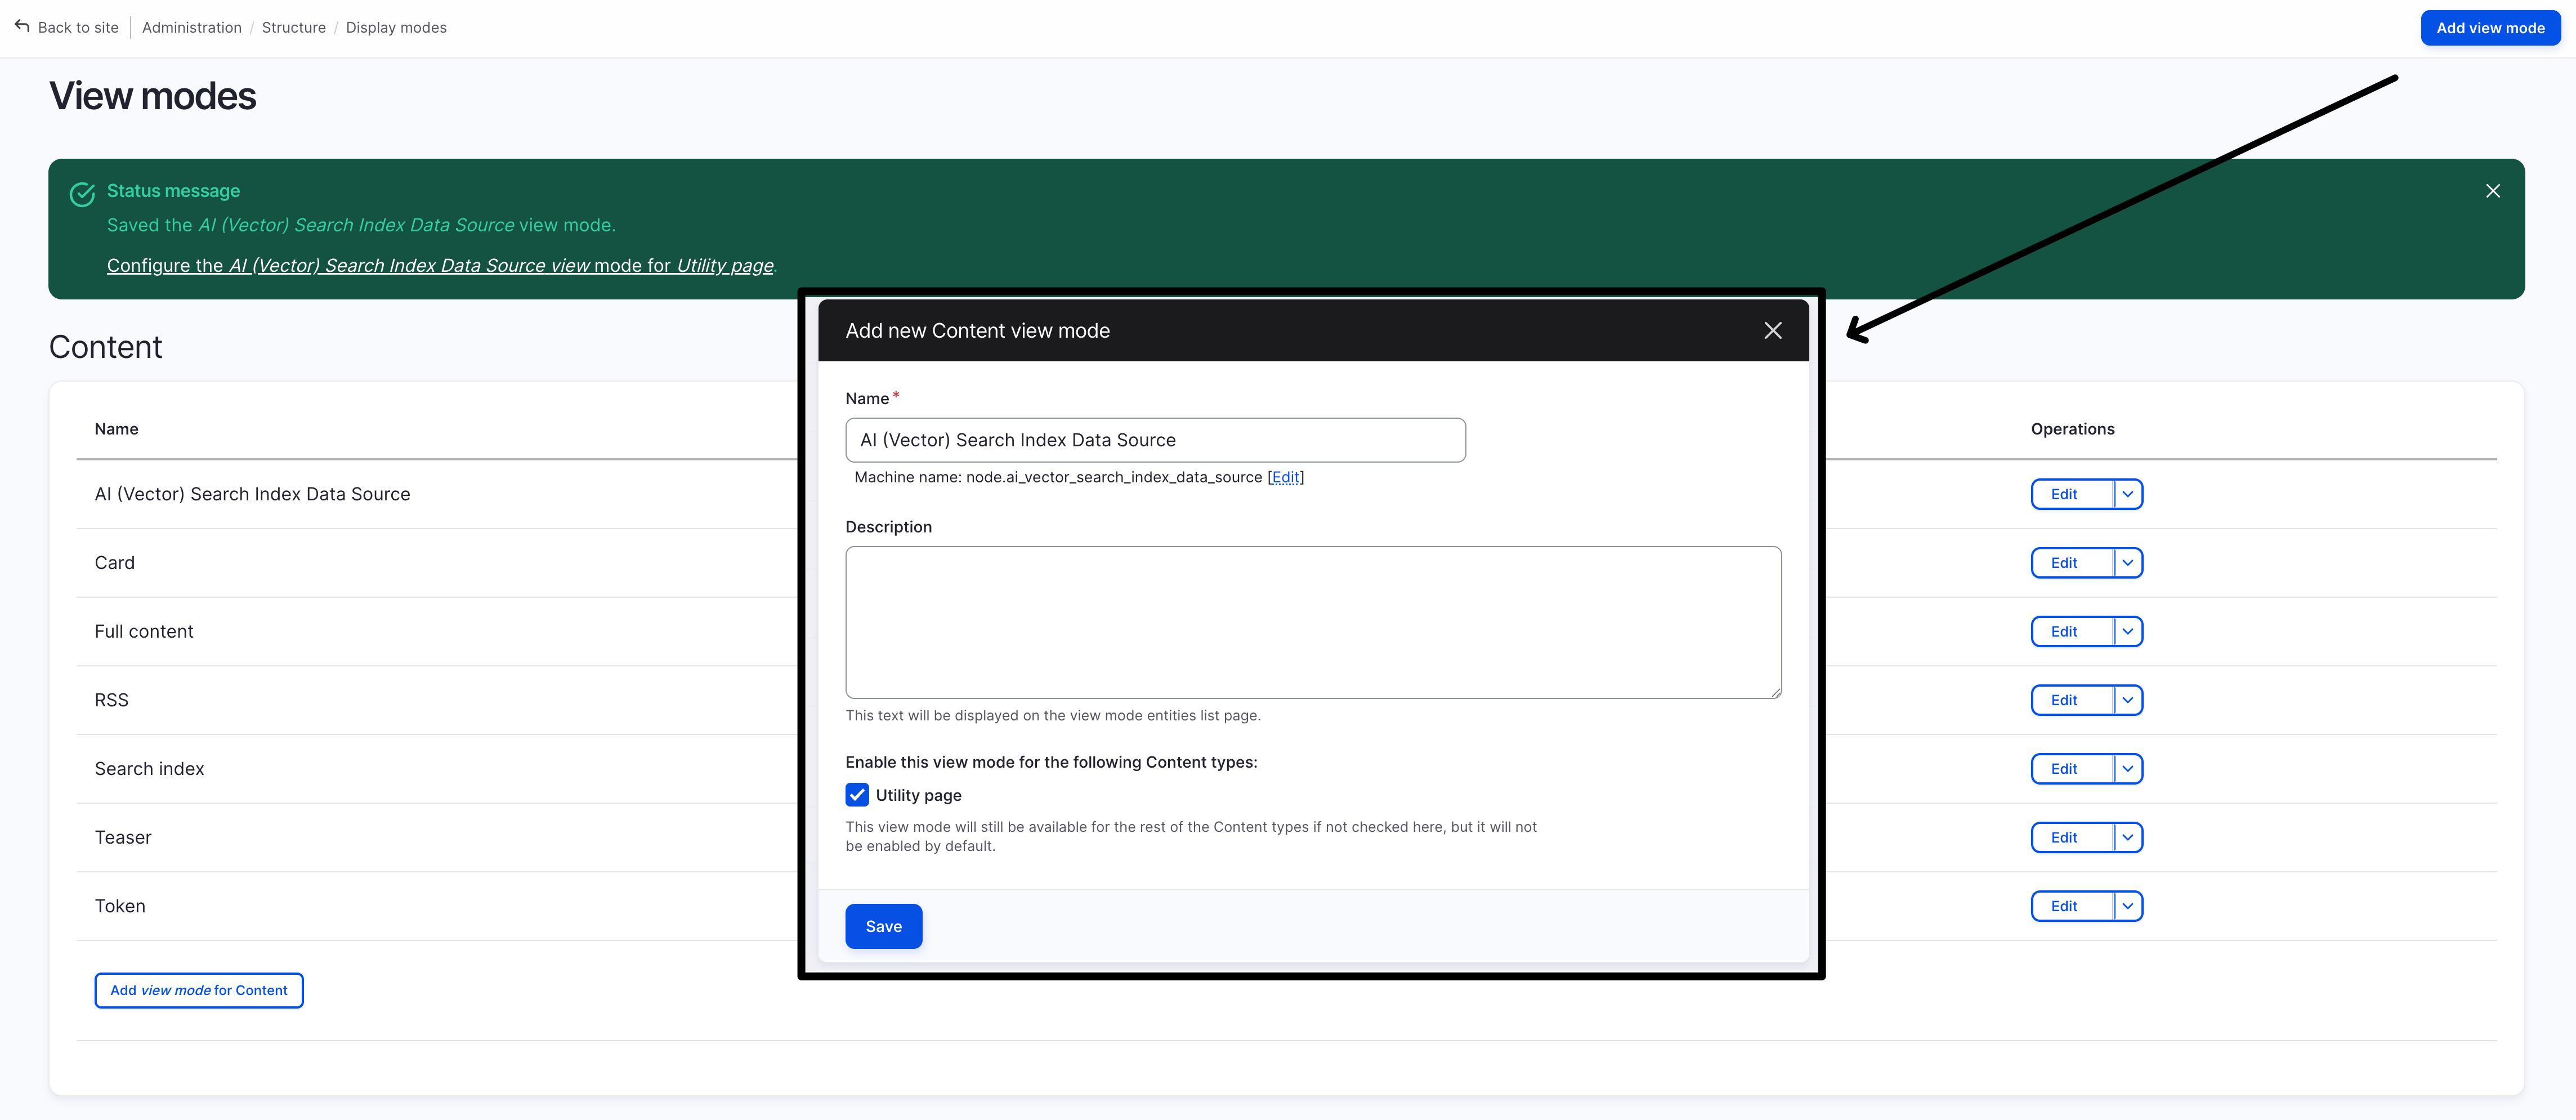
create a new view mode “AI (Vector) Search Index Data Source” (that will be used as the data-source of Search API during index)
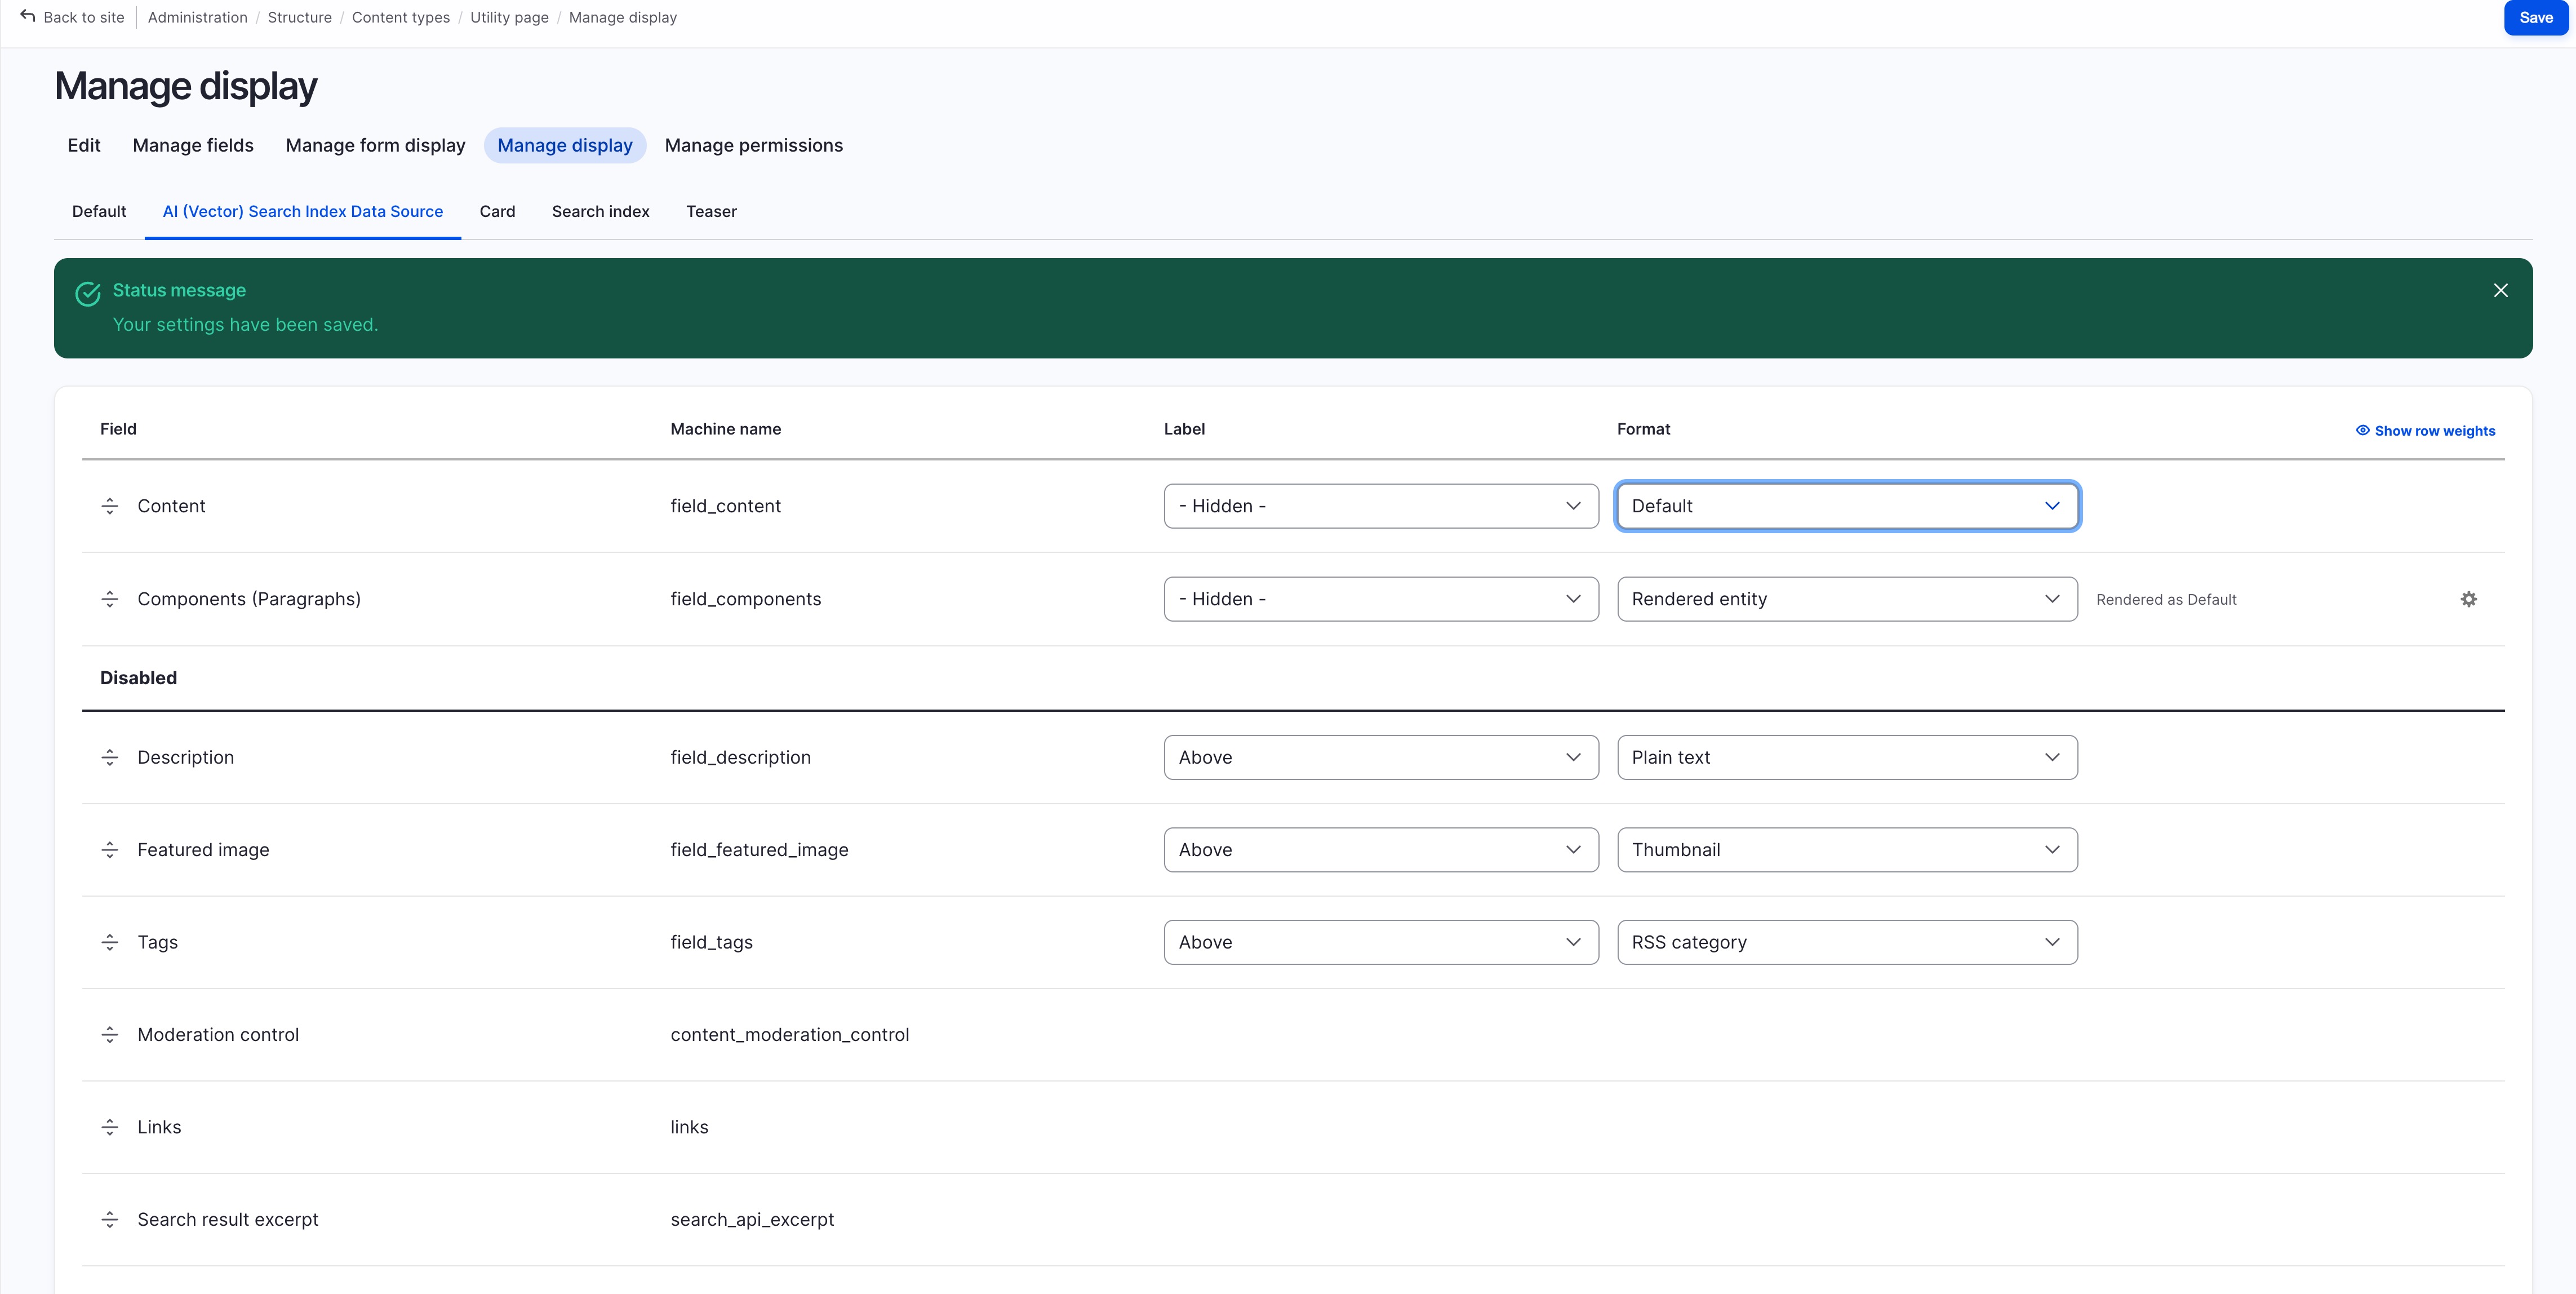
configure this new “AI (Vector) Search Index Data Source” view mode in the content type’s configuration,
to expose the paragraph component along with other page content,
also hide the unnecessary files such as image (will not be used) or description (to avoid duplication if you’re using it as contextual data)
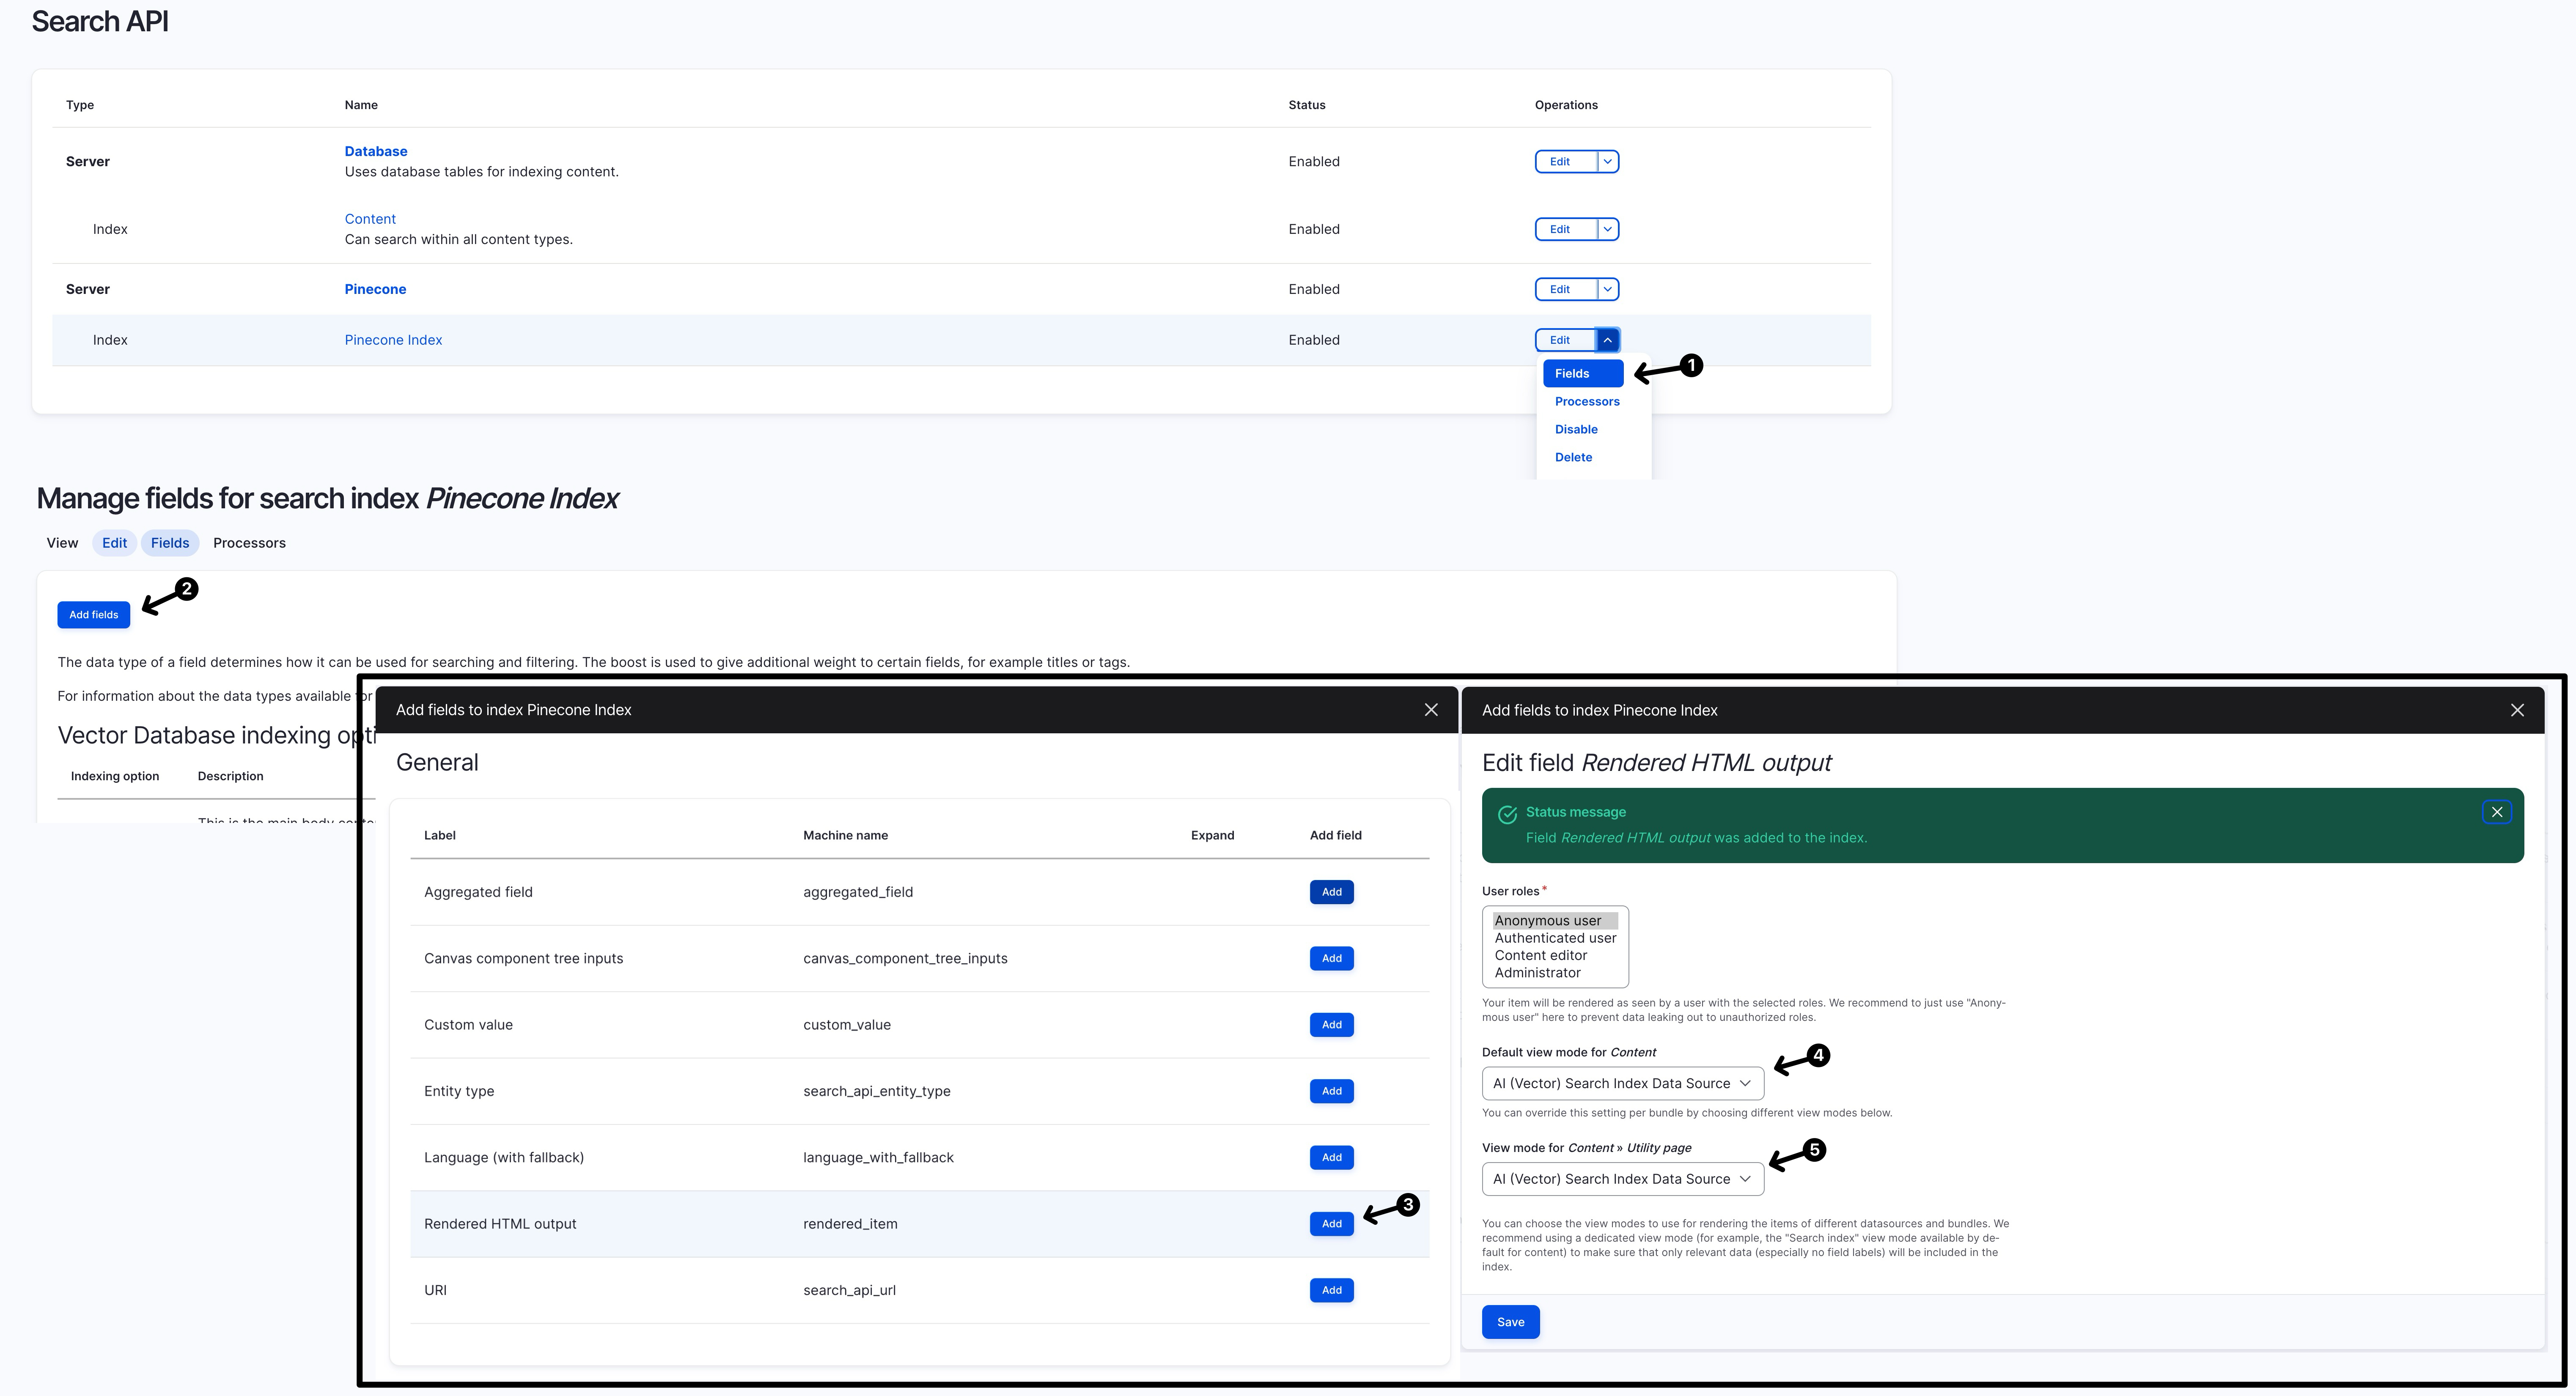
configure the “Search API - Index " settings to include a “Rendered HTML output” with “Al (Vector) Search Index Data Source” as its view mode
finally you will be able to search using the content inside the paragraph/component (rather than just be able to search fields living directly in the content type itself)
Demo: content without two paragraph component (one about “fishing”, one about “nuclear” )
Demo: using “Preview content to be vectorized”
Demo: searching in the “Page View” (after re-indexing with the new config)
Demo: search in “Vector DB Explorer” (after installing “AI API Explorer” module)