Executive Summary
This guide demonstrates how to build a decoupled Drupal site using Astro as the frontend. By separating backend content management from the presentation layer, you can leverage Drupal’s robust modeling while utilizing modern JavaScript frameworks for a faster, component-based user experience.
Step 1: Backend Setup (Drupal)
- Environment: Install Drupal using DDEV.Modules:
- Enable JSON:API and Serialization core modules.
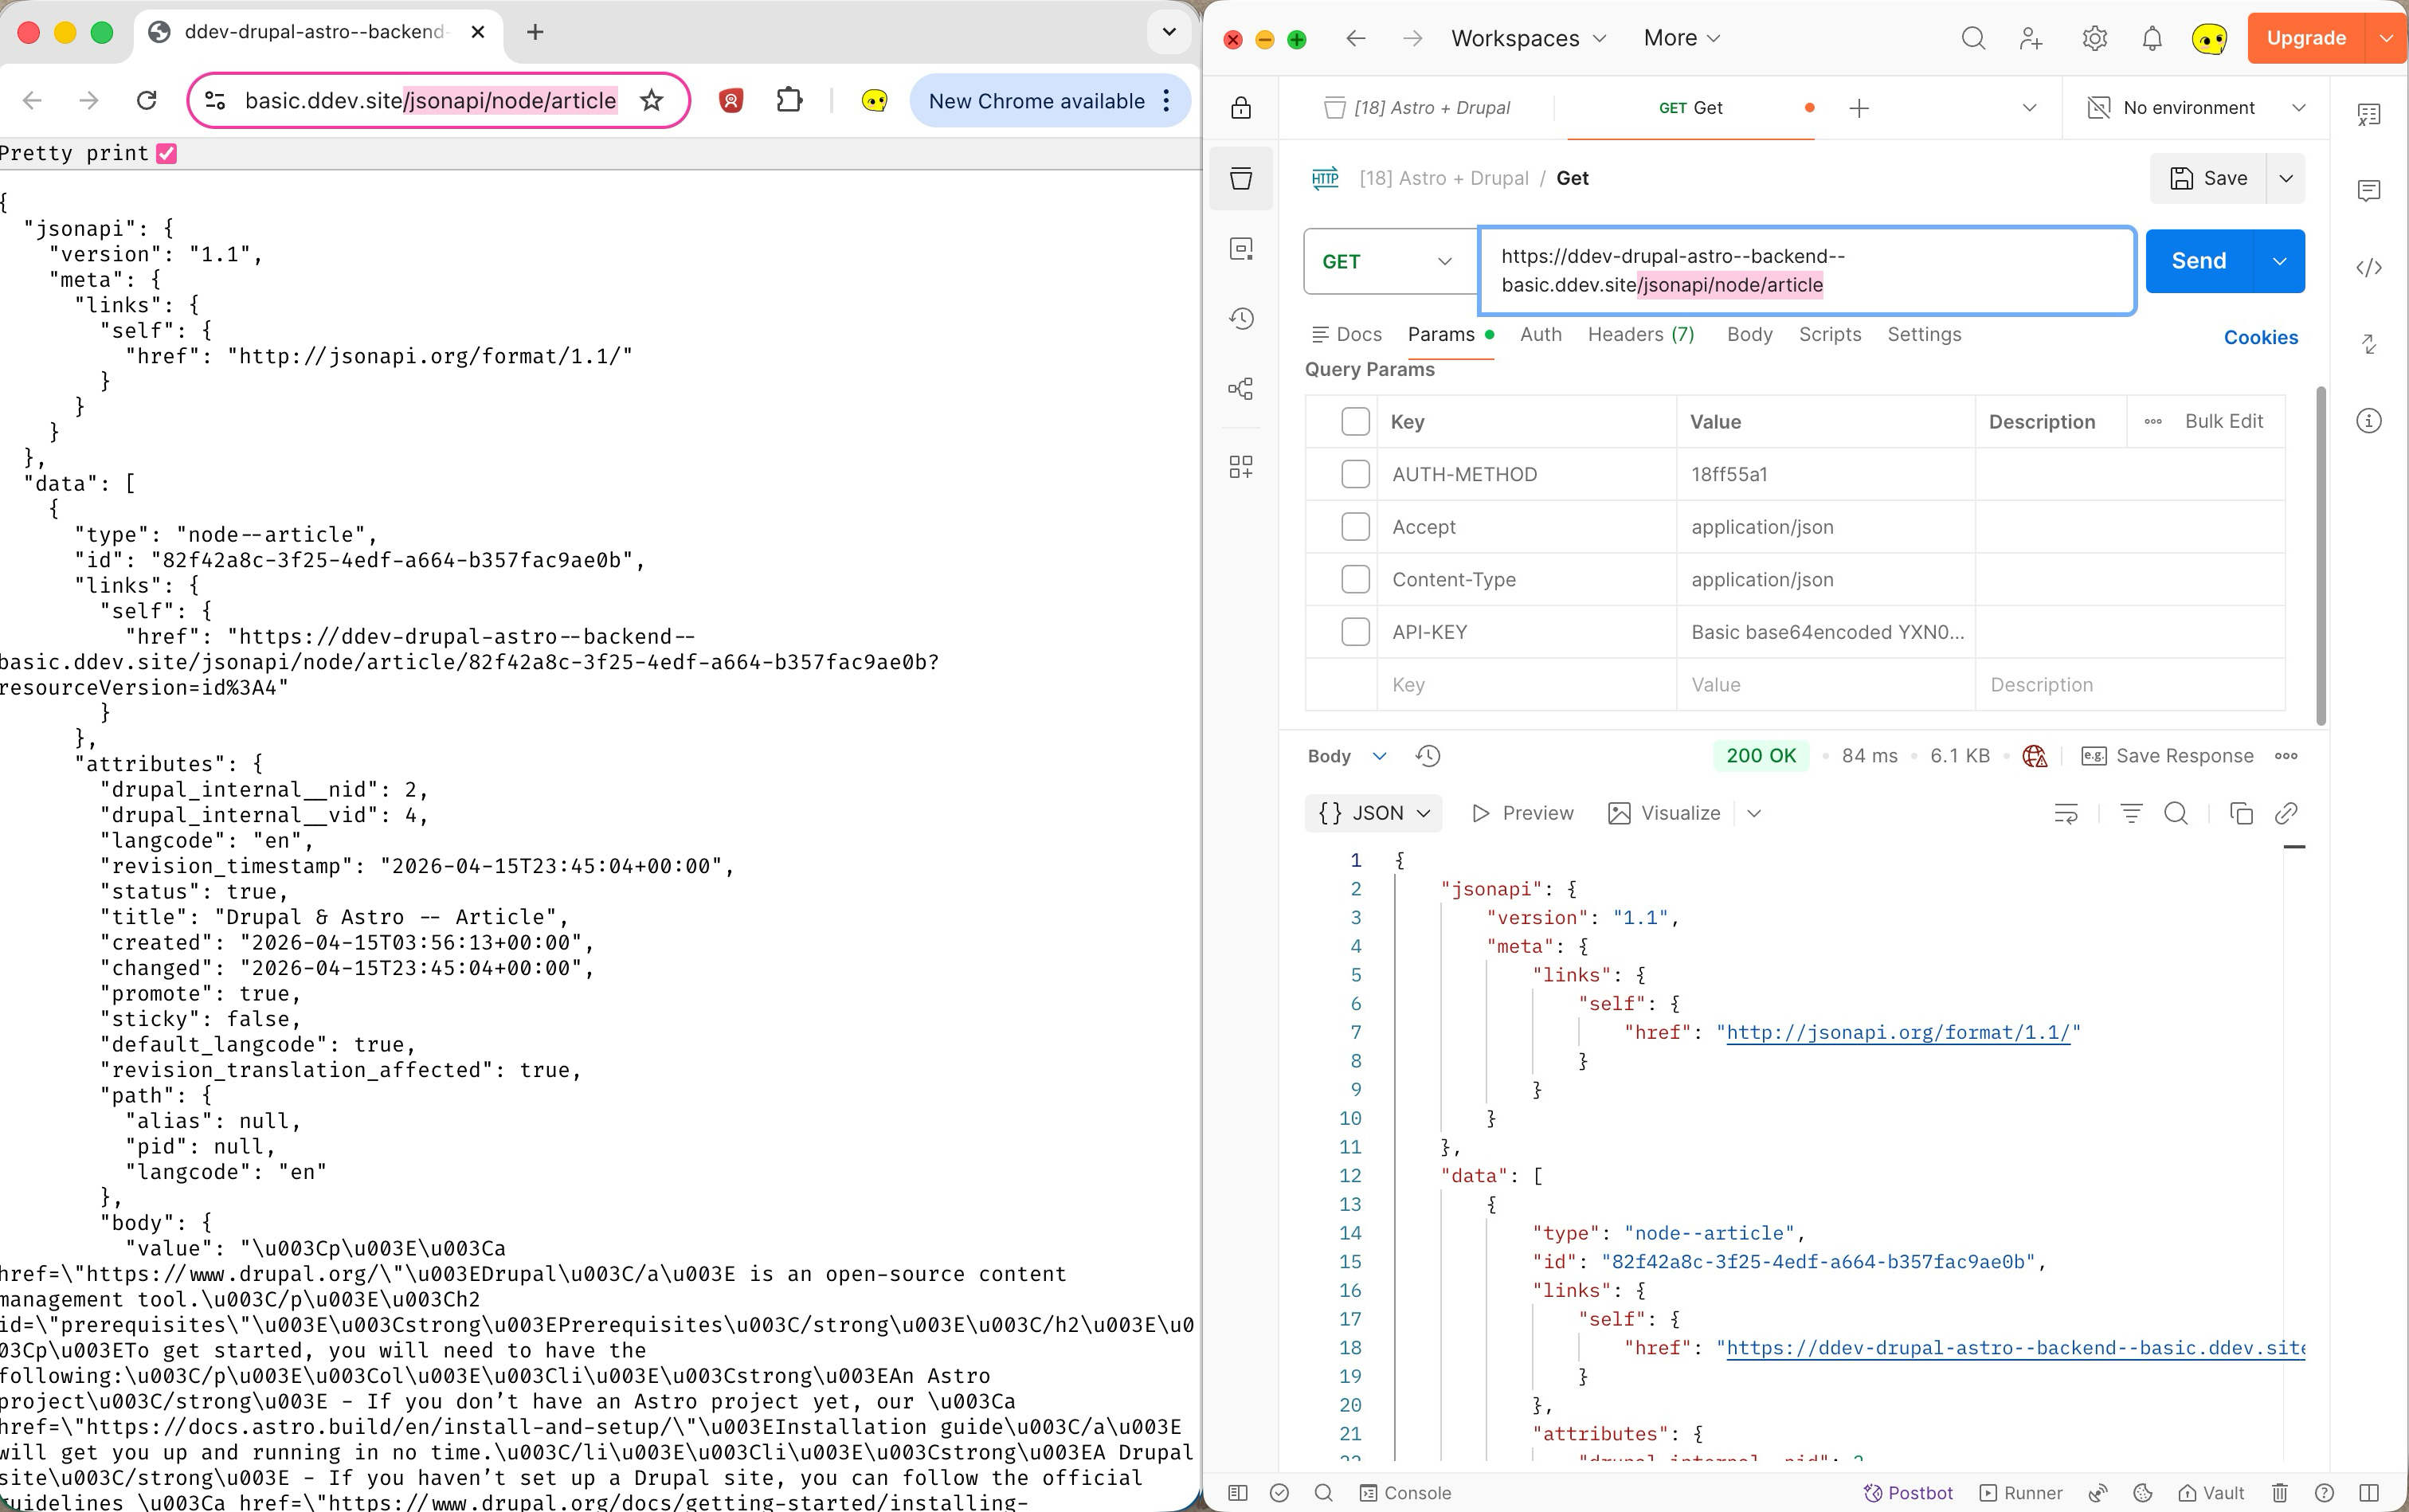
- Content: Create a sample “Article” and verify the output at
https://[base-url]/jsonapi/node/article.
Step 2: Frontend Setup (Astro)
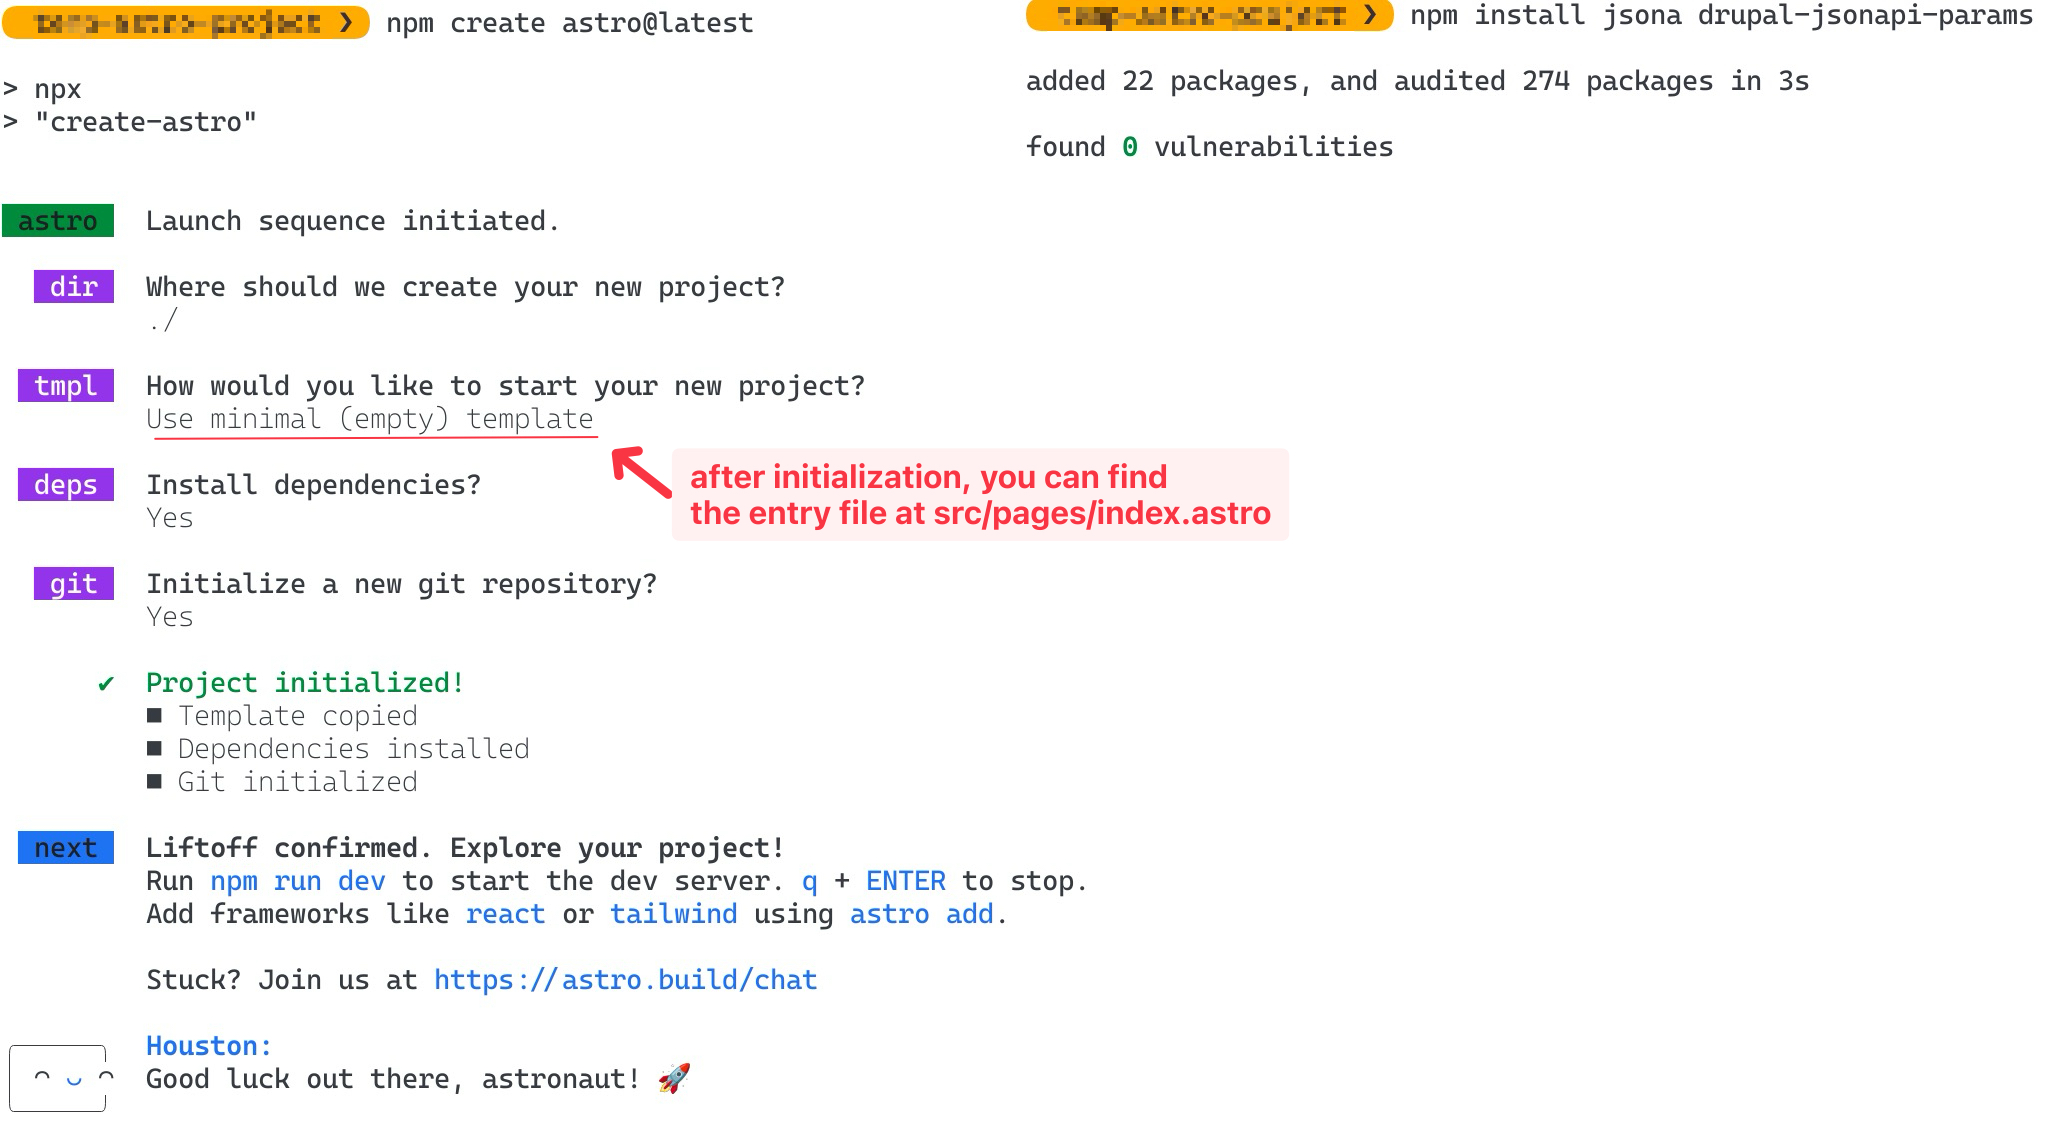
- Init: Run
npm create astro@latestusing the “empty” template.- Dependencies: Install
jsona(for deserializing) anddrupal-jsonapi-params(for query optimization).- Configuration: Define your
DRUPAL_BASE_URLin a.envfile.- Fetching: Use
fetch()in the component frontmatter to retrieve and deserialize Drupal data.
Step 3: Styling and Modularity
- Styling: Add Tailwind CSS with typography and forms plugins to speed up UI development.
- Refactoring: Separate data fetching logic into utility files (e.g.,
fetchNodeArticle.ts) and create reusable Astro components for rendering.
Step 4: Dynamic Content with Server Islands
Astro components are static by default. To ensure Drupal content updates reflect without a full site rebuild:
Add a Server Adapter (e.g.,
@astrojs/node).Apply the server:defer directive to your article component.This renders the component on-demand while serving the rest of the page as static HTML.
Step 5: Integrating UI Frameworks (Vue + Nuxt UI)
Astro is framework-agnostic, allowing you to use multiple frameworks simultaneously.
Vue: Add the Vue integration via
npx astro add vue.Nuxt UI: Install dependencies and register the Nuxt UI plugin in a custom entry point (e.g.,
vue-app.ts) to enable global component access.
Step 6: Client-Side Interaction
For interactive elements or client-side fetching:
Selective Hydration: Use the client:load directive to hydrate components immediately on page load.
Decoupled Menus: Fetch Drupal’s “Main Navigation” using the linkset endpoint:
${baseURL}/system/menu/[menu-name]/linkset.Optimisation: Consider
client:visibleto delay hydration until the component enters the viewport, further improving performance.
Detailed Steps Breakdown
Step-1: Drupal (as Backend) Setup
We need to install Drupal using DDEV on your local, personally I prefer used this code snippet: drupal-ddev-init-snippet, and enable the following core modules: “JSON:API” and “Serialization”, then create a new “Article” content, as shown below:

Once the above is done, you should be able to visit the following JSON:API’s URL: https://base-url/jsonapi/node/article, either using your browser like Chrome or API development tool like Postman, and find the JSON formatted print-out with the article you just created:
Note that the official documentation of Astro + Drupal mentioned that you should setup credentials such as “Basic Authentication” or “API Key-based authentication” (link). In this tutorial, we’ll focus on the important part, so the data-fetching authentication is skipped intentionally for the sake of simplicity. But if you intend to deploy your application to any production environment, it is strongly recommended that you do not skip this step.
Step-2: Astro (as Frontend) Setup
We need to initialise an Astro project using the npm create astro@latest command, and choose minimal (empty) as the template. Once initialised, we’ll install the below dependencies that we will be using later:
JSONA: JSON API v1.0 specification serializer and deserializer for use on the server and in the browser.Drupal JSON-API Params: This module provides a helper Class to create the required query. While doing so, it also tries to optimise the query by using the short form, whenever possible.
Then setup data fetching from Astro:
First, add environmental variable
DRUPAL_BASE_URLto be used later by creating an.envfile in the root directory of the Astro project:1 2# FILE: astro-project-root/.env DRUPAL_BASE_URL="http://ddev-drupal-astro--backend--basic.ddev.site/"Second, modify the
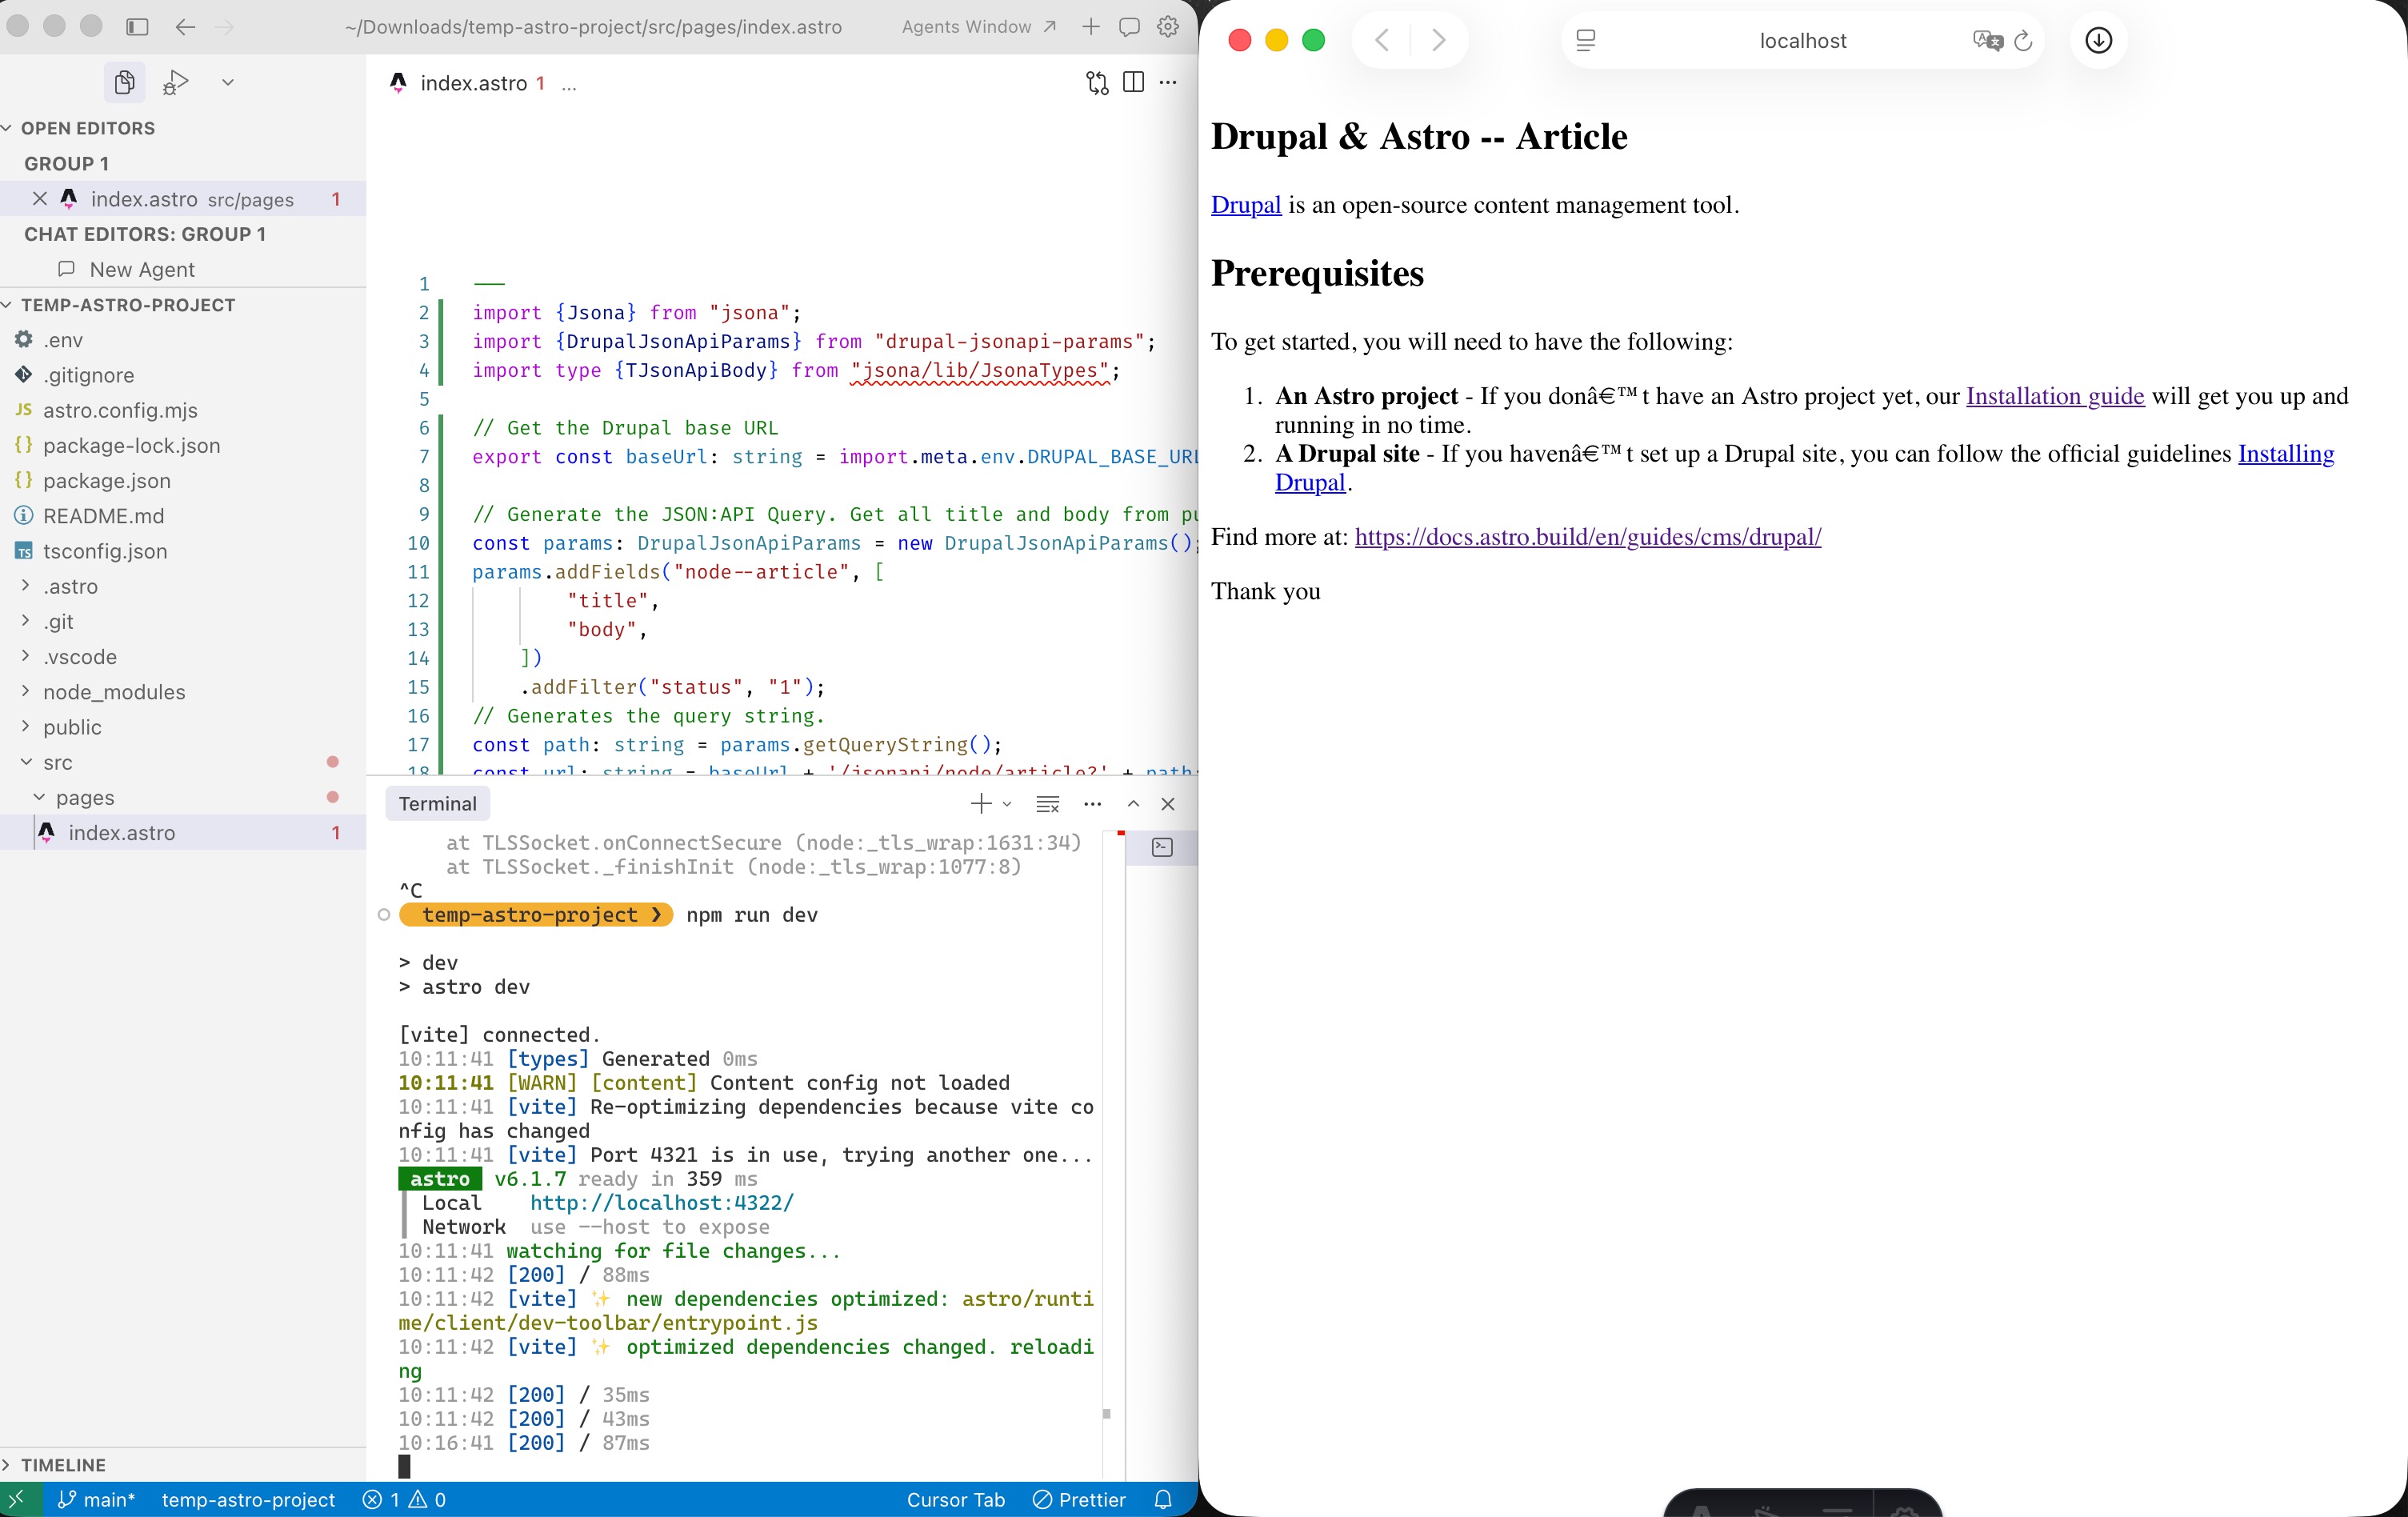
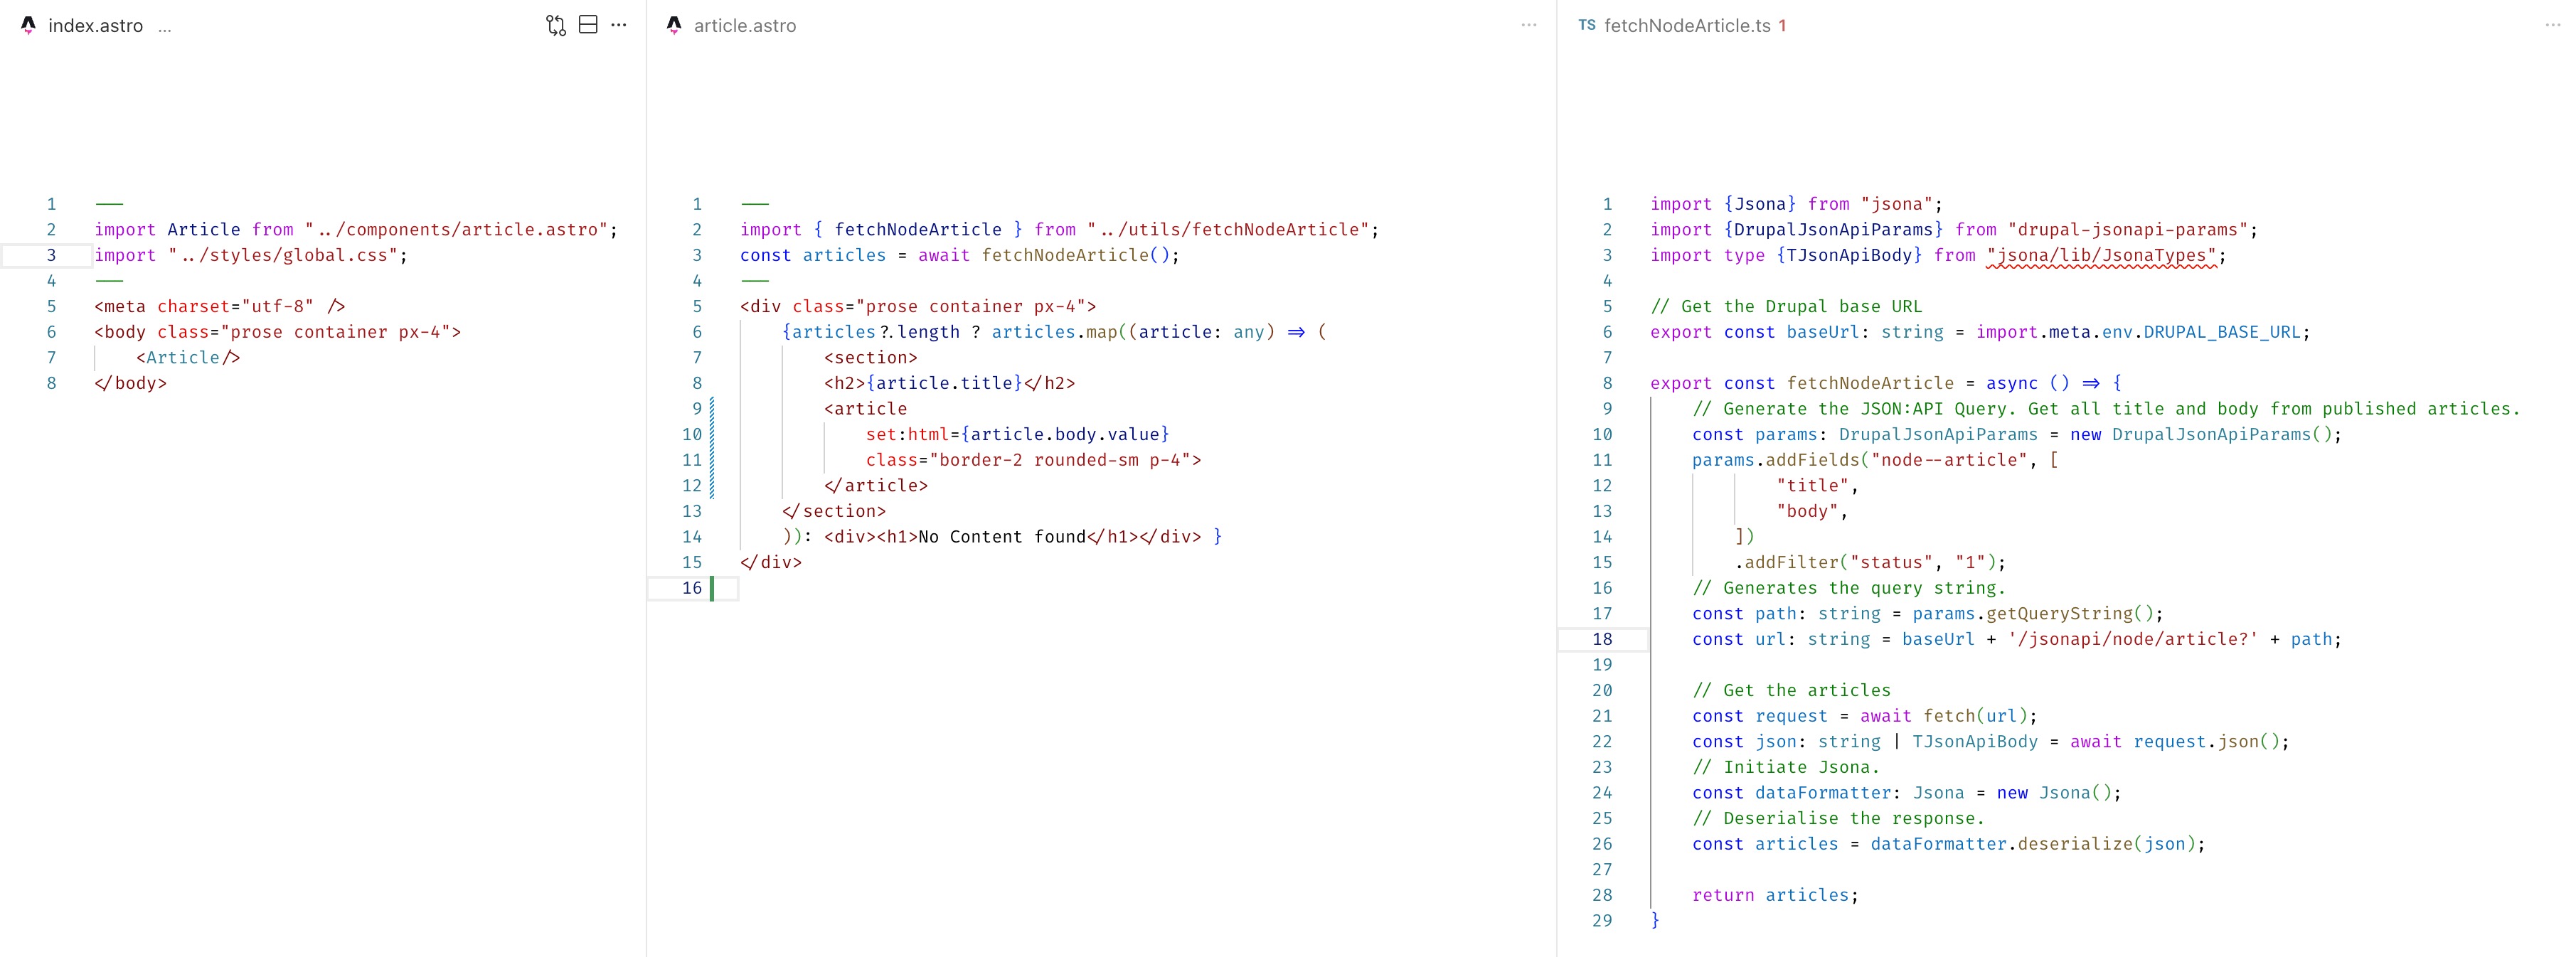
src/pages/index.astrowith the following:1 2 3 4 5 6 7 8 9 10 11 12 13 14 15 16 17 18 19 20 21 22 23 24 25 26 27 28 29 30 31 32 33 34 35 36# FILE: astro-project-root/src/pages/index.astro --- import {Jsona} from "jsona"; import {DrupalJsonApiParams} from "drupal-jsonapi-params"; import type {TJsonApiBody} from "jsona/lib/JsonaTypes"; // Get the Drupal base URL export const baseUrl: string = import.meta.env.DRUPAL_BASE_URL; // Generate the JSON:API Query. Get all title and body from published articles. const params: DrupalJsonApiParams = new DrupalJsonApiParams(); params.addFields("node--article", [ "title", "body", ]) .addFilter("status", "1"); // Generates the query string. const path: string = params.getQueryString(); const url: string = baseUrl + '/jsonapi/node/article?' + path; // Get the articles const request: Response = await fetch(url); const json: string | TJsonApiBody = await request.json(); // Initiate Jsona. const dataFormatter: Jsona = new Jsona(); // Deserialise the response. const articles = dataFormatter.deserialize(json); --- <body> {articles?.length ? articles.map((article: any) => ( <section> <h2>{article.title}</h2> <article set:html={article.body.value}></article> </section> )): <div><h1>No Content found</h1></div> } </body>Finally, run
npm run devto start a Astro development server, and open the “Local” server as denoted on the CLI in your browser:1 2 3 4 5 6 7 8 9 10 11 12 13 14 15 16 17> npm run dev > dev > astro dev [vite] connected. 10:11:41 [types] Generated 0ms 10:11:41 [WARN] [content] Content config not loaded 10:11:41 [vite] Re-optimizing dependencies because vite config has changed 10:11:41 [vite] Port 4321 is in use, trying another one... astro v6.1.7 ready in 359 ms ┃ Local http://localhost:4322/ ┃ Network use --host to expose 10:11:41 watching for file changes... 10:11:42 [200] / 88ms 10:11:42 [vite] ✨ new dependencies optimized: astro/runtime/client/dev-toolbar/entrypoint.js 10:11:42 [vite] ✨ optimized dependencies changed. reloadingFinal Outcome:
(Note that:
if you accidentally used
https://instead ofhttp://in your.envfile, you may encounterfetch errorof error codeUNABLE_TO_VERIFY_LEAF_SIGNATURE. This is because, by default, a locally hosted Drupal website using DDEV does not provide a Certificate Authority (CA) certificate, which means the node server is unable to verify that the Drupal site’s SSL/TLS certificate is authentic: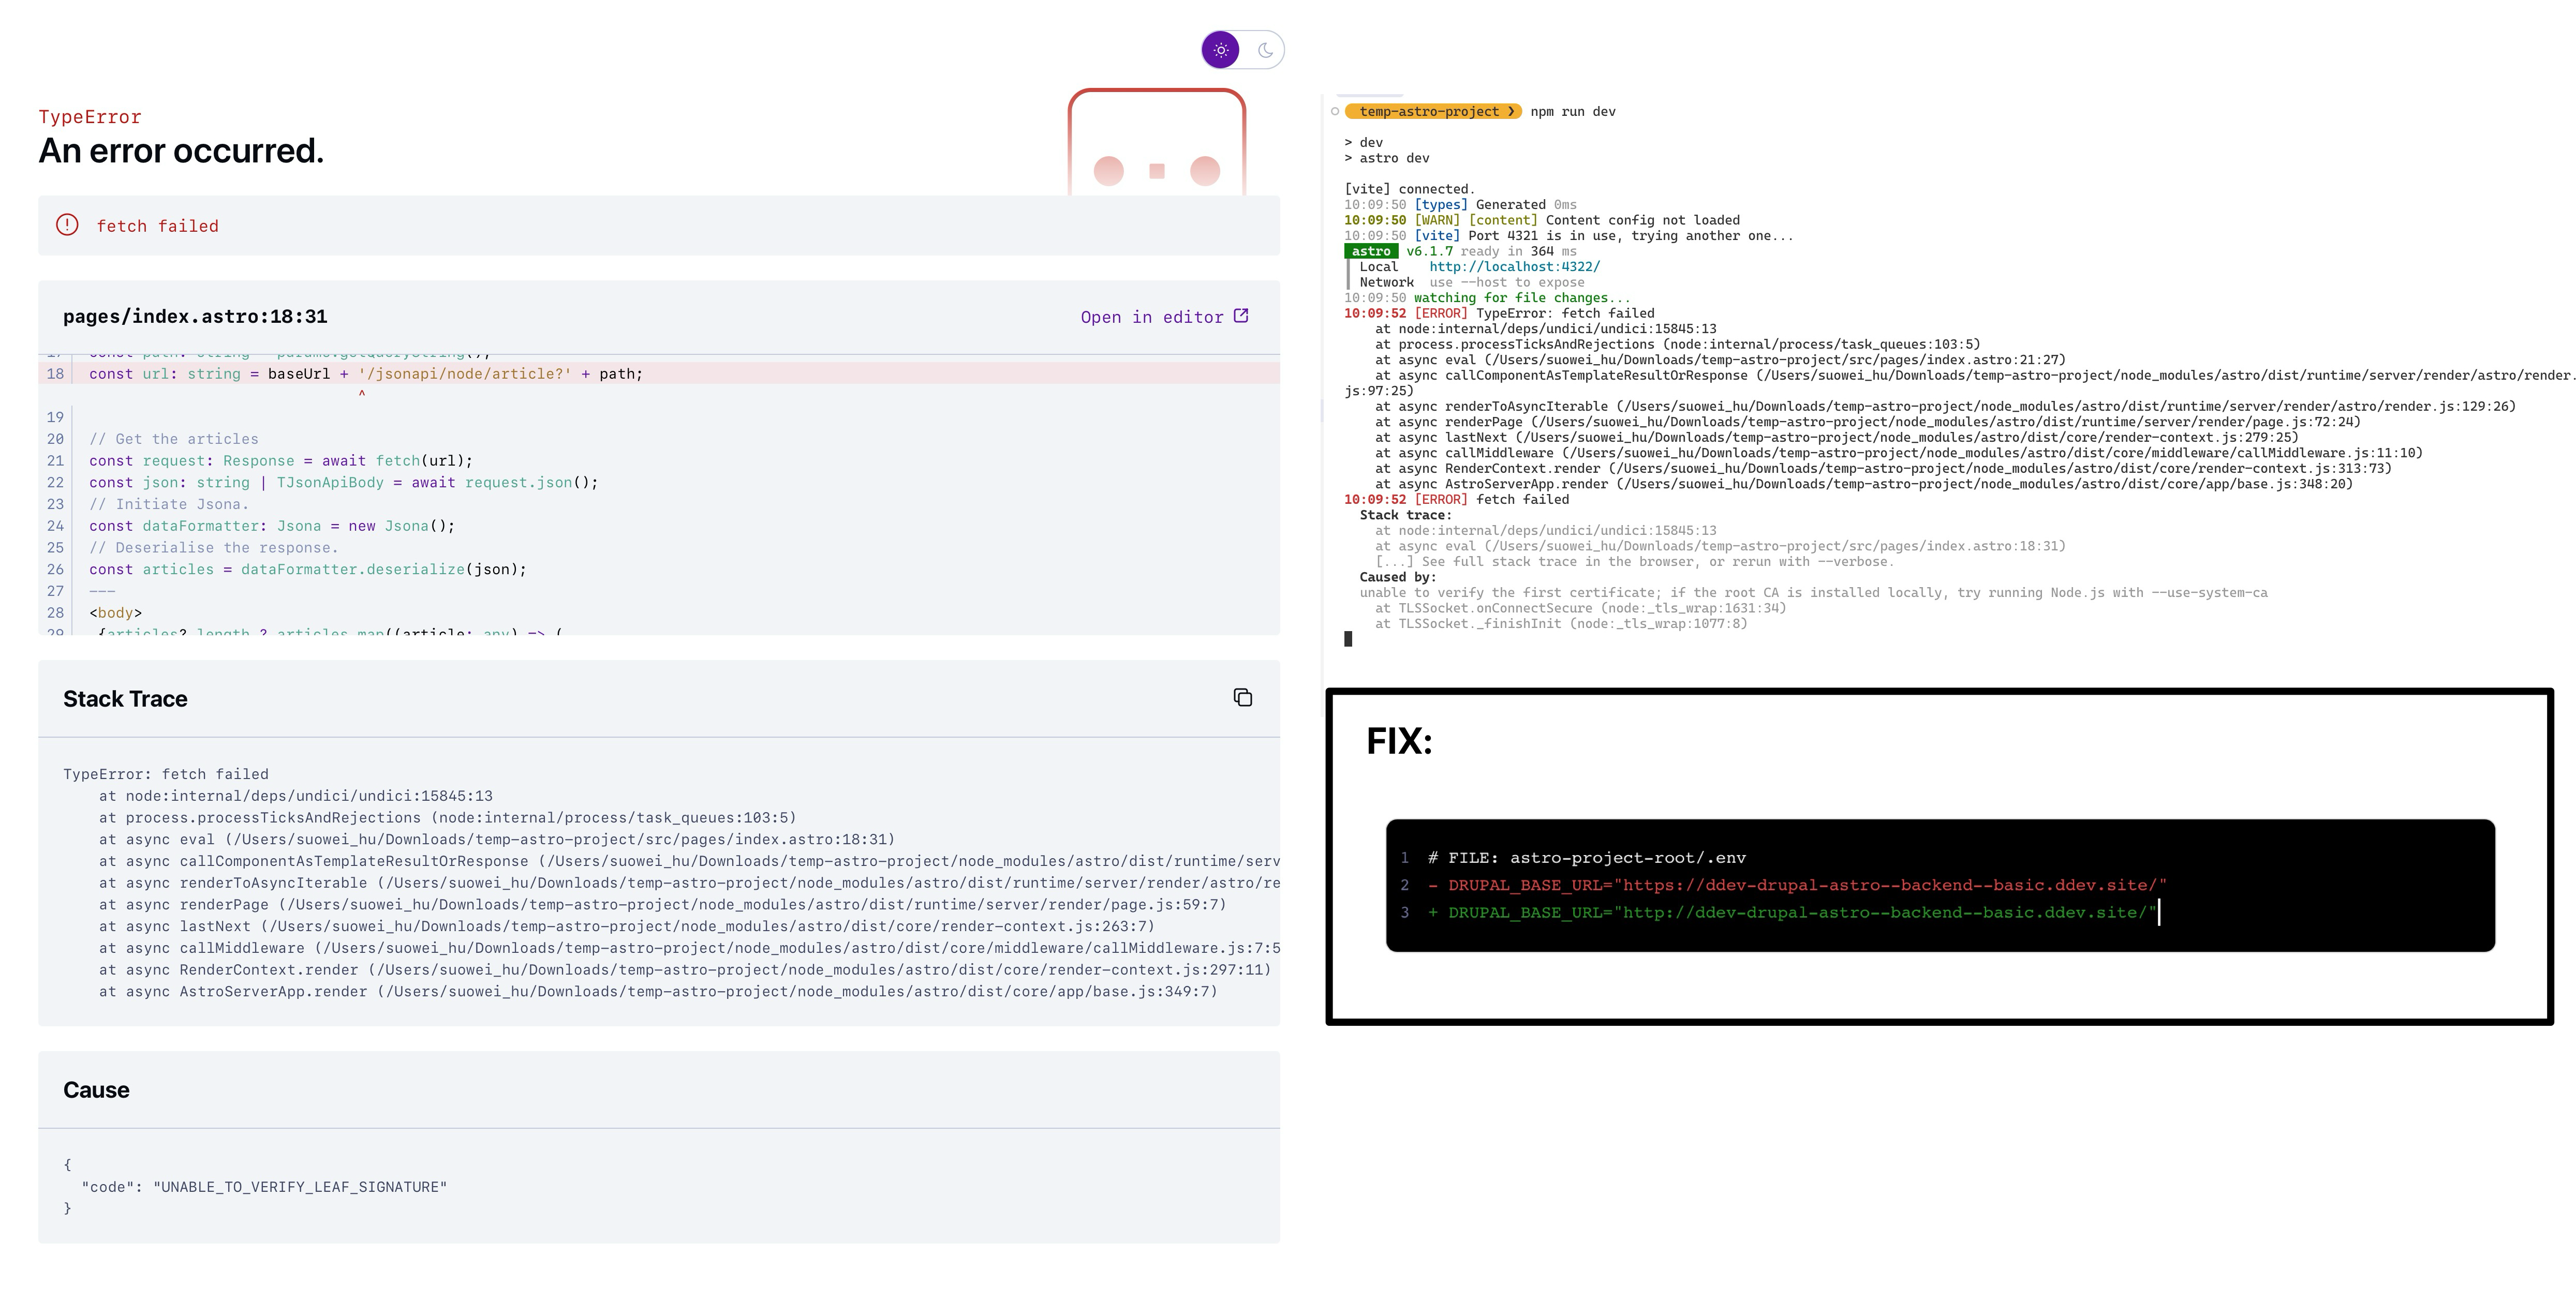
by default, if you happen to find any encoding issue with your page (e.g.
don'tshown asdon’t), you can fix it via adding meta tag to theindex.astrofile: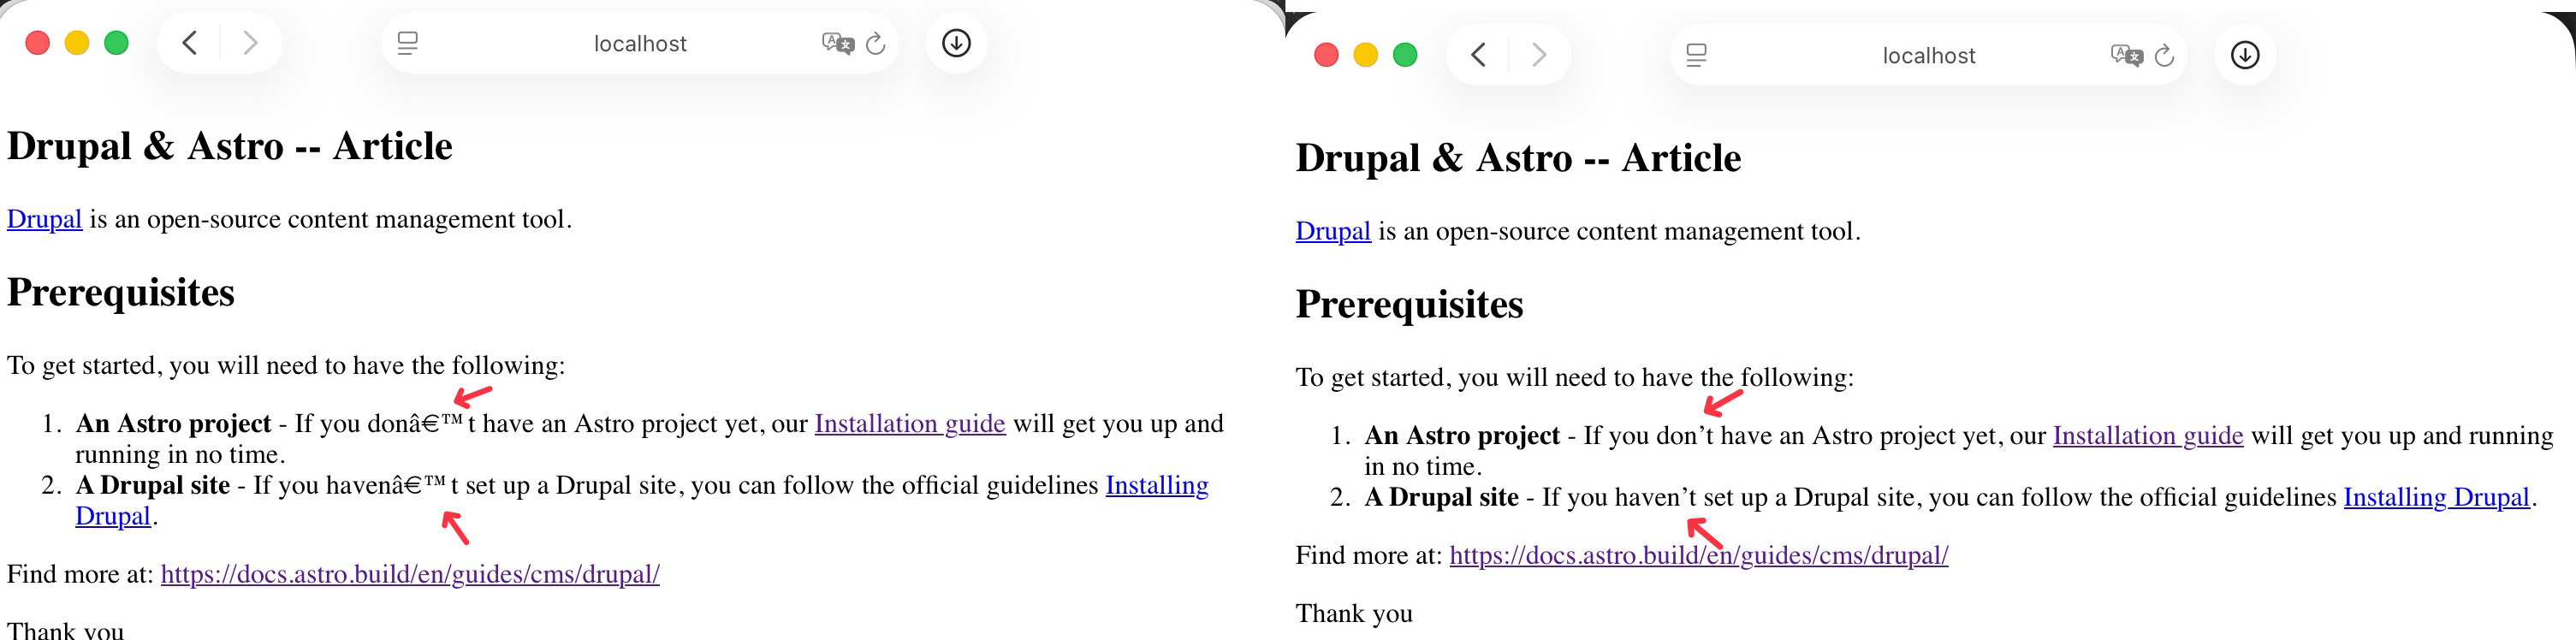
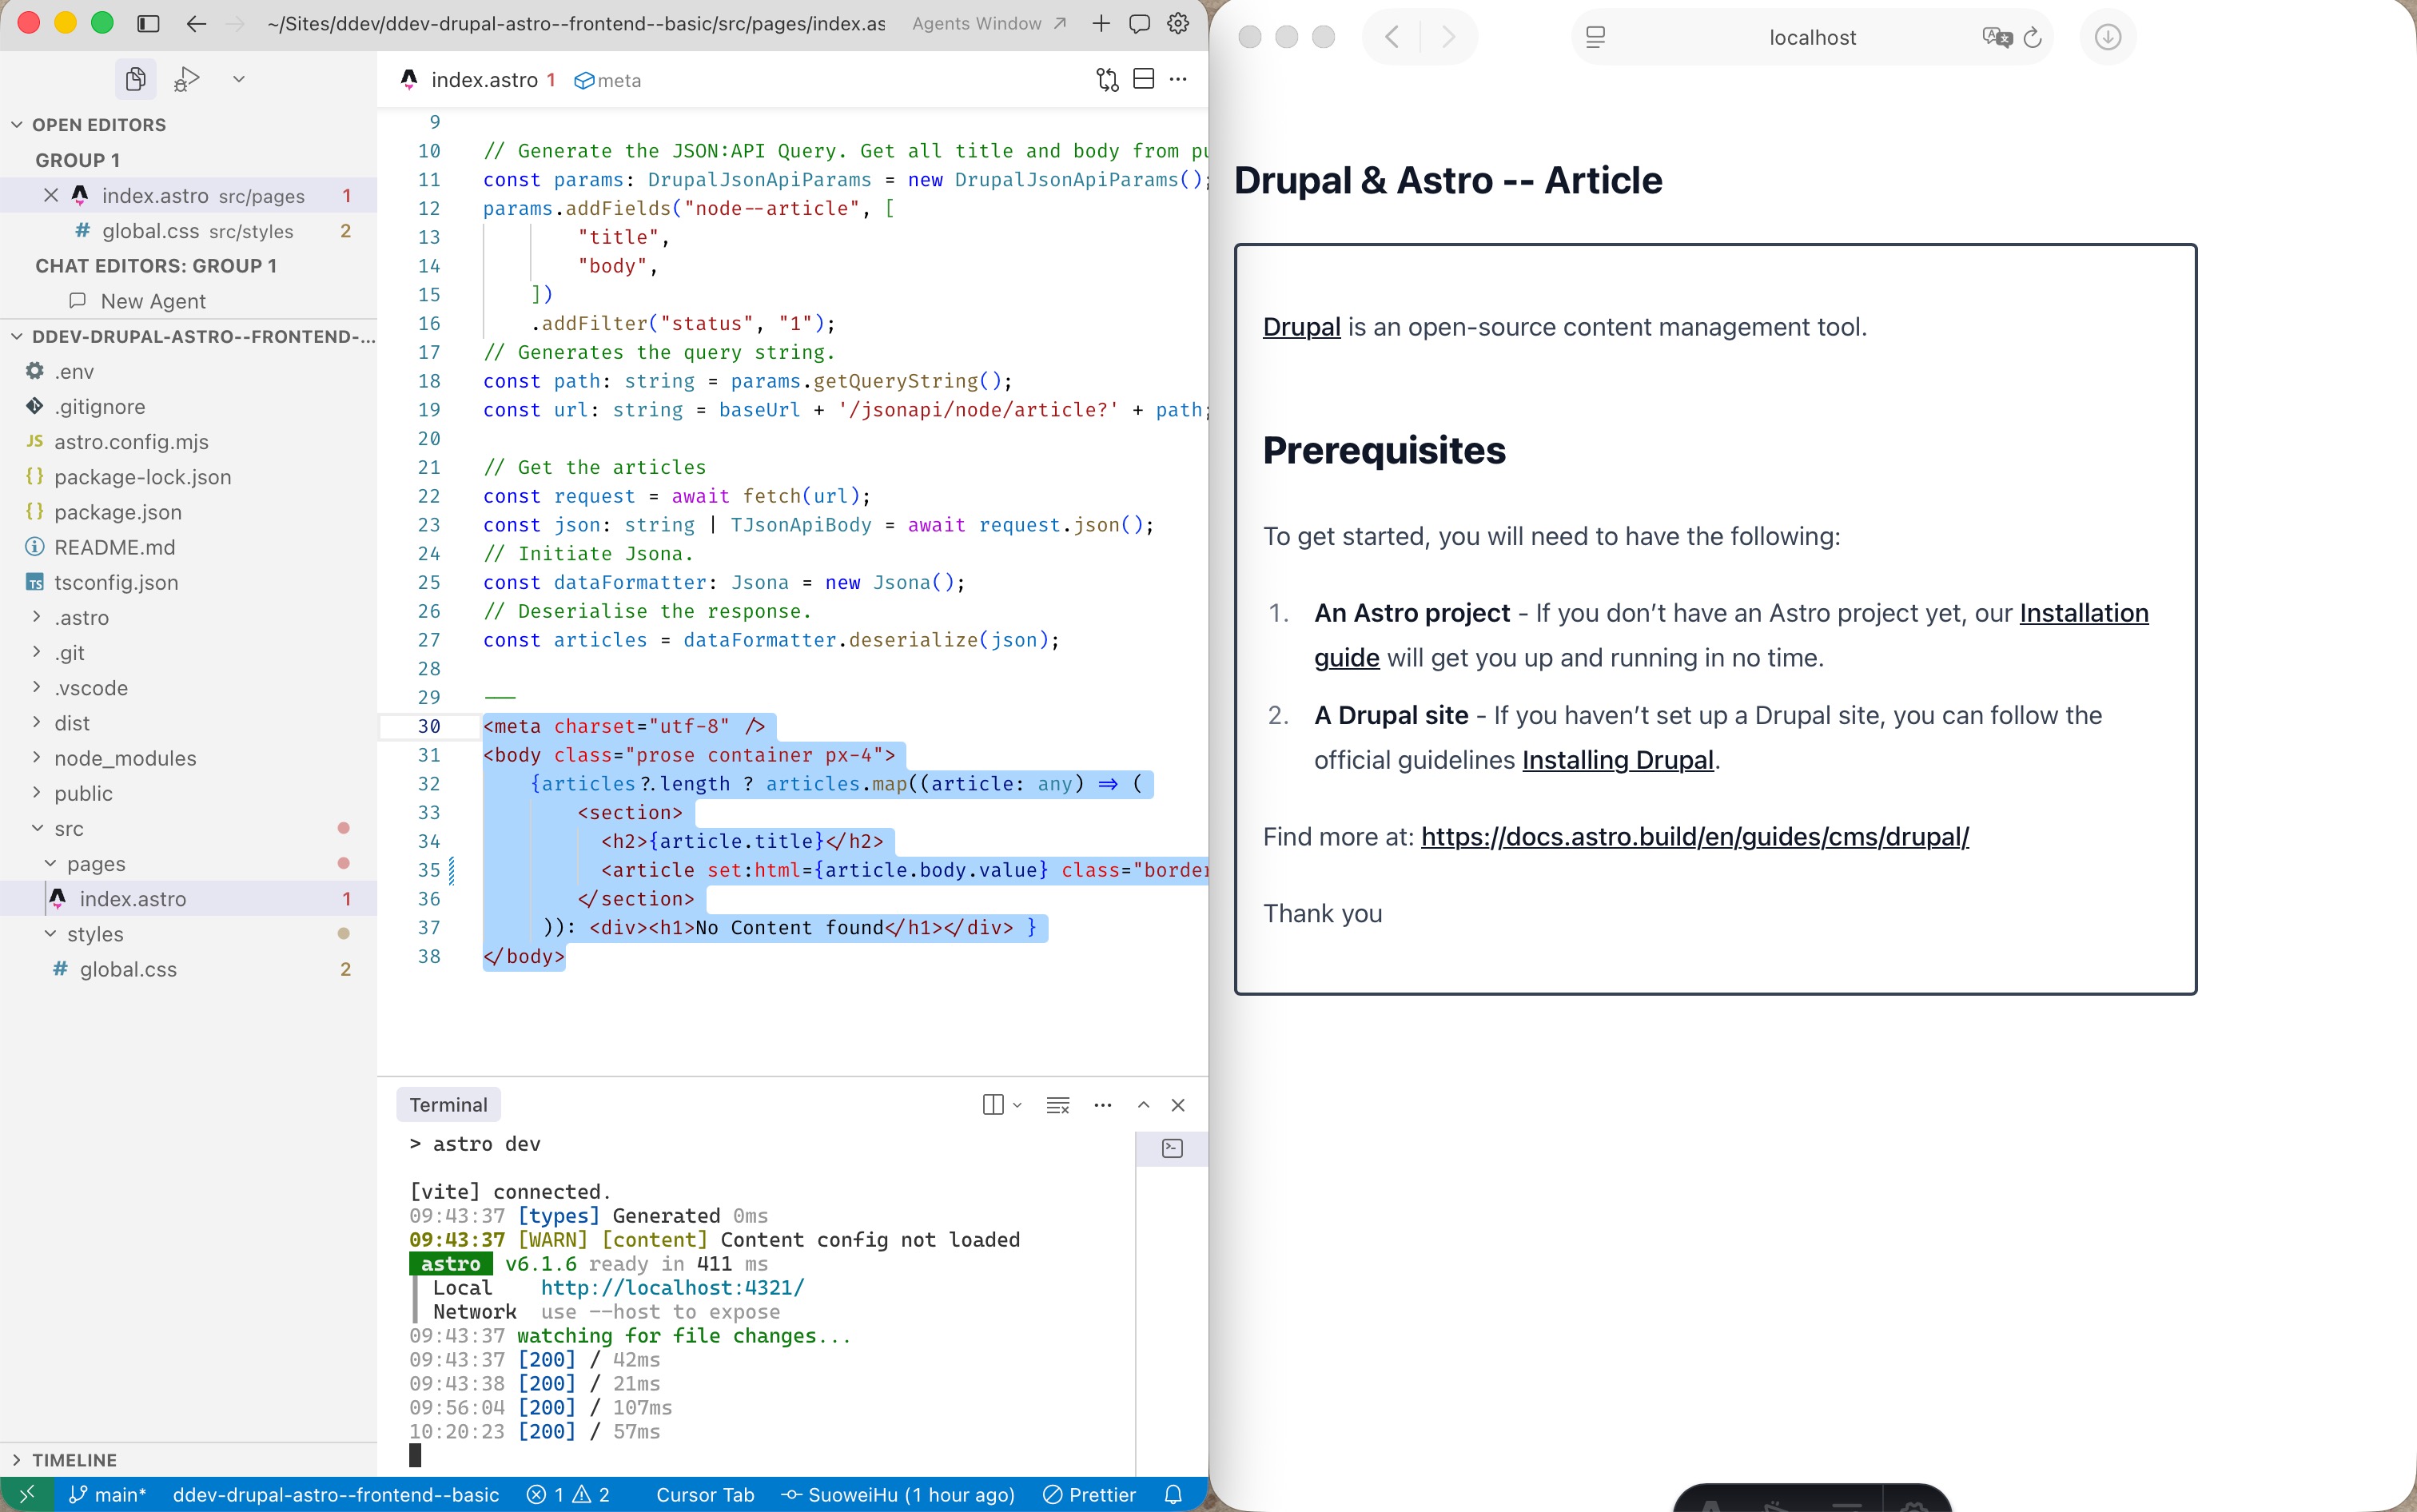
1 2 3 4 5 6 7 8 9 10... + <meta charset="UTF-8"> <body> {articles?.length ? articles.map((article: any) => ( <section> <h2>{article.title}</h2> <article set:html={article.body.value}></article> </section> )): <div><h1>No Content found</h1></div> } </body>
Step-3: Style Enhancement & Refactoring
For simplicity of styling tasks later, I choose to add Tailwind CSS, along with tailwindcss-typography and tailwindcss-form to the project, using this guide: https://docs.astro.build/en/guides/styling/#tailwind
Execute the following:
| |
Create new global.css file, and source it from the index.astro entry point:
| |
| |
Refresh the page, then you’ll get some quick wins of some very basic styling:
Further more, for better modularity and readability, I decide to separate the “fetch data” and “rendering” logic into their own utility and component files: src/utils/fetchNodeArticle.ts , src/components/article.astro :
Step-4: Server Islands (server:defer directive)
Note that in the previous step, when you run npm run dev (OR astro dev) you are using development mode to preview the website. Under this mode, you will always be able to see an up-to-update version of your website, which means no matter if a component is a regular component, or server island it will always be re-rendered on every page load.
However, if you use the deployment setting: npm run build && npm run preview (OR astro build && astro preview), you will preview the version of your site that will be created at build time. This means the majority of the astro component (that are not server island, and in our case, are not JavaScript framework component) will be converted to fast, static HTML.
For our use case, this may be troublesome, because we’re fetching from the Drupal JSON:API as the source of data/content, …. See below example, when you use npm run build && npm run preview to serve the page, modification to the content in Drupal backend will not impact the astro pages, this because they are served in HTML after the build process!
To solve this, we’ll need to make this component an “Server Island”, when you turn a regular Astro component into a server island, instead of the component being transformed into plain HTML, it will be rendered on demand (on server) on page load (on client).
To make our <Article> component server island we’ll use server:defer directive, but before we do that we’ll need to add a server adapter (allows you to trigger code execution on Node/Vercel/etc server to generate page on demand), read more about this on this page: https://docs.astro.build/en/guides/on-demand-rendering/#server-adapters. For our local development example, I’ll use @astrojs/node:
install dependency
npx astro add nodemodify the
astro.config.mjsfile:1 2 3 4 5 6 7 8 9 10 11 12 13 14 15 16 17// @ts-check import { defineConfig } from 'astro/config'; + import node from '@astrojs/node'; import tailwindcss from '@tailwindcss/vite'; // https://astro.build/config export default defineConfig({ + adapter: node({ + mode: 'standalone' + }), vite: { build: { sourcemap: true, // or 'hidden' to avoid exposing them publicly }, plugins: [tailwindcss()], }, });
Finally we can add the server:defer directive to our astro component at src/page/index.astro
| |
Now re-build the page and preview, also disable the javascript then inspect the page, you’ll see that instead of a static HTML component, it become a script tag with data-island-id, that will be replaced with server side rendered <Article> via replaceServerIsland(); And when we change the content in Drupal it changes with it:

Step-5: Astro + UI Frameworks + Component Library
With Astro you can bring any UI framework onboard, whether it is React, Vue, or Alpine. What’s even better is that Astro supports having multiple framework in the same project, each island can use its own framework, and Astro will render each one based on its file type and integration setup.
Find out more about this in the following links
- https://docs.astro.build/en/concepts/islands/#island-components
- https://docs.astro.build/en/guides/framework-components/
- https://docs.astro.build/en/guides/framework-components/#using-framework-components
In the below example, we’ll try to bring Vue and Nuxt UI library onboard.
Step-5.a: Installing and Create Vue Component
Use the astro add command to install vue:
| |
You’ll be prompted to configure the relevant files:
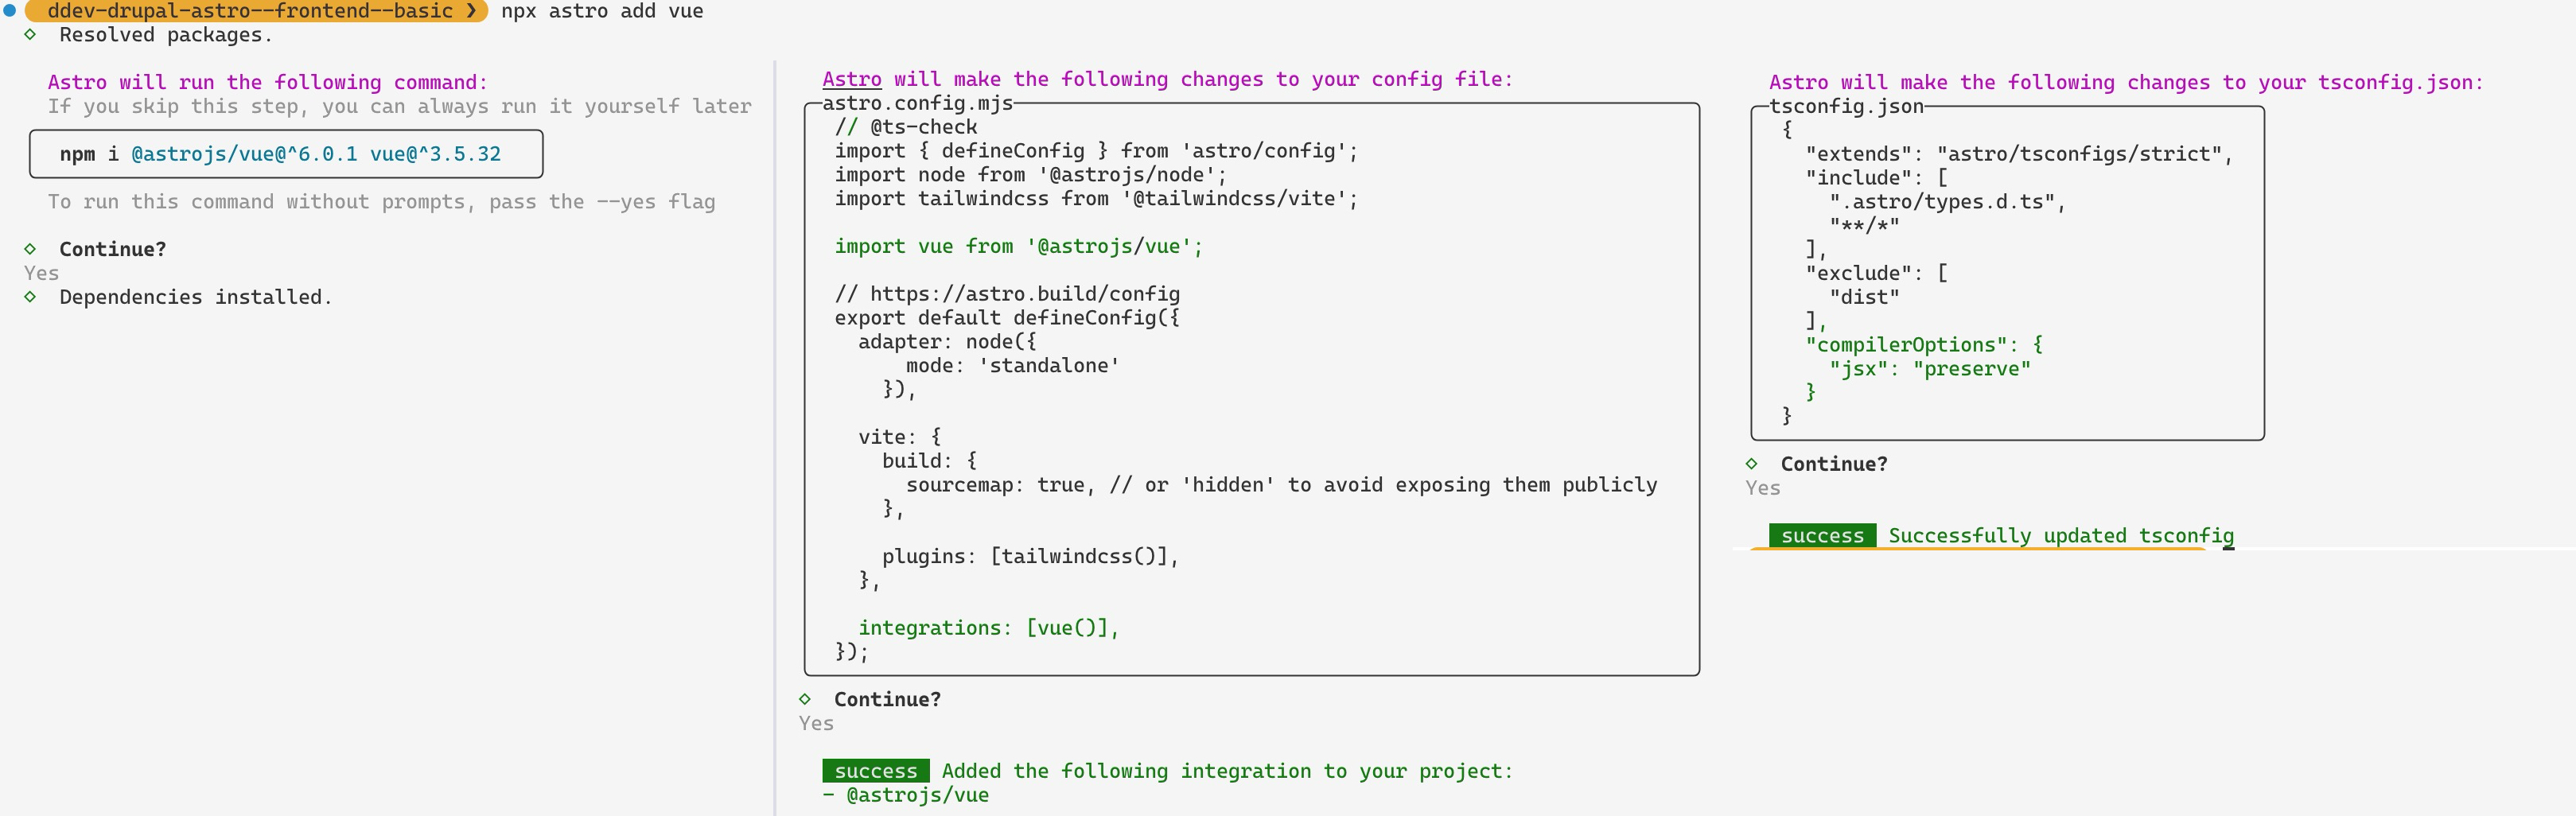
(* as shown above, the astro add command will automatically edit the astro.config.mjs file to add the vue integration)
Creating a counter vue component under the src/component folder:
| |
And modify the src/pages/index.astro entry point file to use this UI framework component:
| |
Final outcome:
Step-5.b: Installing Nuxt UI Component Library
I’m following this official Nuxt UI Installation Guide: link to perform this step.
First run the npm command to install the required dependencies:
| |
Then modify the astro.config.mjs file to use Nuxt UI’s vite plugin:
| |
And also create the entry point file src/vue-app.ts (Purpose: provide a place to register vue plugin before vue component are mounted by Astro, in our case we need to globally install the Nuxt UI plugin so that all Vue component can use component and features from @nuxt/ui)
| |
Finally test creating a component that uses the Nuxt UI PageCard:
| |
And modify the src/pages/index.astro entry point file:
| |
Final Outcome:
Step-6: Client Island (using client:load directive)
Unlike in the previous example where the component is rendered as a server island (using server:defer directive), since we’re using a client-side framework – Vue, if we need to write the fetching logic inside Vue’s <script>, we’ll need a client side referring component, and in order to do that, we will add client:load to the Astro component.
Step-6a: update fetching logic
But first, let’s modify the data fetching logic, since we’re now fetching the data from the client side, we need to write a proxy router in Vite, such that all the API calls initiated from the Vue components goes to the same domain (no CROS issue) →modify astro.config.mjs
| |
And in Astro, in order for a environmental variable to be browser/client-side visible, it must be prefixed with PUBLIC_ → modify .env
| |
Lets extract the logic of article api fetching into a utility file: src/utils/fetch_data.ts:
| |
Step-6b: Setup Client Island (using client:load directive)
Here’s the component itself at src/components/article-card-nuxt-ui.vue:
| |
Import it and use it in the src/pages/index.astro:
| |
Final Outcome of this in browser:
Step-6c: different client:* directive
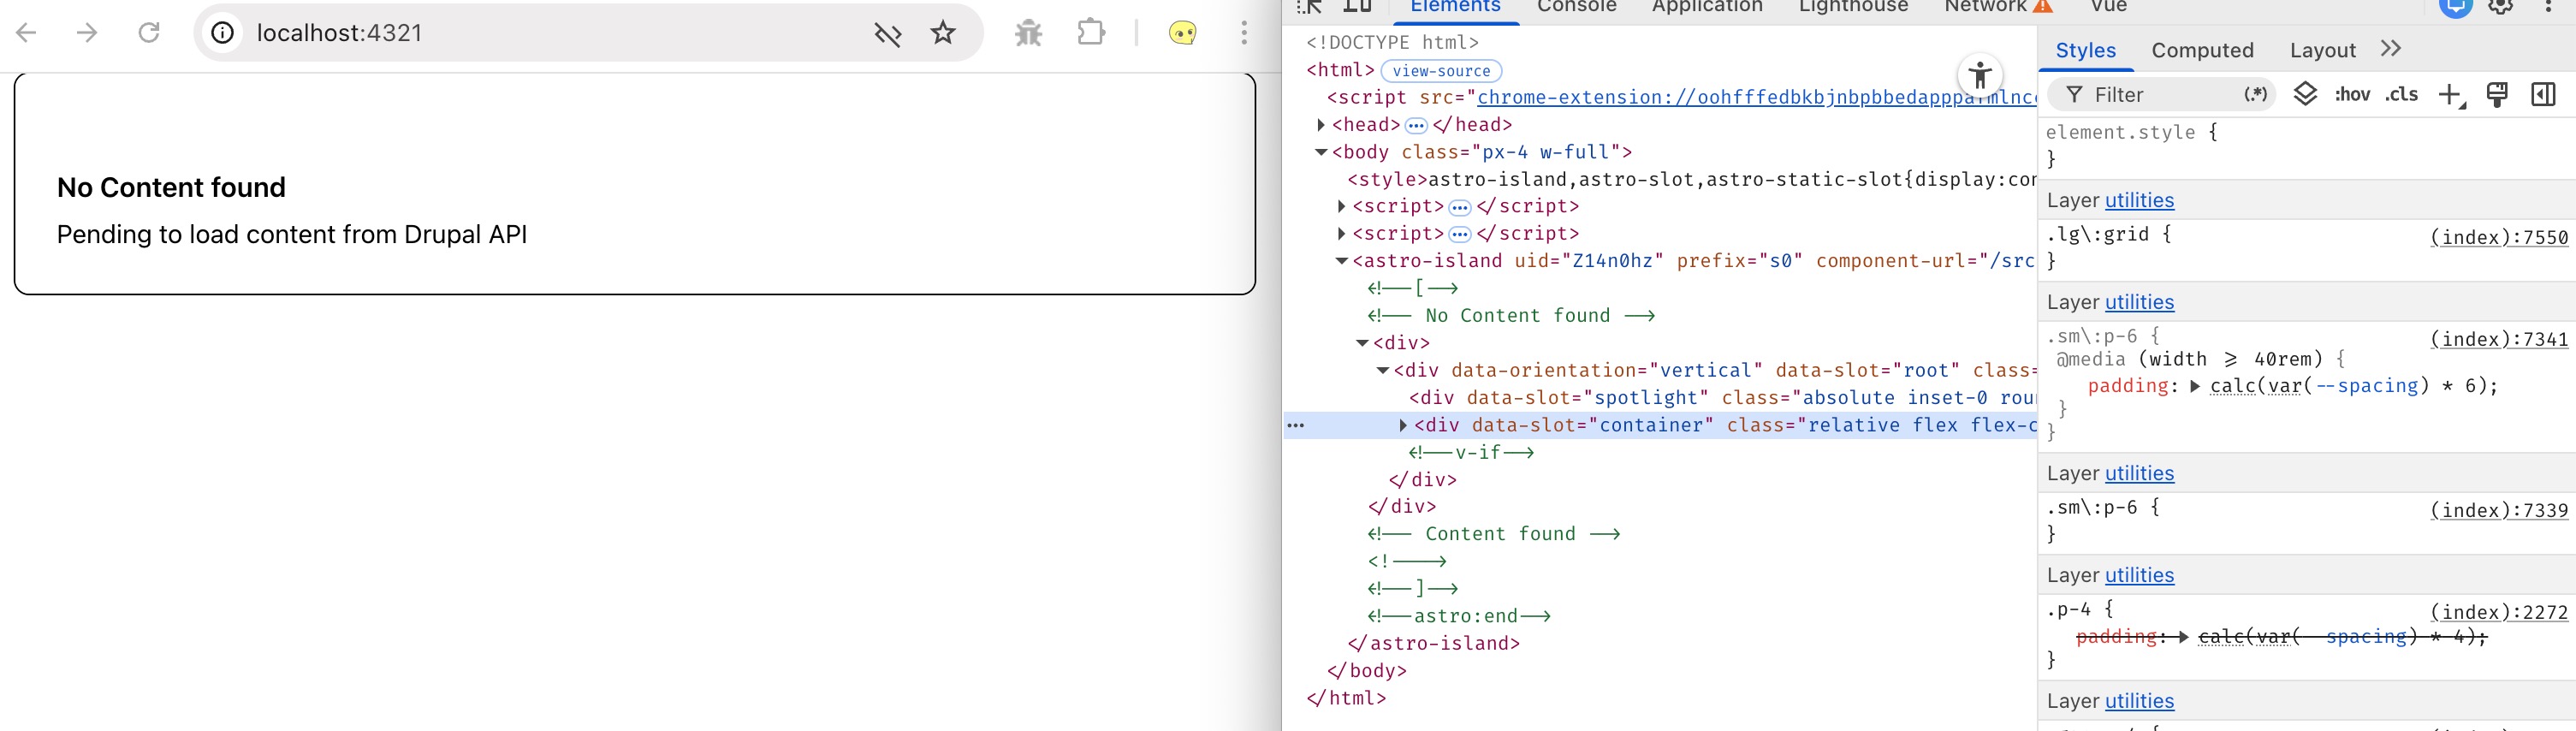
Note that for the above instance, when using client:load directive, you’re using selective hydration; Astro will render the component on the server, and the component is hydrated on the client immediately when the page load. If you disable the JavaScript you’ll see the “No Content Found” card (rendered by Astro during the build time):
You may also use client:visible to make the component render when it becomes visible in the viewport:
Or use client:only={vue} to skip the server rendered HTML, and renders only on the client:
Step-6d: More Component – Main Navigation
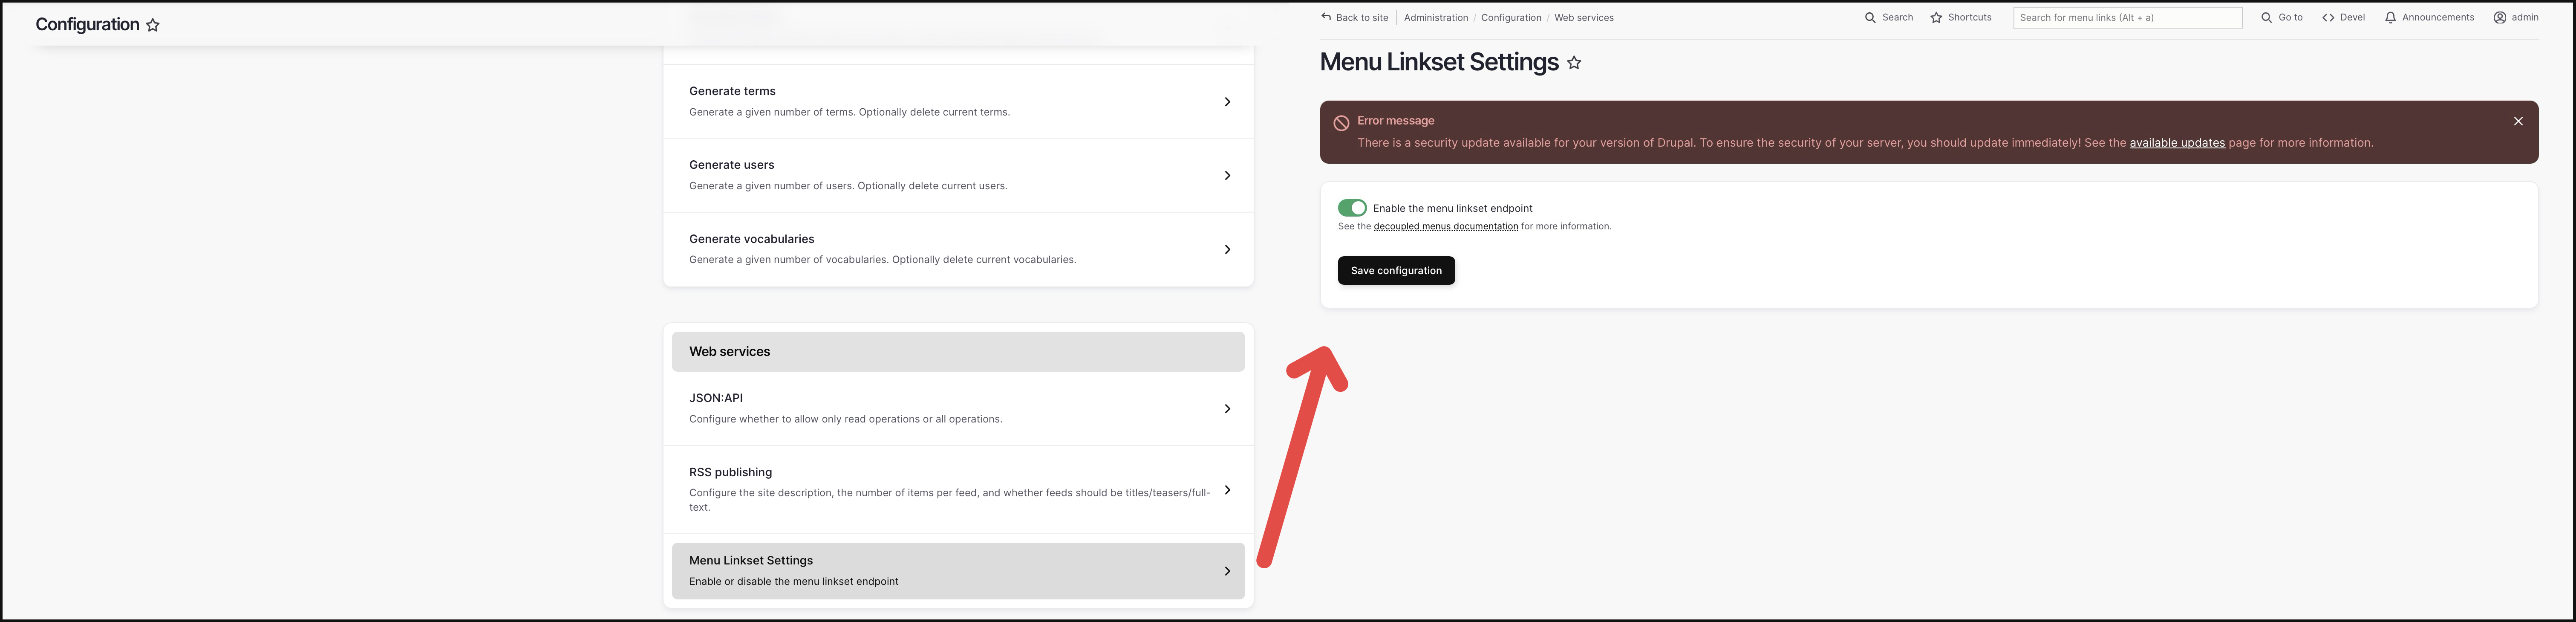
In drupal you can enable decoupled menu setting (see: https://www.drupal.org/docs/develop/decoupled-drupal/decoupled-menus/decoupled-menus-overview) then you will also be able to fetch your menu settings through JSON:API: ${baseURL}/system/menu/${menu_machine_name}/linkset (e.g. for “Main Navigation” menu it is: ${baseURL}/system/menu/main/linkset)
Create the additional fetching logic in src/utils/fetch_data.ts:
| |
And create the component src/components/main-menu.vue:
| |
And used it in src/pages/index.astro:
| |
Final outcome:
Step-6d: More Component – Paginated Article
Source Code: example-article-with-pagination.zip